Guides
4 Oct 2026

How to Make a PEX Crimp or Clamp Connection (2026) — Step-by-Step Guide
Make a PEX crimp or clamp connection step by step: ring and clamp placement, gauge checks, failed joints and code notes from maker sheets.
Set a new toilet on a healthy flange: wax seal, closet bolts, leveling and leak-testing, step by step.
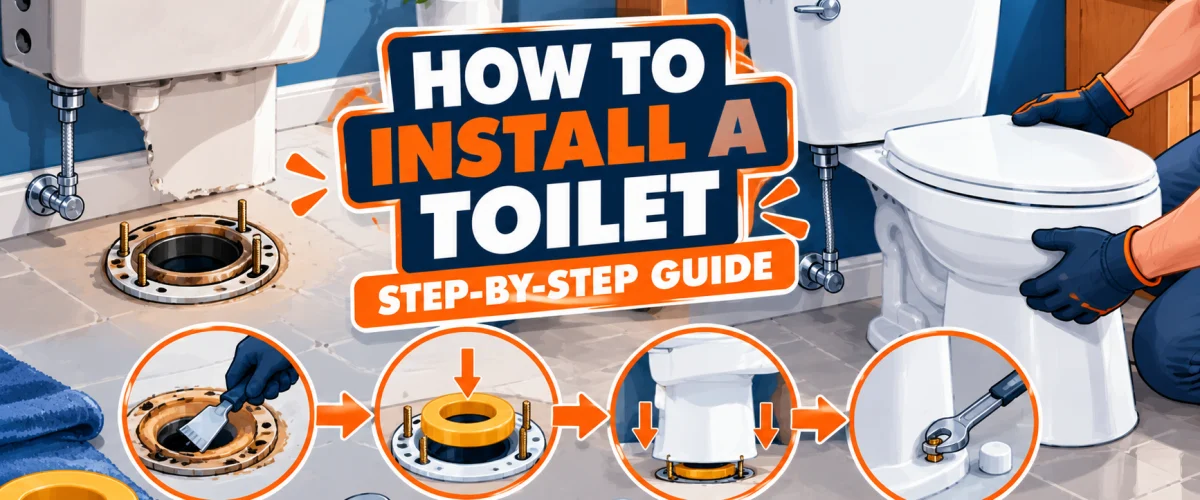
Please note: Product availability and information are based on our research at time of writing and are subject to change. This guide is for general reference. Always follow the installation instructions that come with your toilet, and check your local plumbing code before starting.
Setting a toilet comes down to a few things done in the right order: a healthy flange, a fresh wax seal, a clean one-motion placement and bolts tightened gently. Most of the risk is in the details. A bowl lowered crooked can distort the seal, and a bolt tightened too far can crack the china.
This guide walks through the whole job for a homeowner with a sound flange, from removing the old toilet to the final leak check. If your flange is cracked, corroded or sitting below the floor, start with our guide to replacing a toilet flange first. If you haven’t bought the toilet yet, our rough-in measuring guide will help you pick one that fits.
At a Glance
| Difficulty | Moderate |
| Time | 1–2 Hours |
| Cost | $–$$ for install materials (toilet not included) |
| Tools Needed | Adjustable wrench, screwdriver, putty knife, and a helper to lift the toilet |
| Skill Level | Beginner to Intermediate |
✏️ Our Take
This is a one-afternoon job for a careful homeowner with a healthy flange. The two moments that matter are lowering the bowl onto a fresh seal in a single motion and stopping the moment the bolts are snug. If the flange or the floor around it is damaged, fix that first.
IN THIS GUIDE
1. Your rough-in and clearances. Rough-in is the distance from the wall to the center of the drain. The new toilet’s rough-in should match your existing one. Plumbing codes also set minimum clearances. Oregon’s adopted code, for example, requires at least 15 inches from the center of the toilet to a side wall or obstruction, and at least 30 inches center to center between fixtures. Your local code may differ, so confirm it.
2. The new toilet. Kohler’s installation guide tells you to inspect the new toilet for damage before you begin. Do this before removing anything, so you find out about a chip or crack while the old toilet is still in place.
3. A shutoff valve. Kohler’s instructions say to install one if your toilet doesn’t have a shutoff valve below the tank. A working valve lets you isolate the toilet without shutting off the house.
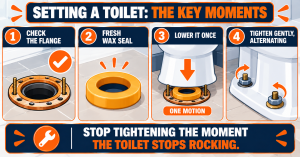
Close the shutoff valve. Flush and hold the handle to drain the tank and bowl, then sponge or shop-vacuum out what’s left. Disconnect the supply line from the bottom of the tank.
Pry the caps off the two closet bolts, then remove the nuts and washers. If a bolt just spins, cut it with a hacksaw. Rock the toilet gently side to side to break it free of the old wax, then lift it straight up, bending your knees, since it is heavier than it looks. Set it on its side on a towel or cardboard.
Scrape the old wax off the flange with a putty knife and cover the drain opening with a rag while you work so nothing falls in. Then check the flange. It should be solid, not cracked or corroded, and it should sit at or above the finished floor. Oatey, a flange and wax ring manufacturer, says the flange should sit on top of or even with the finished floor, and that a thicker ring designed for that case can be used if it’s even with the floor. If it sits lower, or if it’s damaged, stop here and follow our flange replacement guide. Press on the floor around the flange as well. If it feels soft or spongy, stop and call a licensed plumber, because that’s a subfloor problem and not a toilet job.
Slide new bolts into the flange channel, turn them a quarter turn to lock them, and space them 6 inches apart and parallel to the wall, as American Standard’s instructions specify. Reuse the old bolts only if they’re clean and undamaged.
Follow your toilet’s own instructions on where the seal goes. Kohler’s instructions press the seal onto the bottom of the toilet around the outlet, while American Standard’s set the ring on the flange with the tapered end facing the toilet. Center it and press it gently so it sits evenly.
Lift the toilet with a helper, line the holes up over the bolts and lower it straight down in one motion, without tipping or twisting. Press down firmly and evenly to compress the seal. Kohler’s instructions add a warning: don’t lift or rock the bowl once it’s placed. If you break the watertight seal, you need a new wax seal, so if you lift it again, reset it with a new one.
Put a washer and nut on each bolt and tighten them a little at a time, alternating side to side, until the toilet is snug and no longer rocks. Both Kohler and American Standard warn against overtightening because it can crack or chip the china, so stop when the toilet stops moving. Neither manufacturer gives a torque number, so use feel, not force. If the bowl still rocks, slide a plastic shim under the low side, and see our rocking toilet guide if it keeps moving.
Follow your toilet’s instructions for mounting the tank to the bowl, tightening the tank bolts evenly. Kohler’s guide says to check that the tank is level left to right and front to back. Overtightening warnings apply to the tank bolts as well.
Connect the supply line to the fill valve and the shutoff valve according to the line’s instructions, then open the valve slowly. Let the tank fill and check every connection. Flush several times and look for any water at the base and at the supply connection. If the supply line drips, our leaking supply line guide covers the fix.
Trim any long bolt ends if needed, snap on the bolt caps, and wipe up any water. If you haven’t fitted the seat yet, our toilet seat guide takes about ten minutes.
The toilet rocks after tightening. Don’t crank the nuts. Add plastic shims under the low side and re-check. See the rocking toilet guide.
Water at the base. The seal may not have seated, or the toilet was lifted after placement. Shut off the water, lift the bowl and reset it with a new wax seal.
The toilet sits too low or too high on the flange. A flange below the floor needs a thicker seal or a flange repair. See the flange guide.
Leak at the supply line. Check that the line is seated and hand-snug, and replace it if the washer or braiding is damaged.
If any of the checks above point to a bigger problem than a straightforward install, that’s worth a plumber’s assessment before you invest more time or materials.
Find a licensed plumber in your area at PlumberArchive.com — the US plumber directory with 12,000+ verified local plumbers across all 50 states.
Get weekly plumbing tips, honest tool reviews and DIY maintenance guides delivered straight to your Facebook feed. We cover toilet repairs, bathroom fixtures, pipe maintenance and everything in between — written for US homeowners who want to handle more themselves.
No. Kohler’s instructions say that if the seal is broken after placement you must install a new one, and lifting an old toilet breaks it.
It’s possible, but American Standard’s instructions recommend two people for handling because the bowl is fragile and heavy.
Oatey says it should sit on top of or even with the finished floor. Below the floor, it’s a repair job.
Both are common. Our comparison covers the differences.
Snug, alternating side to side, and stop when the toilet stops rocking. Both manufacturers warn against overtightening.
Installing a toilet is a reasonable job for a careful homeowner: check the flange, set a fresh seal, lower the bowl once, tighten gently and test for leaks. If the flange or floor turns out to be damaged, that’s a different job, and our flange replacement guide or a licensed plumber is the right next step.
✍️ About This Guide
PTR Editorial Team — Plumbing Guides. We compare manufacturer specifications, installation requirements, compatibility and available product documentation to help homeowners choose suitable tools and parts. How we review →
Make a PEX crimp or clamp connection step by step: ring and clamp placement, gauge checks, failed joints and code notes from maker sheets.
Install a bathroom sink pop-up drain assembly step by step: remove the old stopper, seat the flange, connect the pivot rod, and adjust the lift rod strap.
Replace or install a submersible sump pump in an existing pit: disconnect power, set the pump, connect the discharge pipe and check valve, then test.

