Guides
4 Oct 2026

How to Make a PEX Crimp or Clamp Connection (2026) — Step-by-Step Guide
Make a PEX crimp or clamp connection step by step: ring and clamp placement, gauge checks, failed joints and code notes from maker sheets.
Fit a bidet attachment on a healthy fill valve and seat: T-adapter placement, mounting and leak-check, from three manufacturer manuals.
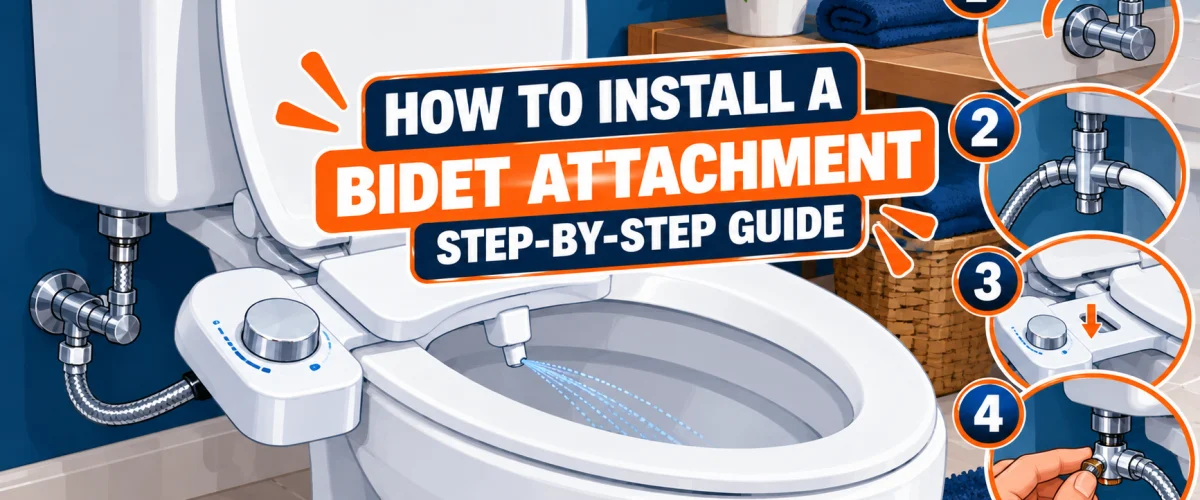
Please note: Product information is based on our research at time of writing and may change. This guide is general. Always follow the instructions that come with your bidet attachment, and check local plumbing code if you’re unsure.
A bidet attachment is a slim sprayer that mounts between your toilet and its seat and takes cold water from the toilet’s supply line through a T-adapter. There’s no electrical connection and no cutting into pipes, so most homeowners can fit one with basic hand tools.
This guide covers seat-mounted attachments. A handheld bidet sprayer is a different product with a different install, and we cover it in our handheld bidet sprayer review. If you’re still choosing, see our best bidet attachments review or the attachment vs. bidet seat comparison.
At a Glance
| Difficulty | Easy |
| Time | 30–60 Minutes |
| Cost | $ if you need a new flexible supply hose (attachment not included) |
| Tools Needed | Adjustable wrench, screwdriver and a towel; a flexible supply hose only if yours is rigid |
| Skill Level | Beginner |
✏️ Our Take
For most toilets this is one of the easier upgrades in the bathroom. What decides how it goes is compatibility: check that your seat, bolts and supply connection suit an attachment before you start, and follow your kit’s own instructions on where the adapter goes.
IN THIS GUIDE
Manufacturers list situations where an attachment won’t fit or needs extra care. TUSHY’s manual is the most specific:
Check your kit’s own compatibility notes too, and confirm your seat has room to close over the attachment once it’s mounted. If your toilet is one of the awkward types, or your shutoff valve is old and won’t turn, that’s a good moment to call a licensed plumber. Our guide to removing a stuck or corroded shutoff valve covers the second case.
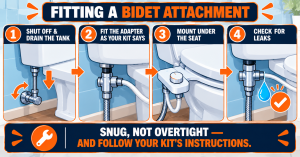
Turn off the toilet’s water supply at the wall. Flush and hold the handle so the tank empties completely, then disconnect the supply hose from the fill valve under the tank. Keep a towel handy for the few drops left in the hose.
Take the seat off first. Brondell’s instructions have you mount the attachment before putting the original seat back on top. Keep the bolts and washers, since you’ll reuse them.
Follow your kit’s instructions on where the adapter goes. Brondell’s and Luxe’s both say the T-valve goes at the fill valve under the tank and not at the cold water supply coming from the wall. TUSHY’s kit places an adapter between the supply hose and the tank. Whichever kit you have, the adapter connects to the fill valve on top and takes your supply hose on the bottom.
Brondell and Luxe name a 7/8 inch fill valve connection on top and a 3/8 or 1/2 inch compression connection for the supply hose. Check your own fill valve and hose before you buy or start, since older or unusual fittings may need a different adapter.
Tighten the connections until they’re snug, and stop there. TUSHY’s manual warns against overtightening several times, since it can cause leaks or damage. None of the three manuals gives a torque figure, so use feel and not force.
Set the attachment on the toilet with its brackets lined up over the seat mounting holes. Brondell’s kit uses adjustable brackets that you position to match your toilet’s holes. Then reinstall your original seat on top of the attachment and tighten the bolts so nothing moves, again without overtightening.
Attach the attachment’s hose to the T-adapter’s remaining outlet, following the kit’s diagram. Check that the hose isn’t kinked or pinched between the seat and the bowl.
Open the water supply slowly. Brondell’s instructions say to check for leaks, wait 5 to 10 minutes and check again. Look at every connection, including the fill valve, both ends of the supply hose and the bidet hose. If you see a drip, turn the water off and re-seat that connection before tightening further.
Sit or stand clear and run the attachment briefly to confirm the spray and pressure control work. The kits we checked draw cold water only and have no electrical connection.
Drip at a connection. Turn off the water, undo the connection and check that the washer or compression seat is in place and the threads aren’t crossed. Snug it again, without cranking it down.
Weak or no spray. Check that the supply valve is fully open, the hose isn’t kinked and the adapter’s own valve or control is open.
The seat won’t sit right or wobbles. Check the brackets are aligned with the seat holes and the bolts are the right length. TUSHY’s manual notes that some seat bolts are too short or too thick to work with an attachment.
The tank fills slowly or leaks after installing. Turn the water off and recheck the adapter at the fill valve. If the fill valve won’t accept the adapter, that’s a job for a plumber.
The IPC requires the water supply to a bidet to be protected against backflow (Section 408.2). That section is written for a bidet fixture. Whether your local authority applies it to a seat attachment tapped into a toilet’s supply isn’t something the manufacturers’ instructions address, so if you’re unsure, ask your local building department or a licensed plumber.
If any of the checks above point to a bigger problem than a straightforward install, that’s worth a plumber’s assessment before you invest more time or materials.
Find a licensed plumber in your area at PlumberArchive.com — the US plumber directory with 12,000+ verified local plumbers across all 50 states.
Get weekly plumbing tips, honest tool reviews and DIY maintenance guides delivered straight to your Facebook feed. We cover toilet repairs, bathroom fixtures, pipe maintenance and everything in between — written for US homeowners who want to handle more themselves.
Most people install one themselves, since it needs only basic hand tools. Call a plumber if the shutoff valve is stuck, the fill valve won’t take the adapter, or a leak persists.
Most standard toilets are fine, but TUSHY lists flush-o-meter, French-curve and skirted toilets, and seats with short or thick bolts, as common problems. Check your kit’s compatibility notes.
The kits we checked use cold water only and have no electrical connection. Models with warm water or a heater work differently, so follow their own instructions.
Follow your kit’s instructions. Brondell’s and Luxe’s both say the fill valve under the tank and not the wall supply.
No. A handheld sprayer mounts near the toilet and doesn’t sit under the seat. See our handheld sprayer review.
Fitting a bidet attachment is a straightforward job for most toilets: shut off the water, fit the adapter where your kit says, mount the attachment under the seat and check every connection for leaks. If your toilet is one of the awkward types, or a valve won’t cooperate, a licensed plumber is the right call. To set the toilet itself, see our toilet installation guide and our toilet seat guide, and for a leaking supply line see how to fix a leaking toilet supply line.
✍️ About This Guide
PTR Editorial Team — Plumbing Guides. We compare manufacturer specifications, installation requirements, compatibility and available product documentation to help homeowners choose suitable tools and parts. How we review →
Make a PEX crimp or clamp connection step by step: ring and clamp placement, gauge checks, failed joints and code notes from maker sheets.
Install a bathroom sink pop-up drain assembly step by step: remove the old stopper, seat the flange, connect the pivot rod, and adjust the lift rod strap.
Replace or install a submersible sump pump in an existing pit: disconnect power, set the pump, connect the discharge pipe and check valve, then test.

