
Guides
19 Oct 2026

Can’t Reach the Faucet Nut? Choose the Right Tool Before You Buy
Not sure which tool fits your faucet nut? Identify the fixing, see how it lets go and check your clearance first. Then choose a tool, or use one you own.
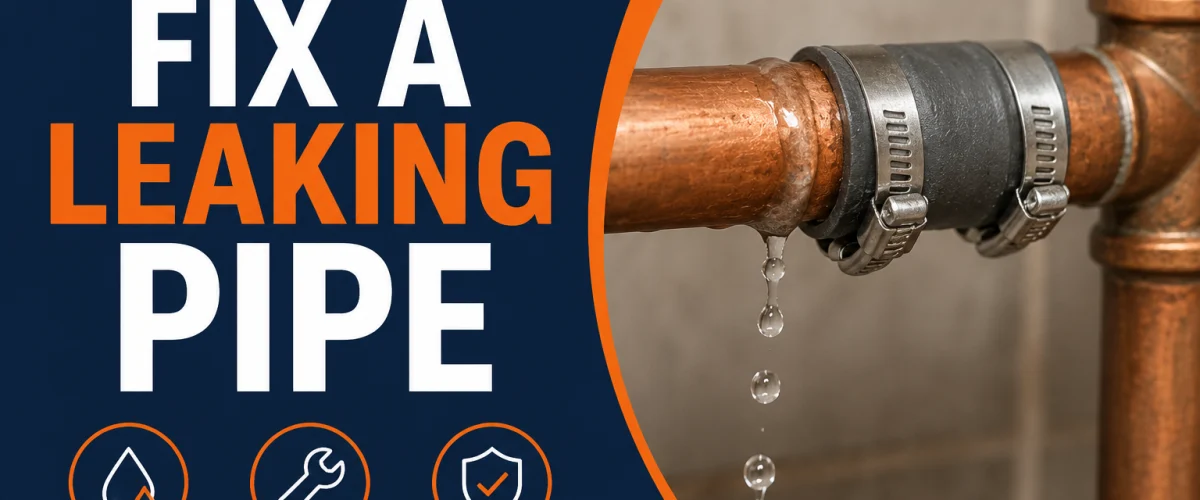
How to fix a leaking pipe: shut off the water, choose a safe temporary fix (clamp, tape, epoxy or wrap), then know when to replace the damaged section.
Please note: Information in this guide is based on our research at time of writing and is subject to change. Always consult a licensed plumber for diagnosis of serious plumbing issues before attempting repairs.
A leaking pipe doesn’t always wait for a convenient time to fail. If water is dripping under a sink, spraying from an exposed pipe, or soaking a cabinet, the first priority isn’t making a perfect permanent repair — it’s stopping the water and limiting damage.
For many accessible household water-pipe leaks, you can temporarily control the problem with a repair clamp, self-fusing repair tape, a pipe-repair wrap, an appropriately rated epoxy repair product, or by isolating the affected fixture or branch.
But a temporary repair is exactly that: temporary. Corrosion, a cracked fitting, freeze damage, or a failing section of pipe doesn’t disappear because the outside has stopped dripping.
This guide explains what to do first, which temporary methods suit different situations, when the damaged section should be replaced, and when it’s time to call a plumber.
At a Glance
| Situation | Temporary approach | Best suited to | Main limitation |
|---|---|---|---|
| Small pinhole or localized leak | Repair clamp | Accessible straight pipe | Must fit pipe and damaged area correctly |
| Small accessible leak | Self-fusing repair tape | Short-term leak control on compatible pipe | Application and pressure ratings vary |
| Crack or irregular damaged area | Rated epoxy repair product | Compatible materials/applications | Requires preparation and curing; product restrictions vary |
| Larger localized damaged area | Pipe-repair wrap | Compatible accessible pipe | Must follow the kit’s pressure/material instructions |
| Leak at one fixture/branch | Isolate water supply | Fixture or branch with working shutoff | Doesn’t repair the damaged pipe |
First choice whenever practical: shut off or isolate the water before attempting a temporary repair.
✏️ Our Take
For most leaking pipes, shut off or isolate the water first, then choose a temporary repair that matches the pipe and damage. A correctly sized repair clamp works well for many small, accessible leaks, while rated repair tape, epoxy products, and repair wraps can suit other situations.
Whatever method you use, treat it as temporary. Badly corroded, split, or repeatedly leaking pipe should be properly repaired or replaced rather than repeatedly patched.
IN THIS GUIDE
Before reaching for tape, epoxy, or a clamp, control the water.
If the leak serves a single fixture and that fixture has an accessible shutoff valve, close it. For a larger leak, damaged supply pipe, or situation where you can’t identify an individual shutoff, you may need to close the home’s main water valve.
Once the water is off, open an appropriate faucet to relieve remaining pressure and drain water from the affected section where practical. Put a bucket or towels beneath the leak and dry the exposed pipe enough to inspect it.
Then determine where the water is actually coming from.
A wet pipe doesn’t necessarily mean the hole is directly above the puddle. Water can travel along the underside of horizontal pipe before dripping elsewhere.
Look for:
That distinction matters because wrapping the middle of a pipe won’t fix a failed fitting two inches away.
Sometimes the safest temporary fix requires no patch at all.
If the leaking section supplies a toilet, sink, appliance, or another fixture with its own functioning shutoff valve, close that valve and leave the fixture out of service until the permanent repair is made.
This removes water pressure from the problem instead of asking tape or putty to resist it.
If there’s no local isolation valve, shutting off the main supply may be necessary.
Choose isolation when:
The inconvenience of temporarily losing one fixture is usually preferable to gambling on an unsuitable patch.
A repair clamp works by placing a sealing material over the damaged area and mechanically compressing it against the pipe.
For a small localized leak on an accessible section of otherwise sound pipe, this can be one of the simplest temporary approaches.
The important word is localized. A clamp isn’t a cure for a long section of heavily corroded pipe.
The clamp must match the pipe diameter and be suitable for the pipe material and application.
If the pipe wall is collapsing, badly pitted, or too irregular for the sealing surface to seat properly, stop. That’s a replacement problem rather than a clamp problem.
Self-fusing silicone repair tape differs from ordinary adhesive tape because the overlapping layers bond to themselves as they’re stretched and wrapped.
It can be useful for temporarily controlling some small, accessible leaks where the tape can wrap fully around the pipe.
The key is using an actual repair tape intended for the application, not ordinary household tape.
First shut off the water and relieve pressure whenever possible.
Clean the pipe and follow the tape manufacturer’s instructions for surface condition, stretch, and overlap. Start before the damaged area, wrap across it under the specified tension, and continue beyond the leak so the repair covers sound pipe on both sides.
Different products have different requirements, so there isn’t a universal number of wraps or amount of stretch that applies to every repair tape.
After installation, restore pressure gradually and watch the area closely.
Tape is most useful when the damaged area is accessible and the tape can wrap fully around the pipe.
It’s less useful where fittings, walls, or adjacent pipes prevent proper wrapping, or where the pipe itself is structurally deteriorated.
And don’t confuse PTFE thread-seal tape with external pipe-repair tape. PTFE tape is normally used at threaded connections; it isn’t a general-purpose patch to wrap over a hole in the side of a pressurized pipe.
Epoxy repair putty can conform to irregular shapes, which makes it appealing for pinholes, cracks, and awkward damaged areas.
But this is where reading the exact product label matters particularly strongly.
Not every epoxy repair product has the same approved uses. A product may be suitable for one pipe material or repair situation but unsuitable for another, including certain pressurized-pipe applications.
So don’t choose “epoxy” generically.
Choose a specific product whose instructions say it is appropriate for your pipe material, water service, and pressure/application.
Where the product permits the application:
Cure times vary significantly by product, so don’t assume that because the surface feels hard, the repair is ready for full water pressure.
Even a successful external patch doesn’t necessarily stop deterioration inside the pipe.
Corrosion can continue spreading underneath or around a repaired area. That’s why a temporary epoxy patch shouldn’t automatically be treated as the final repair.
Stopping the visible leak is not the same thing as restoring the pipe.
Pipe-repair wraps usually combine a resin-impregnated wrap or fiberglass material with a repair compound.
They can cover a larger area than a small spot of putty and distribute the repair around the pipe.
But the specific system’s instructions determine what it can safely do.
Surface preparation, depressurization, wrapping technique, overlap, curing time, pipe compatibility, and pressure limitations can vary between products.
That’s why simply winding repair material around a pipe that’s actively spraying water isn’t a reliable universal procedure.
Follow the particular kit instructions, but the process commonly involves:
Never substitute another product’s pressure rating, cure time, or installation procedure.
The leak itself should determine the method.
| Leak situation | Better starting option |
|---|---|
| Fixture can simply be taken out of service | Isolate its water supply |
| Small pinhole on accessible straight pipe | Correctly sized repair clamp |
| Small leak where full wrapping is possible | Rated self-fusing repair tape |
| Irregular crack/hole on compatible material | Appropriately rated epoxy repair product |
| Larger localized area suited to a wrap system | Rated pipe-repair wrap |
| Extensive corrosion, split pipe, or repeated failure | Skip the patch and repair/replace pipe |
For a deeper comparison of the three physical repair approaches, see Pipe Repair Clamp vs Tape vs Epoxy. That article answers the product-selection question; this guide is about controlling an active leak safely.
An emergency can make almost anything nearby look like a potential pipe-repair material.
That doesn’t make it suitable.
Duct tape can be useful for countless household tasks, but don’t treat ordinary general-purpose duct tape as a rated pressurized-water-pipe repair.
If you’re using tape, use a product specifically designed and rated for the repair you’re attempting.
A product being waterproof after curing doesn’t automatically mean it’s approved to patch a pressurized potable-water pipe.
Material compatibility, cure conditions, pressure, and drinking-water suitability can all matter.
If water is coming from a joint, blindly applying more torque can make things worse.
Compression fittings, threaded joints, plastic fittings, and valves fail in different ways. A cracked fitting won’t become sound because it’s tightened harder.
If the first temporary repair won’t hold, stop and reassess the problem.
Several layers of tape, putty, and clamps can hide the actual condition of the pipe while still failing to address the cause.
There is no safe universal answer such as “24 hours,” “one week,” or “six months.”
It depends on the pipe material, water pressure, temperature, type of damage, and the specific repair product.
More importantly, a temporary repair shouldn’t be treated as a countdown to see how long you can leave it there.
Once the immediate leak is controlled, plan the permanent repair.
That may mean cutting out a damaged section, replacing a fitting, replacing a valve, or having a plumber assess a larger corrosion or freeze-damage problem.
A temporary patch that appears dry today can still fail later.
Permanent repair becomes particularly important when you see:
Those signs suggest the problem isn’t confined to one tiny hole.
Depending on the pipe material, permanent repair might involve replacing the damaged section with the appropriate fittings and joining method.
The temporary patch has done its job once it has bought you enough time to arrange that repair.
When a pipe is corroded, split, or leaking repeatedly, the lasting fix is usually to cut out the damaged section and replace it, rather than covering it with another patch.
Where the material and application allow it, a push-fit repair coupling can be one way to make that repair without soldering or glue. This is a permanent-repair approach, not one of the five temporary methods above.
The process generally looks like this, but follow the fitting manufacturer’s instructions for your exact product:
Before choosing a push-fit coupling, confirm that it is rated for your pipe material, pipe size, and water service, and that local plumbing codes allow it where you plan to use it.
If the damaged pipe is inside a wall, is part of the main supply, or you aren’t sure a coupling is suitable, have a licensed plumber make the repair.
Some leaks shouldn’t become DIY experiments.
Get professional help when:
For a major leak, controlling the water and protecting the property is more important than completing a temporary patch yourself.
If a leak is more than you want to tackle yourself, a pipe is damaged inside a wall, or you can’t stop the water, it is worth getting a professional to look. Search PlumberArchive.com — the US plumber directory with 12,151+ verified local plumbers across all 50 states.
Get weekly plumbing tips and DIY guides delivered straight to your Facebook feed.
If the leaking fixture or branch can be isolated, shutting off its water supply is often the quickest and safest first action because it removes pressure from the leak. After that, the appropriate temporary repair depends on the pipe, damage, and products available.
A repair tape specifically designed for the pipe and application can temporarily control some small accessible leaks. Ordinary household tape shouldn’t be treated as a rated pipe repair, and the manufacturer’s instructions for pressure, material, stretch, and overlap should be followed.
Some epoxy repair products can be applied to damp or wet surfaces, but this is product-specific. Where possible, shutting off the water, relieving pressure, and preparing the pipe according to the manufacturer’s instructions gives the repair a better chance of being applied correctly.
Don’t assume so. Even if an epoxy product successfully stops the visible leak, underlying corrosion or damage may remain. Treat an emergency epoxy patch as temporary unless the specific repair system and application are explicitly designed and approved as a permanent repair.
Some specialized repair products may allow unusual application conditions, but shutting off and depressurizing the pipe is the safer general approach. Follow the instructions for the exact repair product you’re using.
Not universally. A correctly sized clamp can be a straightforward choice for a small localized leak on accessible straight pipe, while repair tape can conform around some areas a clamp cannot. Pipe condition, material, location, and product rating determine which is appropriate.
Shut the water back off rather than continuously tightening, wrapping, or adding repair products. Reassess whether the pipe is too damaged for a temporary patch and arrange a proper repair if necessary.
When a pipe starts leaking, control the water first and patch second.
Isolate the fixture or shut off the main supply where necessary, relieve pressure, locate the actual source, and inspect the condition of the pipe.
For suitable accessible leaks, a correctly sized repair clamp, rated self-fusing repair tape, appropriate epoxy repair product, or pipe-repair wrap may provide short-term control. But each method has material, pressure, and installation limitations.
If the pipe is badly corroded, split, repeatedly leaking, or unsafe to access, skip the patch.
A temporary repair buys you time. It doesn’t turn damaged pipe back into sound pipe.
✍️ About This Guide
PTR Editorial Team — Plumbing Guides. We compare manufacturer specifications, installation requirements, compatibility and available product documentation to help homeowners choose suitable tools and parts. How we review →
Not sure which tool fits your faucet nut? Identify the fixing, see how it lets go and check your clearance first. Then choose a tool, or use one you own.
Check your manual and the drain route first: gravity hose, built-in pump or external pump. Then see whether you need a dehumidifier hose at all.
Explore portable bidets that need no water-line connection, from bottle caps and squeeze bottles to battery-powered handhelds.

