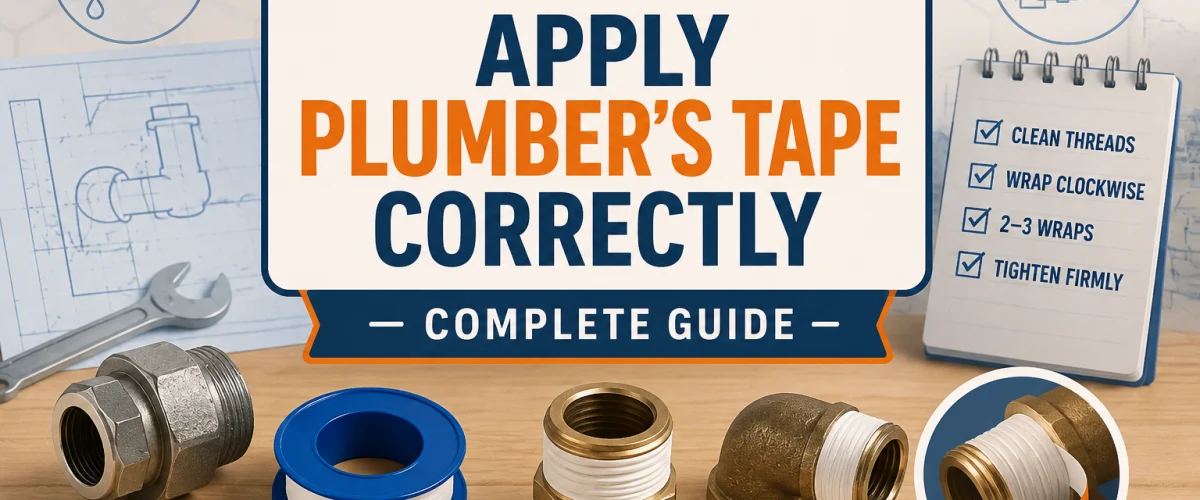
Please note: Information in this guide is based on our research at time of writing and is subject to change. Always check the manufacturer’s instructions for your specific tape and fitting before applying.
Introduction
Plumber’s tape — the thin white (or sometimes yellow) PTFE tape more commonly known as Teflon tape — is one of the simplest tools in plumbing. There’s no mixing, no curing time, and no special equipment involved; you just wrap it around a threaded fitting and tighten. But that simplicity is exactly why it’s so often applied incorrectly. Wrap it in the wrong direction, or use the wrong number of wraps, and a fitting that looks properly sealed can leak anyway, or become unexpectedly difficult to thread on.
The good news is that the correct technique takes only seconds once you understand the logic behind it. This guide walks through exactly how to identify the right wrap direction, how many wraps to use, and the small details — where to start the wrap, how to finish it, how to tighten the fitting — that separate a reliable, leak-free seal from a fitting you’ll be revisiting in a week. None of it requires any tool beyond the tape itself, and once the logic clicks, you’ll never have to think twice about it on a future repair.
At a Glance
| Correct Wrap Direction |
Clockwise, matching the direction the fitting tightens — the single most common mistake |
| Typical Wrap Count |
Roughly 3–5 wraps for most standard fittings; more for larger-diameter threads |
| Tools Needed |
Just the tape itself — no additional tools required |
| Time Needed |
Well under a minute per fitting |
✏️ Our Take
The single most common plumber’s tape mistake is wrapping it in the wrong direction — if the tape unwinds as you tighten the fitting instead of staying put, it won’t seal properly and can even bunch up inside the joint. The fix is simple once you understand the logic: wrap in the same direction the fitting turns when you tighten it, so tightening naturally presses the tape tighter rather than unwinding it. Beyond direction, the other detail that trips people up is wrap count — too few wraps won’t seal, too many can make the fitting difficult to thread on or over-tighten. Getting both right takes seconds and prevents the vast majority of tape-related leaks.
Why Wrap Direction Matters
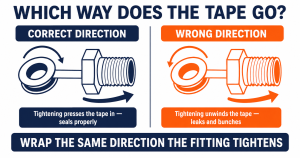
Every threaded pipe fitting tightens in a specific rotational direction. On standard right-hand threads — which cover the vast majority of residential plumbing fittings — that direction is clockwise when you’re looking at the threaded end you’re working on. Plumber’s tape has to be wrapped so that the act of tightening presses the tape into the threads rather than dragging it off the end of the fitting, and that means the tape itself needs to go on in the same clockwise direction the fitting turns when tightened.
Think of it in terms of which way the fitting is going to rotate as you thread it home. As the fitting turns clockwise, it drags across the tape wrapped around the threads. If the tape was wrapped clockwise to begin with, that motion presses the tape more firmly into the thread grooves with each turn — tightening reinforces the seal. If the tape was wrapped the opposite direction, counterclockwise, the same tightening motion catches the loose edge of the tape and starts peeling it backward off the threads, exactly the opposite of what you want.
This is why a fitting can look perfectly taped and still leak, or feel gritty and uneven as it threads on — the tape is bunching up ahead of the threads rather than compressing into them. It’s also why the fix, once you know what to look for, is so straightforward: confirm which way the fitting tightens before you start wrapping, and match the tape to that direction from the very first wrap. Everything else in this guide builds on that one principle.
It’s worth noting that this same clockwise rule holds regardless of which specific fitting you’re working with — a supply line connection, a shower arm, a garden hose bib, or a threaded drain piece all tighten in the same direction on standard US plumbing, so the underlying logic doesn’t change from job to job. The only time it’s worth pausing to double-check is on older or non-standard hardware, covered later in this guide, where left-hand threads occasionally show up.
Step 1: Clean and Dry the Threads
Before any tape goes on, the threads need to be clean and dry. A clean thread surface is what allows new tape to seat properly and seal, and skipping this step can undermine an otherwise correctly wrapped fitting, even one wrapped in exactly the right direction with exactly the right number of wraps.
- Remove any old tape completely. If you’re re-taping a fitting that’s been disassembled, strip off every scrap of the old tape rather than leaving fragments behind — old tape left in place prevents new tape from sitting flush against the threads.
- Clear away old sealant residue or debris. Pipe dope, hardened sealant, or general grime on the threads can create gaps that new tape can’t compensate for, so wipe or brush the threads clean before moving on.
- Make sure the threads are fully dry. Moisture on the threads can affect how well the tape adheres as you wrap it, so give them a moment to dry — or wipe them down — before applying new tape.
💡 Tip: If you’re replacing tape on a fitting that’s been disassembled, take a moment to fully remove any old tape residue with a cloth or brush — layering new tape over old residue is a common cause of an unreliable seal.
Step 2: Identify the Correct Wrap Direction
This is the step that determines whether the rest of the job succeeds or fails, so it’s worth doing deliberately rather than guessing.
- Hold the fitting with the threaded end facing you. Orient the piece so you can clearly see the exposed threads and visualize how it will turn once it’s threaded into place.
- Determine which direction it turns to tighten. Standard right-hand threads — used on the overwhelming majority of residential fittings — tighten clockwise. Test the rotation by hand against the mating fitting if you’re at all unsure.
- Wrap the tape in that same clockwise direction. Starting from the end of the fitting, wind the tape clockwise around the threads so the free end trails in the direction the fitting will turn when tightened, not against it.
- Double-check by tugging gently on the tape after a wrap or two. Tape wrapped in the correct direction should feel like it’s tightening against the threads as you turn it, not loosening or peeling away.
⚠️ Warning: Wrapping tape in the wrong direction is the single most common cause of a leak that seems like it “should” be sealed. If a fitting leaks despite fresh tape, wrap direction is the first thing to check before assuming the tape itself failed.
Step 3: Start the Wrap at the Right Point
Where you begin wrapping matters almost as much as which direction you wrap in. Starting in the wrong spot is a small mistake, but it’s an easy one to make without realizing it.
- Locate the second thread from the end of the fitting. Rather than starting at the very tip, begin your first wrap one full thread back from the end.
- Anchor the tape there and hold it taut. Press the tape against that second thread and keep tension on it as you begin winding, so the first wrap sits snug rather than loose.
- Continue wrapping toward the base of the threads from that starting point. Working from the second thread inward keeps the leading edge of the tape from bunching at the very tip or working its way into the pipe opening itself.
- Keep light, even tension for the first full wrap before continuing. A consistent amount of pull as you complete that first pass sets the tone for the rest of the wraps and helps prevent slack spots later on.
Starting at the first thread instead is a small detail, but it’s one of the more common ways tape ends up loose at the tip or, worse, pushed into the fitting’s opening once it’s threaded on — starting one thread back avoids both problems entirely.
Step 4: Wrap the Correct Number of Times
With direction and starting point handled, the remaining variable is how many times to wrap the tape around the threads. This is where a lot of people either underdo it or overcompensate.
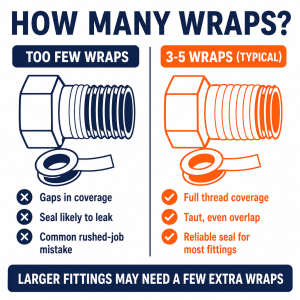
- Wrap the tape around the threads roughly 3 to 5 times for a standard fitting. This range covers most common residential connections — supply lines, standard NPT fittings, and similar small-diameter threaded joints.
- Keep the tape taut and slightly overlapping with each pass. Each wrap should overlap the previous one by roughly half its width, so the threads end up fully covered with no bare gaps showing through.
- Add a few extra wraps for larger-diameter threads or higher-pressure applications. Bigger fittings have more surface area to cover, and connections under higher water pressure benefit from the extra margin a couple of additional wraps provides.
- Tear the tape cleanly rather than leaving a loose trailing end. Pull the tape taut and tear it against the edge of the fitting so the end lies flat, rather than leaving a flap that can catch or unwind during installation.
Too few wraps leaves gaps in the thread coverage that pressure can find its way through over time. Too many wraps can make the fitting unexpectedly hard to thread on by hand, or force you to over-tighten it just to get the connection to seat — both of which create their own problems down the line.
Step 5: Finish and Tighten the Fitting
The last step is where the tape actually gets put to work. A little care here goes a long way toward a seal that holds.
- Press the tape firmly into the thread grooves with your fingers. Run your fingers along the wrapped threads to work the tape down into the grooves before threading the fitting on, rather than leaving it sitting loosely on the surface.
- Hand-tighten the fitting first. Thread it on by hand to confirm it’s going on smoothly and squarely — resistance or binding at this stage usually means it’s cross-threaded, not that more force is needed.
- Finish tightening with a wrench. Once it’s hand-tight and threading correctly, use a wrench for the final turns to bring the connection to a snug, sealed fit.
- Avoid over-tightening. Stop once the fitting is snug and any witness marks or manufacturer guidance indicate a proper seal — over-tightening can crack certain fittings, particularly plastic ones, and compresses the tape more than necessary without improving the seal.
If you’re dealing with a fitting that’s actively dripping despite fresh tape, our how to fix a leaking pipe guide walks through broader troubleshooting and repair steps beyond re-taping alone.
Common Mistakes to Avoid
Most plumber’s tape failures trace back to one of a small handful of recurring mistakes, and nearly all of them are things you can catch and correct in the moment rather than discovering only after the fitting starts leaking. Knowing what they look like ahead of time is what makes the difference.
Wrong wrap direction is by far the most common issue, covered in detail above — tape wrapped against the direction the fitting tightens will unwind rather than seal, no matter how many wraps you use. Too few wraps is the second most common problem: fewer than roughly three wraps often leaves gaps in the thread coverage that pressure eventually finds. On the opposite end, too many wraps can make a fitting difficult to thread on smoothly, or force excessive tightening just to seat the connection, which stresses the fitting more than it needs to be stressed. Starting the wrap at the very first thread, rather than the second, is a smaller but still common mistake — it tends to leave the tip loose or push tape into the pipe opening itself. And applying fresh tape directly over old tape residue, instead of a clean thread surface, undermines the seal regardless of how carefully the new wrap is done.
US Regional Context: Plumber’s tape technique is the same nationwide, but US pipe fittings typically use standard right-hand NPT (National Pipe Thread) threading, meaning the clockwise-tightening rule applies to the vast majority of residential fittings. If you’re working with a specialty fitting or older plumbing with non-standard threading, it’s worth confirming the tightening direction before wrapping tape.
If you’re shopping for tape rather than troubleshooting a fitting you already have, our plumbing tape reviews cover which options hold up best across different fitting types and pressure levels.
Frequently Asked Questions
Q: How do I know if I’ve wrapped plumber’s tape in the correct direction?
The simplest check is to think about which way the fitting turns to tighten — clockwise for standard right-hand threads, which covers most residential fittings — and confirm the tape was wound in that same direction. A quick physical test also works: after a wrap or two, gently tug the tape in the direction the fitting will turn during tightening. If it feels like it’s snugging down against the threads, the direction is correct; if it feels like it’s peeling or loosening, you’ve wrapped it backward and should remove it and start again.
Q: Can I use plumber’s tape on a fitting that already has a small leak?
Re-taping can resolve a small leak if the original cause was insufficient tape, the wrong wrap direction, or worn-out tape that’s simply reached the end of its useful life. Disassemble the fitting, remove every trace of the old tape, clean and dry the threads, and reapply fresh tape using the correct direction and wrap count covered in this guide. If a leak returns quickly after a correctly re-taped fitting, the underlying issue may be a damaged thread, a cracked fitting, or a problem beyond what tape alone can fix — at that point it’s worth reading through our how to fix a leaking pipe guide for broader troubleshooting.
Q: Should I use plumber’s tape or thread sealant instead?
Both are widely used and both can create a reliable seal, but they suit slightly different situations — tape is faster and cleaner for most standard fittings, while paste-style thread sealant can fill larger gaps and works well on fittings that get disassembled and reassembled less often. Our pipe thread sealant vs teflon tape comparison breaks down when each option makes more sense, including situations where using both together is worthwhile.
Q: Does the color of plumber’s tape matter (white vs yellow/gas-rated)?
Yes — color typically indicates the tape’s intended use, not just a cosmetic difference. Standard white tape is formulated for general water-line and plumbing threads. Yellow tape is specifically rated for gas line connections and is manufactured to a different thickness and density standard suited to that application, and the two are not interchangeable despite looking like variations of the same product. Using the wrong type for the job isn’t just a technicality — always confirm you’re using tape rated for the specific application, and never substitute standard white tape on a gas connection, or assume a roll without clear labeling is safe to use on one.
Conclusion
Applying plumber’s tape correctly comes down to a handful of details that take seconds to get right: wrap in the same clockwise direction the fitting tightens, start one thread back from the end, use roughly 3 to 5 wraps for a standard fitting, and press the tape firmly into the threads before hand-tightening and finishing with a wrench. Nearly every plumber’s tape leak traces back to skipping one of these steps — most often wrap direction, which remains the single most common mistake people make with this tool. Once you’ve done it correctly a few times, the whole process becomes second nature, and it’s one of the most reliable, lowest-cost ways to prevent leaks throughout your home’s plumbing.
Prices and ratings may change. Always check Amazon for current prices.
✍️ About This Guide
Written by Mike Reynolds, DIY Home Improvement Writer at PlumbingToolsReview — former residential contractor helping US homeowners tackle plumbing repairs with confidence. Learn how we test →