
Guides
18 Oct 2026

Planning a Dehumidifier Drain? Check the Route Before Buying a Hose
Check your manual and the drain route first: gravity hose, built-in pump or external pump. Then see whether you need a dehumidifier hose at all.
Not sure which tool fits your faucet nut? Identify the fixing, see how it lets go and check your clearance first. Then choose a tool, or use one you own.
Please note: Product availability and information are based on our research at time of writing and are subject to change. Always check Amazon for the latest details before purchasing.
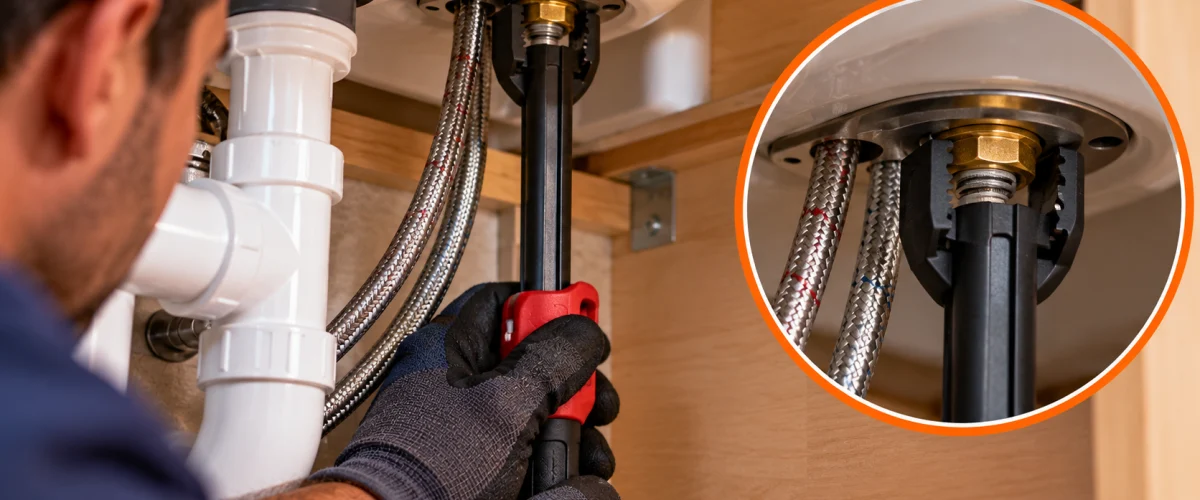
You’re under the sink with a flashlight. You can see the nut that holds the faucet in place, and you can’t get a wrench on it. That is the moment most of us put a basin wrench in the shopping cart. It’s a good tool, but it isn’t always the right one, and sometimes the right answer is a screwdriver that came in the faucet’s box.
So before you buy anything, it’s worth asking three things in order: what exactly is holding your faucet, how does that particular fixing let go, and how much room do you have to work? Once you can answer those, the choice of tool mostly makes itself, and this guide takes them one at a time.
✏️ The Short Answer
Work out whether you are dealing with a mounting nut, a bracket or a supply-line connection, because each lets go in its own way and may call for a different tool. Your faucet’s instruction sheet usually names the fixing and sometimes supplies the tool. Check how much room you have, and buy a tool only if the one in the box, or something you already own, can’t reach.
IN THIS GUIDE
“The faucet nut” can mean three different things, and mixing them up is how people end up with the wrong tool. Shine the flashlight up from the cabinet floor and see which of these you have.
The quickest way to tell which you have is the faucet’s own instruction sheet, because the parts list names each one. If it’s long gone, the model number on the faucet will usually find the sheet on the maker’s support site. The examples in this guide each come from one maker’s document for one model or series, and say nothing about the rest of that brand’s range.
They show how much designs differ. Kohler’s K-6350 kitchen faucet uses a bracket, a washer and a nut on a mounting stud. Moen’s 7065 series kitchen faucet uses a mounting bracket and a mounting nut, with an installation tool in the box. Globe Union’s top-mount kitchen faucets go the other way: the base goes in from above, tightened with the hex wrench supplied, and a set screw locks the faucet to the bracket, so there is no conventional mounting nut below the sink at all.
Looking, measuring and reading need no disconnection, so do all of that first. Once you start loosening anything, and especially a supply connection, shut off the water and follow the removal instructions for your faucet. Moen’s owner’s manual for its 87810 series filtering faucet, for example, says to turn the water supplies off and run the faucet to relieve pressure before taking an old faucet out.
It helps to be clear about what the documents are. Most of what makers publish is installation guidance. It shows you what the fixing is and which tool the maker specifies, which is what you need for choosing a tool, but it is not a verified removal procedure for a faucet that has been in place for years. Where a maker does give removal advice, we say so and name it.
Two makers mention penetrating oil, and only for mounting hardware. Delta’s article suggests a little, left for a few hours or overnight, on a mounting nut that won’t budge, and Moen’s 87810 manual says years of use may call for a spray on the faucet mounting hardware to loosen corrosion. That is those makers’ advice for seized mounting hardware, not a first step for every connection, and neither says to use it on supply connections, so we haven’t suggested it there. RIDGID’s FAQ for its EZ Change answers the frozen-nut question only by saying the tool is made to common nut torque requirements.
Access is the other half of the decision. With the flashlight, look at the nut you’ve identified and ask four plain questions. How far back is it from the cabinet opening? What sits above, below and beside it, such as the sink bowl, a disposal, drain pipes or the shut-off valves? From what angle could a tool actually reach it? And what size is it? A tape measure helps with the first and the last; for a hex nut, measure across the flats.
Be wary of anyone who offers a single clearance figure. None of the tool makers’ pages we read gives a minimum space, so the useful comparison is the features each maker does publish. RIDGID says its basin wrenches hold the head in any position up to 90 degrees and that its Models 1017 and 1019 telescope from 10 to 17 in. Its EZ Change has a short body for clearance in tight spaces and a maximum nut size of 1 in. Reach, head angle and body length answer different problems: a deep, narrow cabinet needs length, an obstruction beside the nut needs angle, and a nut you can almost reach by hand may only need a short tool.
Start with what you already have, because for several of these fixings the tool is already in your hands.
When none of those reaches, a specialty tool earns its place. Two have clear, documented jobs.
RIDGID Model 1017 telescoping basin wrench (catalog 31175). This is the classic answer to a hex nut at the back of a deep cabinet. RIDGID describes spring-loaded forged alloy steel jaws for one-handed ratcheting, a head that holds any position up to 90 degrees, and a shank that telescopes from 10 to 17 in, with a capacity of 3/8 to 1-1/4 in.
RIDGID EZ Change faucet tool (catalog 57003). This one is not a basin wrench. It is a short-bodied tool with interchangeable fittings that RIDGID documents for different problems, and that is its value.
A brief aside on the other end of the supply line. If the connection you are fighting is where the tube meets an angle stop or a compression coupling, rather than the faucet itself, RIDGID’s One Stop wrench is sized for that job, with 9/16 and 15/16 in open ends and a 5/8 in flare end. It is a supply-connection tool, not a faucet-mounting one.
If you decide a basin wrench is what you need and want several compared side by side, our roundup of basin wrenches and under-sink faucet tools sets out the documented capacities. And if the real question is whether an adjustable wrench would do, see our basin wrench vs adjustable wrench comparison.
Once the tool is sorted, our guides to replacing a kitchen faucet and replacing a bathroom faucet take you through the job itself, and our braided supply lines roundup helps if the connections need replacing while you are in there.
Read on 18 and 19 October 2026. This guide is based on these manufacturer documents and product pages; we have not used these tools ourselves. Documents hosted by the manufacturer are marked; copies on retailer servers are marked as copies, so check the maker’s own file for your model.
✍️ About This Guide
PTR Editorial Team — Plumbing Guides. We compare manufacturer specifications, installation requirements, compatibility and available product documentation to help homeowners choose suitable tools and parts. How we review →
Check your manual and the drain route first: gravity hose, built-in pump or external pump. Then see whether you need a dehumidifier hose at all.
Explore portable bidets that need no water-line connection, from bottle caps and squeeze bottles to battery-powered handhelds.
A strap wrench grips round parts with a strap, not teeth. See where makers call for one, how to size it, and when you can skip it.

