Please note: Product availability and information are based on our research at time of writing and are subject to change. Always check retailer listings for the latest details before purchasing.
Introduction
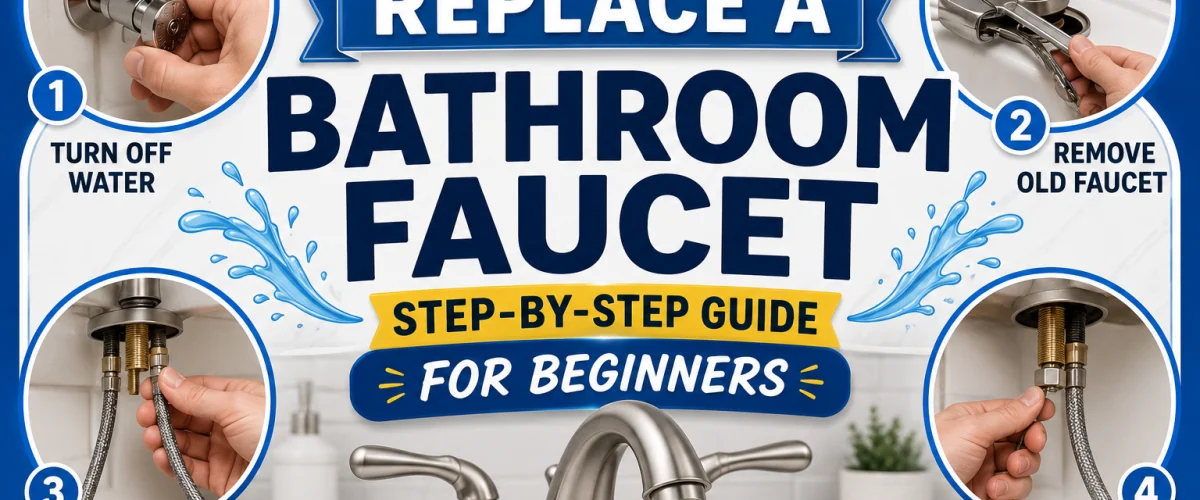
Replacing a bathroom faucet is one of the best value DIY repairs you can do at home. A licensed plumber will typically charge between $150 and $300 for this job — but with the right tools and a clear step-by-step process, most homeowners can complete it in 60 to 90 minutes without any prior plumbing experience. The money you save more than covers the cost of a quality replacement faucet.
This guide covers single-hole and centerset bathroom faucets — the two most common configurations in US homes. If you are not sure which type you have, look at the number of holes in your sink deck: one hole means a single-hole faucet, three holes spaced four inches apart means a centerset. The installation process is the same for both. If you have not yet chosen a replacement, see our guide to the best bathroom faucets — we cover picks across every price tier. For related repairs, our guide to how to fix a dripping faucet covers the faster alternative when the faucet itself is still serviceable, and our kitchen faucet replacement guide covers the equivalent job at the sink.

✏️ Our Take
Replacing a bathroom faucet is one of those DIY jobs that looks intimidating but is actually very manageable for a first-timer. The hardest part is almost always the old faucet — corroded nuts under the sink can be stubborn, but a basin wrench makes this job significantly easier. Budget around 90 minutes for your first attempt and you will be fine.

You do not need a large toolkit for this job. Gather everything before you start so you are not running to the hardware store mid-repair with the water shut off.
- Basin wrench — the single most important tool for this job. Its long shaft and pivoting jaw reach the mounting nuts behind the sink deck that a regular wrench simply cannot access.
- Adjustable wrench — for disconnecting the supply line connections at the shutoff valves and tightening the supply lines on the new faucet.
- Plumber’s putty or silicone sealant — check the installation instructions for your specific faucet. Many modern faucets come with a gasket and require no putty; others require a bead of putty around the base.
- Bucket and towels — to catch the water sitting in the supply lines when you disconnect them, and to protect the cabinet floor.
- Flashlight or headlamp — the space under the sink is dark and tight. A headlamp keeps both hands free.
- New faucet with supply lines — most quality bathroom faucets include braided stainless supply lines in the box. Confirm before purchasing separately.
- Penetrating oil (optional) — useful if the old mounting nuts are corroded. Apply 10 minutes before attempting removal.
💡 Tip: A basin wrench is the single most important tool for this job — it reaches the mounting nuts under the sink that a regular wrench cannot access. If you do not already own one, it is worth buying before you start. See our guide to the
best bathroom faucets for faucet recommendations that pair well with standard basin wrench sizes.
Step 1 — Turn Off Water Supply
Before touching anything else, shut off the water. The shutoff valves for a bathroom sink are almost always located in the cabinet directly underneath — two small oval or lever-handle valves on the hot and cold supply lines running up from the floor or wall.
- Locate the shutoff valves under the sink — one for hot water (left supply line) and one for cold (right supply line).
- Turn each valve clockwise until it stops moving. This closes the valve and stops water flow to the faucet. Do not force a valve that resists — see the warning box below.
- Turn the faucet on at the tap handles to release any remaining water pressure in the lines. Let it run until the flow stops completely.
- Place your bucket under the supply line connections at the shutoff valves — there will be residual water in the lines when you disconnect them.
⚠️ Warning: If your shutoff valves are stuck, stiff, or corroded — turn off the main house water supply instead. The main shutoff is typically near the water meter or where the supply line enters the house. Never force a corroded valve — a valve that breaks under pressure can flood the bathroom before you can react.
Step 2 — Remove the Old Faucet
With the water shut off and pressure released, you can now remove the old faucet. This is the step that takes the longest on older fixtures — corroded nuts and stiff connections require patience more than force.
- Disconnect the supply lines at the shutoff valves using your adjustable wrench — turn the nuts counterclockwise. Keep the bucket in position as residual water drains out.
- Disconnect the supply lines at the faucet end if they are separate from the faucet body. Some faucets have integrated supply lines that lift out with the whole unit.
- Use the basin wrench to loosen the mounting nuts underneath the sink deck. The jaw pivots to grip the nut and the long handle gives you the leverage to break the nut free. Turn counterclockwise.
- In older homes in the South and Southwest where hard water is common, mineral deposits can make removing the old faucet connections more difficult — soaking the nuts with white vinegar for 30 minutes before attempting removal helps significantly. Apply it with a cloth wrapped around the nut and leave it to penetrate.
- Once the mounting nuts are loose, lift the old faucet straight up and out from above the sink. It may be stuck down with old putty — a gentle rocking motion breaks the seal.
💡 Tip: Take a photo of the existing supply line connections before you disconnect anything — it is a useful reference when connecting the new faucet and eliminates any uncertainty about which line goes where.
Step 3 — Clean the Sink Deck
Once the old faucet is out, you will almost always find old plumber’s putty, silicone residue, or mineral scale around the faucet holes. Cleaning this completely before installing the new faucet is an important step that many DIYers rush past — old residue prevents the new faucet from seating flush and can cause leaks at the base over time.
- Scrape off old putty or silicone using a plastic scraper or old credit card — avoid metal scrapers on porcelain or acrylic sinks as they will scratch the surface.
- Clean the sink deck surface around each hole with a mild cleaner or white vinegar to dissolve any mineral scale or soap residue. An old toothbrush works well for getting into the edges of the holes.
- Dry the sink deck completely with a clean towel before installing the new faucet. Silicone does not adhere properly to wet surfaces, and residual moisture can cause premature corrosion on metal components.
💡 Tip: A clean, dry sink deck ensures the new faucet seats properly and creates a watertight seal at the base. Any putty or silicone residue left behind creates an uneven surface that the new faucet gasket cannot bridge correctly — and this is one of the most common causes of faucet base leaks after a DIY install.
Step 4 — Install the New Faucet
With the sink deck clean and dry, you are ready to install the new faucet. Read the manufacturer’s installation instructions before starting — different faucet designs have slightly different mounting systems, and following the specific steps for your model avoids problems.
- Check whether your faucet needs plumber’s putty or silicone. Many modern faucets include a rubber or plastic deck gasket and specify no putty — using putty when the manufacturer says not to can damage the finish. If putty or silicone is required, apply a rope of putty or a thin bead of silicone around the perimeter of the faucet base.
- Feed the supply lines through the sink hole from above — on single-hole faucets these pass through the centre hole; on centerset faucets the supply lines typically hang down through the same holes as the mounting posts.
- Position the faucet so it sits centred over the hole and aligned straight. Press down firmly to seat the gasket or putty against the sink deck surface.
- From underneath the sink, hand-thread the mounting nut or hardware onto the faucet body until snug, then use the basin wrench to fully tighten. The faucet should not be able to rotate when tightened correctly.
- Wipe away any putty squeeze-out from around the base of the faucet above the sink — use a damp cloth and clean up completely before the putty sets.
⚠️ Warning: Do not overtighten the mounting nuts — it is one of the most common DIY mistakes on this job. Over-tightening can crack a porcelain sink deck or strip the plastic mounting hardware on the faucet body. Hand-tight plus a quarter turn with the basin wrench is enough for most faucets. The goal is firm, not maximum force.
Step 5 — Connect the Water Supply Lines
With the faucet secured, the next step is connecting the supply lines. Most replacement faucets include braided stainless steel supply lines already attached to the faucet body — you simply connect the other end to the shutoff valves under the sink.
- Identify the hot and cold supply lines. Hot connects to the left shutoff valve, cold to the right — this is standard US plumbing convention. Some faucets label the lines H and C near the connection point.
- Hand-thread the supply line nuts onto the shutoff valve outlets — turn clockwise. Make sure the threads start straight to avoid cross-threading, which is the most common cause of supply line leaks.
- Tighten with the adjustable wrench — hand-tight plus a quarter to half turn is sufficient. The rubber washer inside the supply line nut creates the seal; you do not need to crank hard.
- Check that neither line is kinked or sharply bent. Braided stainless lines are flexible but should follow a gentle curve from the shutoff valve to the faucet connection — a sharp kink restricts flow and weakens the line over time.
💡 Tip: Hot supply line connects to the left valve, cold to the right — standard US plumbing convention. Getting this right means the hot and cold handles on your new faucet will work in the expected direction from day one. If you mix them up, the hot and cold will be reversed at the handle — an easy fix but an annoying one.
Step 6 — Turn On and Test
The final step is turning the water back on and checking every connection for leaks. Do this slowly and methodically — catching a small drip now takes 30 seconds to fix, catching it after a flood is considerably more work.
- Turn the shutoff valves on slowly — rotate counterclockwise a quarter turn at a time, pausing to check for leaks at the supply line connections before opening them fully.
- Watch all four connection points as water pressure builds: both supply line nuts at the shutoff valves, and both connections at the faucet body if visible.
- Turn the faucet on at the handles and run both hot and cold to check the water comes through cleanly and switches between hot and cold as expected.
- Check the faucet base on the sink deck — look for any water seeping around the gasket or putty. A slow seep here usually means the mounting nut needs another quarter turn.
- Test the drain operation — check that the pop-up drain assembly (if included with your faucet) opens and closes correctly and that water drains away without backing up.
- Leave the valves open and check again after 10 minutes — some slow leaks only show up once the rubber washers have settled under full pressure.
⚠️ Warning: If you see any drips at connections — turn the water off immediately and tighten the relevant nut before turning back on. Never leave a dripping connection running, even a small one. Even a slow drip deposits water in the cabinet over weeks, leading to mold and wood damage that is expensive to repair.
Common Problems and Fixes
Even a careful installation can produce a minor issue on first use. Here are the most common problems and how to fix them without starting over.
- Faucet leaking at the base. Water seeping from under the faucet deck means the gasket or putty has not seated properly. Turn off the water, remove the faucet, clean the surface completely, and reinstall with fresh putty or a correctly positioned gasket. This is almost always caused by installing over dirty or uneven residue from the old faucet.
- Supply line dripping at the connection. Hand-tighten the nut first to confirm it is fully on the threads, then add a further half turn with the wrench. If the drip persists, the rubber washer inside the supply line nut may be damaged — replace the washer or the supply line itself.
- Low water pressure after install. Remove the aerator — the small screen at the tip of the faucet spout — and rinse it under running water. Installation disturbs sediment in the supply lines and the aerator traps it. Reinstall the aerator and pressure should return to normal.
- Faucet handle feels stiff. Check that the mounting nut has not been overtightened, compressing the cartridge or valve mechanism inside the faucet body. Loosen the mounting nut by a quarter turn and test the handle movement again.
If you are still seeing issues after working through these fixes, our guide to the best bathroom faucets covers models known for straightforward installation and good manufacturer support.
Need a Professional Plumber?
Sometimes a job is too big for DIY — particularly if your shutoff valves need replacing, your drain assembly requires modification, or you discover corroded pipework during the removal. If you need a licensed plumber in your area, search PlumberArchive.com — the US plumber directory with 12,151+ verified plumbers across all 50 states.
Find a trusted plumber near you →
Looking for our top recommended tools in one place? Browse our curated Amazon Storefront →
Frequently Asked Questions
Q: How long does it take to replace a bathroom faucet?
Most first-time DIYers complete a bathroom faucet replacement in 60 to 90 minutes. The time varies based on the condition of the old faucet — corroded mounting nuts and stiff shutoff valves are the most common cause of delays. If the old faucet comes out cleanly and the shutoff valves work properly, an experienced DIYer can complete the job in 30 to 45 minutes.
Q: Do I need a plumber to replace a bathroom faucet?
Not in most cases. Replacing a like-for-like bathroom faucet — same number of holes, same configuration — is a straightforward DIY job that does not require a plumber’s licence. You do need to know how to shut off the water supply and use basic hand tools. Call a plumber if the shutoff valves do not work, if there is any sign of pipe corrosion or damage, or if the new faucet requires modifications to the sink deck or drain assembly.
Q: What tools do I need to replace a bathroom faucet?
The essential tools are a basin wrench, an adjustable wrench, a bucket, and towels. A basin wrench is the one tool you cannot substitute — its long handle and pivoting jaw are specifically designed to reach the mounting nuts behind the sink deck that a standard wrench cannot access. A flashlight or headlamp is also very helpful since the space under the sink is dark. For most faucet installations, no power tools are needed.
Q: How do I know what size faucet to buy?
Measure the number of holes in your sink deck and the distance between them. A single hole means you need a single-hole faucet. Three holes spaced four inches apart (centre to centre) means a centerset faucet. Three holes spaced eight inches apart means a widespread faucet. Most faucets also list their spout reach (the horizontal distance the spout extends over the basin) — measure your basin width to make sure the new faucet reaches the centre of the sink. Our guide to the best bathroom faucets covers all configurations with measurements clearly listed.
Conclusion — Replacing a Bathroom Faucet Is Well Within DIY Reach
Most homeowners complete their first bathroom faucet replacement in around 90 minutes — and every replacement after that in considerably less. The process is straightforward when broken into these six steps, and the money saved versus a plumber call-out ($150–$300) more than justifies the time investment.
The basin wrench is the key tool that makes this job possible. Without it, reaching the mounting nuts behind the sink deck is nearly impossible. If you only buy one tool for this job, buy the basin wrench — it will earn its cost back on the first use and on every faucet job after that.
If you are still choosing a replacement faucet, see our full guide to the best bathroom faucets — we cover the top options for single-hole, centerset, and widespread configurations across all price ranges. For kitchen plumbing repairs, see our guide to the best kitchen faucets for the same level of detail applied to kitchen installations.
✍️ About This Guide
Written by Mike Reynolds, DIY Home Improvement Writer at PlumbingToolsReview — former residential contractor helping US homeowners tackle plumbing repairs with confidence since 2026. Learn how we test →