Guides
4 Oct 2026

How to Make a PEX Crimp or Clamp Connection (2026) — Step-by-Step Guide
Make a PEX crimp or clamp connection step by step: ring and clamp placement, gauge checks, failed joints and code notes from maker sheets.
How to unclog a kitchen sink — 6 methods that actually work, from boiling water to cleaning the P-trap and using a drain snake. Step-by-step guide for US homeowners.
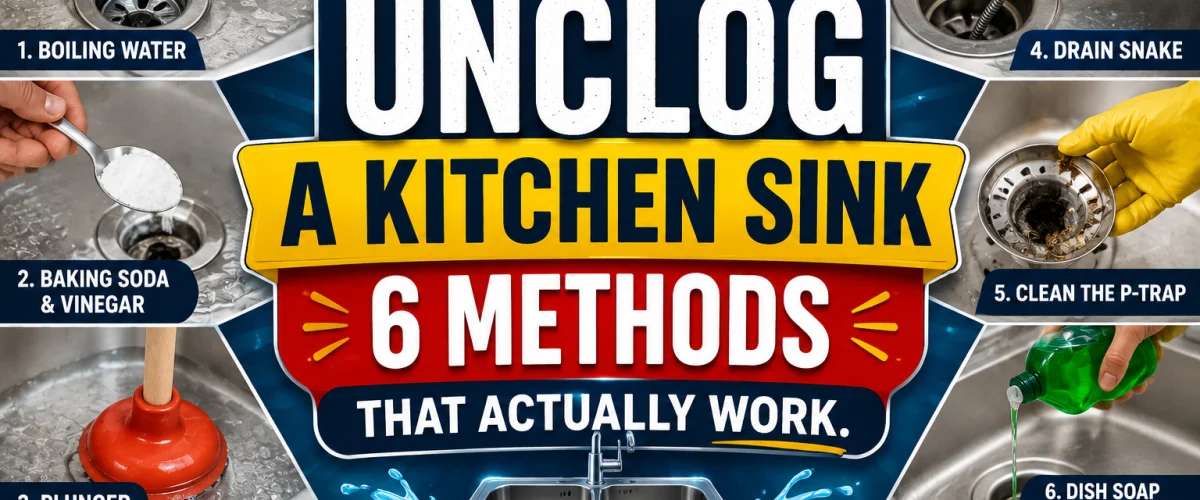
A clogged kitchen sink is one of the most common household plumbing problems in the US — and one of the most frustrating to deal with when you are standing in front of a basin full of grey, standing water. The good news is that most kitchen sink clogs sit in the same place: the P-trap, the curved section of pipe directly under your sink, where grease, food scraps and soap buildup accumulate over time. In the majority of cases you can clear the clog yourself in under 30 minutes without calling a plumber.
This guide covers six methods in order of effort — from the simplest free fix to using a drain snake for the most stubborn blockages. Work through them in sequence and most kitchen sink clogs will clear by Method 3 or 4. For chemical-based options, see our guide to the best drain unblockers for current product recommendations.
Please note: Product availability and information are based on our research at time of writing and are subject to change. Always check retailer listings for the latest details before purchasing.
✏️ Our Take
One thing we noticed when researching kitchen sink clogs — grease is by far the biggest culprit in US homes, especially in households that cook frequently. The P-trap method (Method 5) clears stubborn clogs that chemicals cannot touch — most homeowners skip this step but it is the most effective fix of all.
Understanding what causes kitchen sink clogs makes it easier to choose the right fix — and avoid making the same blockage happen twice. Kitchen sink clogs are almost always caused by one or more of these:
In older homes in the Northeast and Midwest built before 1970, galvanized steel drain pipes are common — these corrode internally over time and catch grease more easily than modern PVC. If your sink blocks repeatedly despite regular cleaning, the pipe itself may need replacing. A licensed plumber can scope the line to confirm.
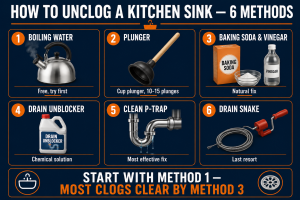
The simplest and cheapest method — always try this first. Boiling water melts and flushes grease and soap deposits that have built up on the pipe walls, and it costs nothing. It works on a surprising number of kitchen sink clogs, particularly those caused by grease or soap scum that has not yet fully hardened.
If boiling water does not shift the clog, a plunger is the logical next step. The suction and pressure created by plunging can dislodge soft blockages that water pressure alone cannot move. The key is using the right type of plunger and following the correct technique — most people plunge ineffectively and give up too soon.
For a reliable cup plunger, see our full guide to the best plungers — we cover the top options for sinks and toilets across all budgets.
The classic natural drain cleaning combination. When baking soda (a base) meets white vinegar (an acid), the chemical reaction produces carbon dioxide gas that fizzes and agitates organic buildup clinging to the pipe walls. It is not as aggressive as a chemical drain cleaner, but for light to moderate organic clogs it is genuinely effective, safe for all pipe types, and uses ingredients most households already have.
When the natural methods have not shifted the clog, a chemical drain unblocker is the next step. These products use caustic or enzyme-based formulations designed to dissolve grease, food scraps, and soap buildup in the drain pipe. They are more aggressive than the methods above and should be used with care, but they are highly effective on the organic clogs that most commonly block kitchen sinks.
For current product recommendations, see our full guide to the best drain unblockers — we cover the most effective options for kitchen sink clogs across budget and premium tiers.
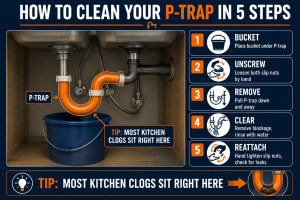
This is the method most homeowners skip — and it is also the most effective for stubborn kitchen sink clogs. The P-trap (the curved section of pipe directly under your sink) is where the vast majority of kitchen sink blockages actually sit. Chemicals cannot always reach and dissolve a solid grease blockage deep in the trap, but removing and cleaning the P-trap physically clears it completely. It looks intimidating but it takes around 10 minutes and requires no tools in most cases.
When all other methods have failed, the clog is deeper in the drain line than the P-trap — further into the wall pipe or approaching the main stack. A drain snake (also called a drain auger) is a flexible cable tool that you feed into the drain opening and rotate to reach, break up, and retrieve blockages well beyond the reach of any of the methods above. It is the most powerful DIY tool for a kitchen sink clog short of calling a plumber.
For product recommendations across manual and powered drain snakes, see our guide to the best drain snakes — we cover the best options for kitchen and bathroom drain lines at every budget.
The best kitchen sink clog is one that never forms. A few consistent habits take less time per month than fixing a blocked drain takes in an afternoon — and they keep you away from chemical drain cleaners entirely.
If all six methods have failed, the blockage is likely deeper in the drain line or in the main sewer — beyond DIY reach. If you need a licensed plumber in your area, search PlumberArchive.com — the US plumber directory with 12,151+ verified plumbers across all 50 states.
Get weekly plumbing tips, honest tool reviews and DIY guides delivered to your Facebook feed.
For most kitchen sink clogs, a kettle of boiling water (or very hot tap water on PVC pipes) poured in two or three stages is the fastest method — it takes under five minutes and clears the majority of grease and soap-based clogs without any tools or products. If boiling water does not work within two attempts, move to the plunger, which is the next fastest fix. The P-trap cleanout (Method 5) is the most reliable fix for stubborn clogs and takes around 10 minutes once you have a bucket in place. Working through the six methods in sequence is the most efficient approach — most kitchen sink clogs clear by Method 3 without needing a drain snake or plumber.
You can, but it is significantly less effective than a cup plunger on a flat sink drain. A toilet plunger (flange plunger) has a rubber flap that folds out of the cup — this is designed to seal the curved opening of a toilet bowl, not a flat drain. On a sink it sits unevenly and breaks the seal with every stroke, reducing the suction and pressure you generate. A cup plunger (the flat-bottomed type) seals properly over a flat kitchen sink drain and is far more effective. If a flange plunger is all you have, fold the rubber flap up inside the cup before using it and it will function more like a cup plunger.
A kitchen sink that blocks repeatedly despite clearing usually has one of three underlying causes. First, grease is being regularly poured down the drain — even small amounts build up quickly on pipe walls and create recurring blockages. Second, the P-trap may not be fully clearing with chemical methods and needs a physical cleanout. Third, in older homes — particularly those built before 1970 in the Northeast and Midwest — galvanized steel drain pipes corrode internally and develop a rough surface that catches grease far more easily than smooth modern PVC. Repeated blockages in an older home despite good habits can indicate that the drain pipe itself needs professional attention or replacement.
Call a plumber if the drain is still blocked after working through all six methods in this guide, if multiple drains in the house are slow or blocked at the same time (which indicates a main sewer line issue rather than a local blockage), or if the kitchen sink gurgles when other fixtures drain — a sign that the main stack or sewer line is partially blocked. You should also call a professional if you notice water backing up from the sink when the dishwasher runs, or if there is a sewage smell from the drain that persists after cleaning the P-trap. Search PlumberArchive.com
Looking for our top recommended tools in one place? Browse our curated Amazon Storefront →
for a verified licensed plumber in your area.
Work through the six methods in sequence and you will clear the vast majority of kitchen sink clogs without a plumber. Start with boiling water — it is free, takes five minutes, and clears most grease and soap clogs on the first attempt. If that does not work, move to the plunger, then baking soda and vinegar. Most kitchen sink blockages clear by Method 3.
For stubborn clogs that chemical methods and plunging cannot shift, the P-trap cleanout (Method 5) is the fix most homeowners overlook — and it is the most effective of all for blockages that have built up in the curved pipe section directly under the sink. It takes around 10 minutes, requires no specialist tools, and physically removes the blockage rather than trying to dissolve or push it through.
If the clog sits deeper in the line, a drain snake reaches the wall pipe and main stack — far beyond where any of the earlier methods can work. For product options across budget and premium drain snakes, and for the most effective chemical treatments for stubborn kitchen clogs, see our guide to the best drain unblockers. The same techniques apply at the bathroom basin — see how to unclog a bathroom sink.
✍️ About This Review
PTR Editorial Team — Plumbing Guides. We compare manufacturer specifications, installation requirements, compatibility and available product documentation to help homeowners choose suitable tools and parts. How we review →
Make a PEX crimp or clamp connection step by step: ring and clamp placement, gauge checks, failed joints and code notes from maker sheets.
Install a bathroom sink pop-up drain assembly step by step: remove the old stopper, seat the flange, connect the pivot rod, and adjust the lift rod strap.
Replace or install a submersible sump pump in an existing pit: disconnect power, set the pump, connect the discharge pipe and check valve, then test.

