Guides
4 Oct 2026

How to Make a PEX Crimp or Clamp Connection (2026) — Step-by-Step Guide
Make a PEX crimp or clamp connection step by step: ring and clamp placement, gauge checks, failed joints and code notes from maker sheets.
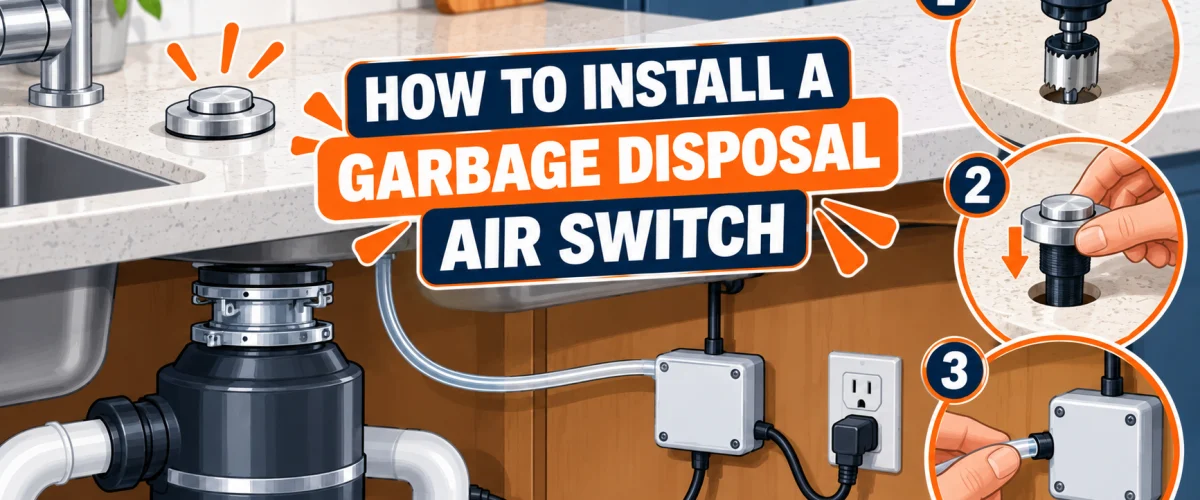
Install a garbage disposal air switch step by step — tools, wired vs. plug-in wiring, and troubleshooting a switch that won't respond.
Please note: Product availability and information are based on our research at time of writing and are subject to change. Always check Amazon for the latest details before purchasing. This guide is for general reference — check your local electrical code and manufacturer instructions before starting any wiring work.
A garbage disposal air switch replaces the wall-mounted toggle switch that normally controls your disposal with a sealed push button mounted at the sink deck or countertop. The button connects to a power module under the sink by a thin air tube, not by electrical wiring, so the part your hand touches at the sink is pneumatic, not electrical.
Installing one is a manageable DIY job for most homeowners, whether you’re adding an air switch to an existing disposal or installing one alongside a new disposal from scratch. This guide walks through the process from tools to testing. If you’re installing the disposal itself, see our guide to installing a garbage disposal first. If you haven’t picked an air switch kit yet, our best garbage disposal air switches review compares wired, dual-outlet, plug-in and budget options.
At a Glance
| Difficulty | Easy to Moderate |
| Time | 30–60 Minutes |
| Cost | $ – $$ for the air switch kit |
| Tools Needed | Air switch kit, drill with hole saw bit (if needed), adjustable wrench or pliers, voltage tester, screwdriver, wire nuts and electrical tape (wired kits only) |
| Skill Level | Beginner to Intermediate |
✏️ Our Take
Most of this job is mechanical, not electrical: seating the button, running the tube without excess slack, and connecting the module. The one step that genuinely calls for care is any wiring into a junction box, and a plug-in module sidesteps that step entirely. If you’re not confident about the wiring path, a plug-in kit or a licensed electrician are both reasonable ways to avoid it.
IN THIS GUIDE
Air switch kits generally come in two installation styles for the power module, and it’s worth confirming which one you have before you begin, since the steps differ slightly:
Check your specific kit’s instructions and listing details to confirm which type you have — our best garbage disposal air switches review covers this distinction across several kits in more detail, including a case where a product marketed as “cordless” still uses a power cord.
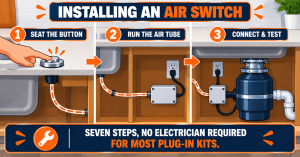
Step-by-Step Installation
At the breaker box, switch off the circuit that powers your garbage disposal. Confirm the power is off with a voltage tester before touching any wiring.
Most kits fit a hole of roughly 1-1/4 to 1-3/4 inches, though this varies by kit — check your specific product’s stated hole diameter. If your sink or countertop already has a spare hole (common on sinks originally set up for a soap dispenser or side sprayer), you may be able to use it directly. If not, mark the location and use a hole saw bit sized to your kit’s requirement to drill through the countertop or sink deck.
Insert the button from above, with its gasket in place to create a watertight seal against the countertop or sink deck. From underneath, thread on and tighten the mounting nut with an adjustable wrench or pliers, snug enough to compress the gasket without overtightening.
Connect the air tube to the back of the button, then run it down to where the power module will sit under the sink. Avoid coiling excess tubing — cut it to length instead, since leftover coiled tubing between the button and the module is a common cause of an unreliable switch.
Mount the power module in a convenient, dry location under the sink, following your kit’s instructions for whether it’s screw-mounted or comes with an alternative mounting method. Connect the air tube to the module’s air-inlet fitting.
Plug the garbage disposal’s own power cord into the power module, rather than directly into the wall outlet. The module now sits between the wall power and the disposal, and the air switch controls that connection.
Turn the breaker back on. Press the button once — the disposal should start. Press it again — it should stop. If it doesn’t respond, see the troubleshooting section below before assuming a faulty unit.
The button doesn’t turn the disposal on or off: Check for a kink or loose connection in the air tube first — a leak or blockage in the tube is the most common cause of an unresponsive switch. Confirm the tube is fully seated at both the button and the module.
The disposal runs but won’t turn off, or runs intermittently: This can indicate the button itself is stuck or damaged, or that the power module’s internal switch has failed. Confirm the button isn’t jammed by debris or improper seating before assuming a defective module.
Water is getting under the button: Check that the gasket is properly seated and the mounting nut is adequately tightened. A missing or misaligned gasket is the most common cause of a leak at this connection.
The module won’t reset after tripping: Some modules have an internal reset function if overloaded — check your specific kit’s instructions, since this varies by product.
Most air switch installs are a straightforward DIY job. But if the wiring path isn’t clear, if you’re not confident working near a junction box, or if something about your sink’s plumbing or electrical setup looks off once you’re under there, a licensed electrician or plumber can take it from here.
Find a licensed plumber in your area at PlumberArchive.com — the US plumber directory with 12,000+ verified local plumbers across all 50 states.
Get weekly plumbing tips, honest tool reviews and DIY guides delivered to your Facebook feed.
No — always shut off power at the breaker before working on any wiring connected to the disposal circuit, and confirm it’s off with a voltage tester. This applies even for plug-in kits, since you’re still working near the disposal’s own wiring.
Many homeowners install a plug-in kit without professional help, since it involves no wiring. If your kit requires wiring into a junction box and you’re not comfortable with that work, a licensed electrician or plumber is a reasonable choice.
Most air switch kits state broad compatibility across disposal brands, though it’s worth checking your specific kit’s listing against your disposal’s brand and horsepower rating before buying. Some kits are designed for a specific disposal brand’s models.
No — a batch-feed disposal turns on by inserting and twisting a stopper into the drain, not with a separate switch, so an air switch has no role in that setup. See our continuous-feed vs. batch-feed comparison if you’re not sure which type you have.
Installing a garbage disposal air switch is a straightforward upgrade for most kitchens, whether you’re retrofitting an existing disposal or setting one up during a new install. The job comes down to seating the button, running the air tube without excess slack, and correctly connecting the power module — wired or plug-in, depending on your kit. If you haven’t chosen a kit yet, our best garbage disposal air switches review compares several options, and our guide to installing a garbage disposal covers the disposal side of the job if you’re doing both at once.
✍️ About This Guide
Written by Mike Reynolds, DIY Home Improvement Writer at PlumbingToolsReview — former residential contractor helping US homeowners tackle plumbing repairs with confidence. Learn how we test →
Make a PEX crimp or clamp connection step by step: ring and clamp placement, gauge checks, failed joints and code notes from maker sheets.
Install a bathroom sink pop-up drain assembly step by step: remove the old stopper, seat the flange, connect the pivot rod, and adjust the lift rod strap.
Replace or install a submersible sump pump in an existing pit: disconnect power, set the pump, connect the discharge pipe and check valve, then test.

