Guides
20 Sep 2026

How to Install and Program a Hose Bib Timer (2026) — Step-by-Step Guide
Learn how to install and program a hose bib timer — check the washer, thread it on hand-tight, set the schedule, and run a test cycle.
Learn how to install a septic tank riser kit safely — dig to the existing lid, seal the riser, backfill, and bolt on the cover without opening the tank.
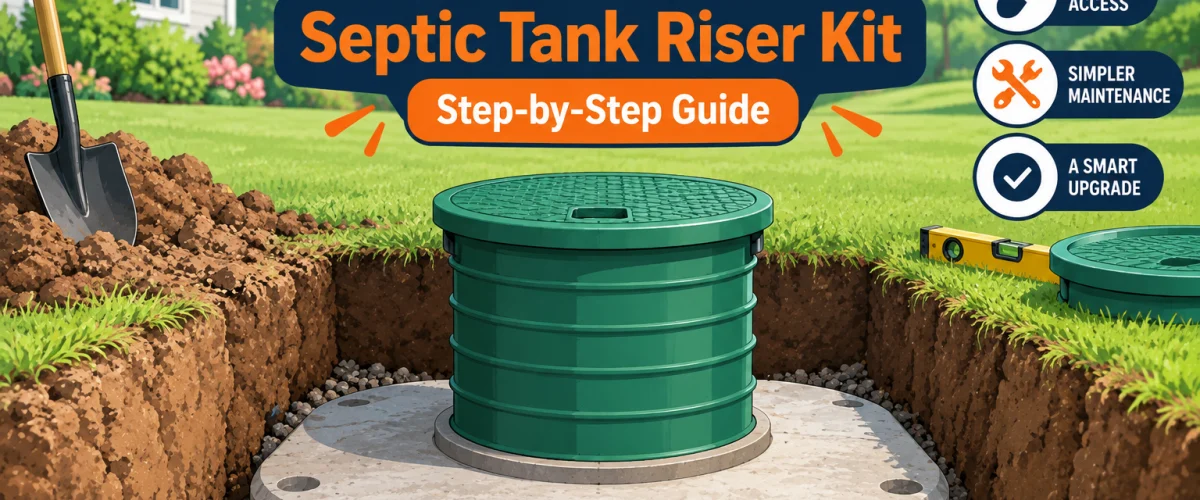
Please note: This guide covers installing a riser at the existing, sealed access point of a shallow, accessible septic tank. Tank designs, kits, and local rules vary — follow your kit’s instructions, check local requirements, and if your tank doesn’t match what’s described here, call a septic professional.
A septic riser is a hollow cylinder that extends from your tank’s access opening up to ground level, where a bolt-down cover caps it. The payoff is access: without a riser, every pump-out or inspection starts with locating a buried lid and digging down to it, often through a foot or more of soil and sod. With one, the cover sits at the surface and whoever services your tank simply lifts the cover. Easier access also means the pumping and inspection that protect your drain field are less likely to get put off.
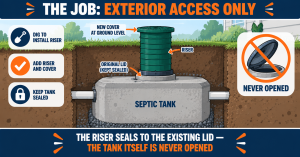
The scope of this guide is deliberately narrow. It covers exposing the tank’s existing access point from the outside and sealing a riser to the existing lid. It never involves opening the tank. Still choosing a kit? Our 5 Best Septic Tank Riser Kits roundup covers sizes, heights, and options.
IN THIS GUIDE
At a Glance
| Skill Level | Beginner to intermediate — basic digging and careful work, but only for a shallow, accessible tank. |
| Tools Needed | A shovel, the riser kit with its gasket or butyl sealant and hardware, and a saw to trim the riser to height if needed. |
| Time Needed | Roughly a weekend afternoon for a shallow tank; longer if digging is difficult. |
| Critical First Step | Confirm whether your area requires a permit before you start. Some jurisdictions treat a riser as routine, others require notification or inspection. |
Sizing comes first, before any digging. Risers aren’t universal: you need the inside diameter of your tank’s existing access opening and the depth from the lid to your desired finished grade. Our riser kits roundup walks through both measurements in full, so we won’t repeat it here. Have the right kit in hand before you dig.
Start with your system’s as-built diagram if you have one; it shows where the tank and its access point sit. If you’re not sure you even have a septic system, or where the tank is, our septic tank vs sewer connection comparison explains how to check.
Dig by hand with a shovel, working from beside the lid rather than on top of it, and remove soil until the top and edges of the existing lid are exposed. Stay off the lid itself — don’t stand or kneel on it — and keep children, pets, and equipment well clear. If you find a crack, a gouge, or a lid that shifts or feels unsound, stop there. Don’t pry against the lid or its gasket area; damaging that seal can let groundwater in or odors out. Finish the same day rather than leaving an open excavation beside the tank overnight.
Measure from the top of the lid up to the grade you want the cover at, and trim the riser body to that height. Most riser bodies have factory-scored rings so you can cut at a marked line with a saw. Do the cutting on the ground, away from the excavation, and wear eye protection. Aim for a cover at grade: high enough that runoff drains away, not so high it’s a trip hazard.
A universal adapter ring can bridge a small size mismatch, but it’s no substitute for the correct diameter. For anything larger, get the right riser rather than improvising.
Brush loose dirt and grit off the surface where the riser will meet the lid, so the seal has a clean surface to bond to. Then follow your kit’s instructions for the gasket or butyl sealant, which goes at the joint between the riser and the existing lid assembly. Set the riser down straight and press it into place evenly, checking with a level across the top. The existing lid stays exactly where it is: you’re sealing the riser to it, not moving it.
Work gently, and don’t lever, pry, or hammer against the lid to seat the riser. If it won’t seat without force, the size or configuration is wrong — don’t push harder.
Refill the excavation in layers, tamping gently by hand, and keep the fill even on all sides so the riser stays plumb and supported. Use loose soil rather than large rocks or debris, which can press against the riser or the seal. Slope the finished surface slightly away from the riser so rain runs off instead of pooling around the cover, and keep vehicles and heavy equipment off the area.
Set the new cover on the riser and fasten it with the stainless steel screws from your kit. A riser brings a once-buried access point up to where children, pets, and lawn equipment can reach it, so the cover should always be bolted down, never left as a loose cap. If kids or pets are around, choose a kit with a locking or child-safety lid. A secure cover also keeps rainwater and groundwater out of the tank.
This is a straightforward job only when the riser can seat onto the existing, closed opening. Stop and call a septic professional if any of these apply:
Stopping isn’t a failure — it’s where the job stops being a DIY project.
The boundary is simple: anything that requires lid removal, tank entry, or work beyond the exterior access point belongs to a licensed professional. That includes inspecting the tank’s interior and checking baffles or filters, which our septic maintenance guide puts firmly in professional hands, along with its rule to never open or enter a septic tank yourself. Once your riser is in, your pumper or inspector uses it to do that work safely.
✏️ Our Take
Installing a riser is a genuinely accessible DIY project, but only within its proper scope: exterior access only, with the original lid staying put and sealed the whole time. That boundary is what keeps it safe. Stay inside it and the work is digging, sealing, backfilling, and bolting on a cover; if you can’t, hand it off.
Prices and ratings may change. Always check Amazon for current prices.
If your tank is deep, the lid looks damaged, or the install would need the tank opened, find a licensed professional in your area at PlumberArchive.com — the US plumber directory with 12,151+ verified local plumbers across all 50 states.
Get weekly plumbing tips, honest tool reviews and DIY guides delivered to your Facebook feed.
It depends on your county and state. Some treat a riser as routine, since it doesn’t change the tank’s function, while others require notification or inspection. A quick call to your local health or septic authority before you dig will confirm it.
No, and you shouldn’t. The riser seals to the existing, closed lid. If a step would require lifting the lid, breaking anything out, or reaching in, stop and call a septic professional.
Your tank’s existing opening decides that, not brand. Measure first, then see our septic tank riser kits roundup for sizes and options.
Confirm the permit question and the right size, call 811, dig by hand to expose the existing lid, seal the riser to it, backfill evenly, and bolt on the cover. Throughout, the tank stays closed; if the job ever calls for opening it, stop and call a professional. To pick a kit, see our best septic tank riser kits roundup.
✍️ About This Guide
Written by Mike Reynolds, DIY Home Improvement Writer at PlumbingToolsReview — former residential contractor helping US homeowners tackle plumbing repairs with confidence. Learn how we test →
Learn how to install and program a hose bib timer — check the washer, thread it on hand-tight, set the schedule, and run a test cycle.
Learn how to install a whole-house sediment pre-filter for well water — location, mounting, plumbing it in, pressure testing, and setup.
Learn how to replace a bathtub drain stopper — lift-and-turn, tip-toe, toe-touch, and trip lever, each with its own step-by-step process.

