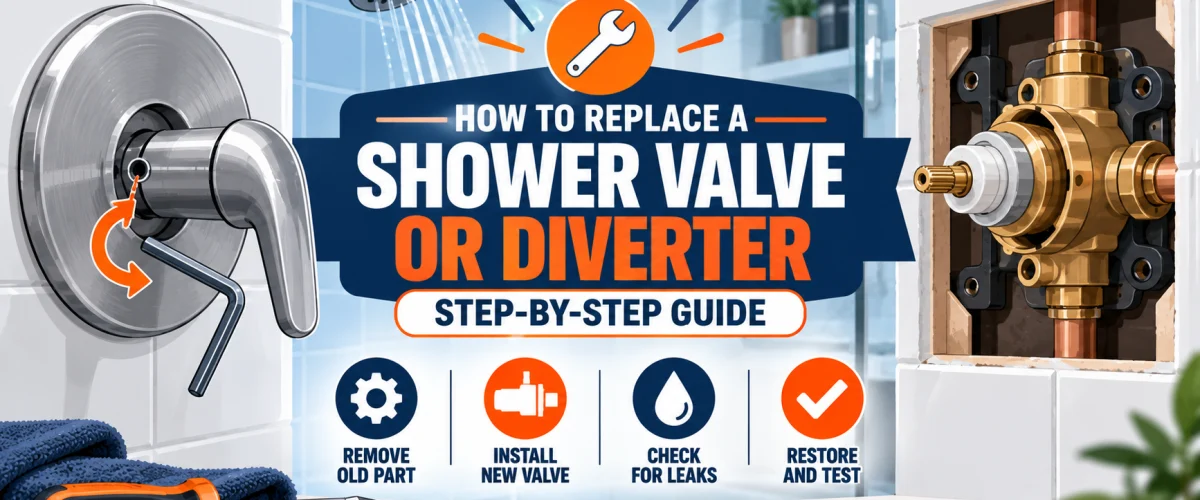
Please note: This guide covers two related but distinct jobs — replacing a shower valve body and replacing an arm-mounted diverter. Connection types, wall construction, and code requirements vary by home and by location — if anything about your specific setup doesn’t match what’s described here, a licensed plumber is the safer next step.
Introduction
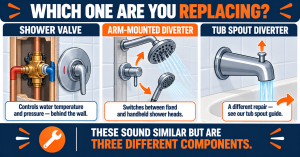
A shower valve and an arm-mounted diverter do two different jobs, even though the terminology gets mixed up constantly. The shower valve is the control mechanism behind the wall that regulates water temperature and pressure as you turn the handle — modern valves also include an anti-scald mechanism that limits how hot the water can get if pressure suddenly drops elsewhere in the house. An arm-mounted diverter is a separate fixture, usually mounted on the shower arm itself, with a knob or lever that switches water flow between a fixed shower head and a handheld unit. Either one gets replaced for similar reasons — it’s leaking, the internal cartridge or seals have worn out, you’re upgrading to a pressure-balancing or anti-scald valve for safety, or the fixture is simply outdated and doesn’t match the rest of the bathroom.
One important disambiguation before you go further: if what’s actually failing is the pull-up rod on your tub spout — the small lever on top of a tub spout that redirects water up to the shower head — that’s a completely different repair, not covered here. See our tub spout replacement guide, which covers that specific diverter mechanism and the repair kit that usually fixes it. This guide is for the wall-mounted valve body and the separate arm-mounted diverter fixture only.
At a Glance
| Skill Level |
Varies widely — diverter replacement is beginner-to-intermediate; valve replacement is intermediate-to-advanced and often opens the wall. |
| Tools Needed |
Diverter: an adjustable wrench and plumber’s tape. Valve: drywall tools for wall access, a pipe wrench, and — depending on your connection type — a soldering torch, press-fit tool, or threading equipment. |
| Time Needed |
Diverter: 20 to 30 minutes. Valve: a half day to a full day, including wall patching — longer if it’s your first time. |
| Critical First Step |
Shut off water to the shower before starting either job — use the dedicated shower shutoff if one exists, or the main water shutoff if it doesn’t. |
Shower Valve vs. Arm-Mounted Diverter: What’s the Difference
Before doing anything else, confirm which component you actually need to replace — the two jobs aren’t remotely similar in difficulty. The shower valve is inside the wall; all you see from the shower side is the handle and trim plate. If your handle is hard to turn, the temperature swings unexpectedly, or you see water staining on the wall around the handle, that points to the valve. The arm-mounted diverter is fully visible — it’s the knob or pull-lever mounted on the shower arm (the pipe the shower head screws onto) that redirects water to a handheld unit. If flow won’t switch properly between a fixed head and a handheld sprayer, or the diverter itself is leaking at its base, that’s the diverter, not the valve.
And to repeat the disambiguation from the introduction, because the terminology overlap causes real confusion: neither of these is the pull-up rod on a tub spout. That’s a third, separate mechanism, covered in our tub spout guide. If your tub spout has a stuck pull-up diverter rod, that’s a different repair from either job covered here.
Replacing a Shower Valve — Overview and Complexity
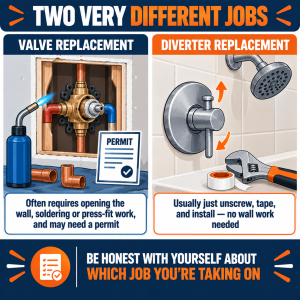
Be honest with yourself about this one before you start: replacing a shower valve is a genuinely more involved job than most guides on this site, and it’s worth understanding why before you open the wall. The valve sits inside the wall cavity behind the shower, so access alone means cutting into drywall or tile — from the front if there’s an access panel or from the back if you can get to it through an adjacent closet or wall. The water supply to the whole bathroom, or sometimes the whole house, needs to be off for the duration. And connecting the new valve typically means soldering copper, using a press-fit system, or threading fittings, depending on what your home’s plumbing uses — not a job most first-time DIYers have direct experience with.
Whether this is a reasonable DIY project for you depends heavily on your own plumbing experience, comfort opening and patching a wall, and — importantly — your local building code. Many jurisdictions require a permit for shower valve replacement specifically because it involves altering the water supply system behind a finished wall, and some require the work to be inspected before the wall goes back up. None of that makes it impossible to DIY, but it does mean this isn’t a same-afternoon job the way a diverter swap is, and it’s worth an honest self-assessment before you start cutting drywall.
⚠️ Warning: Check your local code and permit requirements before starting a valve replacement. Many areas require a permit and inspection for this type of work specifically because it involves the water supply behind a finished wall, and skipping that step can create real problems if you ever sell the home or file an insurance claim related to water damage.
Shower Valve Replacement Steps
Start by shutting off the water — the main shutoff if there’s no dedicated valve for the bathroom — and opening the wall behind the shower valve to get working access. Once you can see the valve, note and, ideally, photograph the exact rough-in position before removing anything.
💡 Tip: Photograph the old valve’s rough-in measurements — the distance from the finished wall face, the centerline height, and the orientation of the hot and cold supply lines — before you remove it. Getting this wrong is the single most common reason a new valve doesn’t sit right behind the trim plate once the wall is closed back up.
Remove the old valve body from the supply lines, then connect the new one using whichever method matches your home’s plumbing — sweat/soldered copper, press-fit, or threaded, depending on what you have. We don’t re-teach connection types in detail here since it depends entirely on your setup; our shower valves buying guide covers IPS, CC (copper sweat), and PEX connections in depth if you need to confirm which one applies to you before buying a replacement valve.
The step that matters most, and the one most likely to go wrong for a first-timer, is setting the valve’s rough-in depth — how far the valve body sits back from the finished wall surface — correctly before you close anything up. Most valves have a printed rough-in dimension specific to the trim kit you’re installing; get this wrong and the trim plate either won’t seat flush or the handle stem won’t reach it once tile or drywall goes back on. Double-check this against your new valve’s installation instructions, not just against where the old one sat, since rough-in depth can differ between valve models even within the same brand.
Once the new valve is connected and the rough-in depth is confirmed, close the wall back up — but not before pressure-testing the connections first (see the testing section below). Patching drywall or resetting tile is its own separate skill; if you’re not confident in that part specifically, it’s reasonable to hire that portion out even if you did the valve swap yourself.
Replacing an Arm-Mounted Diverter
This is the far more approachable of the two jobs, and for most homeowners it’s a reasonable weekend DIY task with no wall-opening required. Shut off water to the shower first, then unscrew the old diverter from the shower arm — it typically comes off counterclockwise by hand or with a bit of help from an adjustable wrench if it’s been on a while. Clean off any old plumber’s tape or mineral buildup from the arm’s threads.
Wrap fresh plumber’s tape clockwise around the threads — clockwise so it tightens rather than unwinds as you install the new diverter — then thread the new diverter on by hand until snug, finishing with a partial turn from an adjustable wrench if needed. Don’t overtighten; snug and leak-free is the goal, not maximum torque. Reattach the shower head to the diverter’s outlet and you’re done — no wall access, soldering, or permits involved for this half of the job.
Testing Temperature, Pressure, and Diverter Switching
Before closing up a valve wall or considering a diverter swap finished, turn the water back on and test thoroughly. For a valve: run through the full range of the handle, checking that temperature and pressure respond smoothly and that the anti-scald limit is working as expected. Check every connection you made — supply lines, valve body, any fittings — for even a slow drip, since a small leak found now is far easier to fix than one found after the wall is closed. For a diverter: switch it back and forth several times, confirming water reliably redirects to the handheld unit and back to the fixed head with no leaking at the diverter’s base or the shower arm connection.
US Regional Context: Anti-scald valve requirements vary by state and local plumbing code — many areas now require pressure-balancing or thermostatic-mixing valves in new construction and major renovations specifically to prevent sudden scalding if water pressure drops elsewhere in the house, though requirements for a like-for-like replacement in an existing home vary more. Moen, Kohler, Delta, and Pfister account for the large majority of US shower valve installations, and trim kits are generally brand- and sometimes model-specific rather than universal — confirm compatibility with your specific valve body before buying a replacement trim kit.
When to Call a Professional
For the valve: it’s genuinely common, even among homeowners comfortable with other plumbing repairs, to hire this one out — and that’s a reasonable call, not a failure to DIY. Opening a finished wall, soldering or press-fitting new connections correctly, calibrating an anti-scald mechanism, and navigating permit and inspection requirements all add up to real risk if something goes wrong behind a closed wall. Call a licensed plumber if you’re not confident in sweating copper or press-fitting connections, if your local code requires a permit and inspection you’d rather not manage yourself, or if you discover water damage, corroded supply lines, or anything unexpected once the wall is open.
For the diverter: this one rarely needs a professional. Call a plumber only if the shower arm itself is corroded or damaged, or if water is leaking from inside the wall at the arm connection rather than at the diverter fitting itself — that points to a problem beyond the diverter, closer to valve territory. If you’re dealing with a leaking or worn shower head rather than the diverter itself, our guide to fixing a leaking shower head covers that separate, similarly approachable repair.
✏️ Our Take
These two jobs sound similar and get lumped together constantly, but they’re not close in difficulty. Replacing an arm-mounted diverter is a genuine 30-minute DIY task for nearly anyone — wrench, plumber’s tape, done. Replacing a shower valve is a different category of project entirely: opening a wall, working with the water supply, and often soldering or press-fitting connections behind a surface you’ll need to patch afterward. There’s no shame in doing the diverter yourself and hiring out the valve — figure out honestly which job you’re actually facing before you commit to either one.
Prices and ratings may change. Always check Amazon for current prices.
Frequently Asked Questions
Q: My tub spout diverter is stuck — is that covered by this guide?
No. A stuck pull-up rod on a tub spout is a separate mechanism from both the shower valve and the arm-mounted diverter covered here. See our tub spout replacement guide, which covers that specific repair and the repair kit that usually fixes it.
Q: Can I replace a shower valve without opening the wall?
Generally no. The valve body sits inside the wall cavity, so replacing it — as opposed to just swapping the visible trim kit — requires access from the front or back of the wall. If only the trim (handle and cover plate) needs replacing and the valve body itself is fine, that’s a much smaller job than what this guide covers.
Q: Do I need a permit to replace a shower valve myself?
It depends on your local building department — many jurisdictions require a permit and inspection for work that alters the water supply behind a finished wall, while others don’t for a like-for-like replacement. Check with your local code office before starting rather than assuming either way.
Q: Is replacing an arm-mounted diverter as difficult as replacing a valve?
No, not close. A diverter is a visible, externally mounted fixture that typically unscrews and reinstalls with just an adjustable wrench and plumber’s tape, with no wall access needed. A valve is inside the wall and involves the water supply lines directly — a meaningfully bigger project.
Conclusion
Start by confirming which component you actually need to replace — the valve behind the wall, or the arm-mounted diverter switching flow to your handheld unit — since the two jobs aren’t close in scope. A diverter swap is a genuine same-afternoon task for most people. A valve replacement is a bigger project involving wall access, the water supply, and often permit requirements, and it’s worth an honest assessment of your own experience before committing to doing it yourself rather than hiring it out. If you’re still shopping for the right part, our best shower valves roundup and best shower diverter valves roundup cover picks for each.
✍️ About This Guide
Written by Mike Reynolds, DIY Home Improvement Writer at PlumbingToolsReview — former residential contractor helping US homeowners tackle plumbing repairs with confidence. Learn how we test →