Please note: This guide is based on our research at time of writing and covers the two most common US tub spout connection types. Fittings and hardware vary by manufacturer and by home — if anything about your specific setup doesn’t match what’s described here, or you run into a connection that looks unusual, a licensed plumber is the safer next step.
Introduction
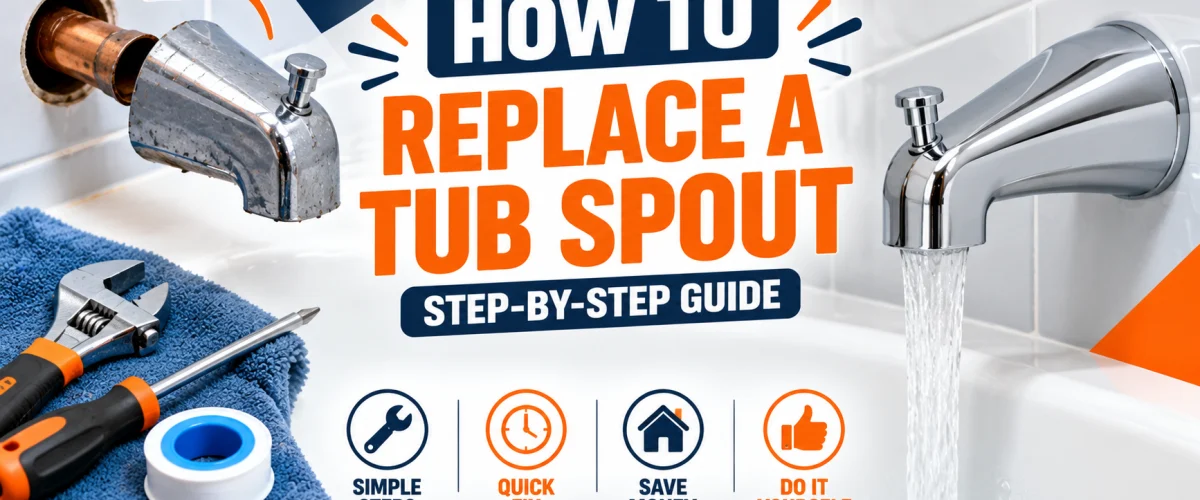
A tub spout usually gets replaced for one of a few reasons: it’s cracked or chipped, it’s leaking at the wall where it meets the plumbing, the finish is outdated and doesn’t match the rest of the bathroom anymore, or the internal diverter mechanism has failed beyond a simple repair. This guide covers replacing the spout itself, start to finish — identifying your connection type, removing the old spout without damaging the pipe stub behind it, and installing the new one correctly the first time.
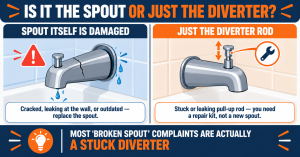
⚠️ Before you start — are you sure it’s the spout? If the spout itself looks fine but the diverter — the pull-up rod that redirects water up to the shower head — is stuck, loose, or won’t hold water up top anymore, you probably don’t need a new spout at all. That’s very often a worn internal diverter mechanism, which is a separate, smaller repair. Our
shower diverter valve roundup covers a dedicated diverter repair kit built for exactly this situation. This guide is for replacing the spout itself — cracked, leaking at its base, outdated, or a diverter mechanism that’s failed beyond what a repair kit can fix — not for a working spout with just a stuck rod.
At a Glance
| Skill Level |
Beginner — a genuine same-afternoon DIY job for most US bathtubs, with no specialty tools required. |
| Tools Needed |
An adjustable wrench or large pliers, plumber’s tape, a soft cloth or old towel, and a hex key if your spout uses a slip-fit set screw. |
| Time Needed |
Well under 30 minutes for most installs, once you know which connection type you have. |
| Critical First Step |
Identify whether your spout is slip-fit or threaded before attempting removal — the technique, and the risk of damaging the pipe stub, differs between the two. |
Identifying Your Spout Type
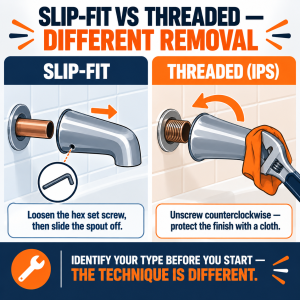
Before you touch a tool, look at what’s underneath your existing spout (or, once it’s off, at the bare pipe stub coming out of the wall). A bare, smooth copper pipe with no visible threading means slip-fit — the spout pushes directly onto it and is held in place by a small hex set screw underneath. Visible threads cut into the pipe mean threaded (IPS) — the spout screws directly onto it. The two aren’t interchangeable, and knowing which one you have determines which removal and installation steps below apply to you. If you want a deeper look at brand-matched versus universal replacement spouts once you’ve identified your type, our roundup of the best tub spouts covers specific picks for both connection types.
Removing the Old Spout
Slip-fit: Look on the underside of the spout, close to the wall, for a small hex set screw — this is what actually holds the spout onto the pipe stub, not friction alone. Loosen it a few turns with a hex key (you generally don’t need to remove it fully), then pull the spout straight off the stub. It should slide off with a firm, steady pull once the screw is loose enough; if it’s stuck, a slight twisting motion while pulling usually breaks it free without needing more force.
Threaded: Turn the spout counterclockwise to unscrew it from the pipe. Many will loosen by hand once you break the initial seal, but a stuck or old spout often needs a wrench or large pliers for that first turn. Wrap a cloth or old towel around the spout before clamping down with a metal tool — this protects the finish from scratches and gives the jaws better grip without slipping.
💡 Tip: Once the old spout is off, take a moment to inspect the pipe stub itself before moving on. It should look solid, with no visible corrosion, cracking, or looseness in the wall. A stub in good condition is what makes the rest of this job straightforward.
Preparing the New Spout
For a threaded connection, wrap plumber’s tape clockwise around the pipe threads (clockwise matters — it should tighten with the direction you’ll be turning the spout, not unwind) before threading the new spout on. Two to three wraps is typically enough to seal the connection without building up so much bulk that the spout won’t seat fully.
For a slip-fit connection, plumber’s tape isn’t used at all — the seal comes from the fit itself, not from tape on a smooth pipe. Instead, wipe down the exposed pipe stub to remove any old plumber’s putty, mineral buildup, or debris left behind from the previous spout, so the new one can slide on cleanly and seat fully against the wall.
Installing the New Spout
Threaded: Thread the new spout on clockwise by hand until it’s snug, then use a wrench with a protective cloth for a final partial turn — generally no more than a quarter to half turn past hand-tight. The goal is a spout that sits level and doesn’t wobble, not maximum tightness.
Slip-fit: Slide the new spout onto the pipe stub until it sits flush against the wall, then tighten the hex set screw underneath until the spout no longer rotates or pulls off with light hand pressure. Don’t overtighten the set screw itself — snug is sufficient, since it’s a small screw into a soft-metal fitting.
⚠️ Warning: Overtightening a threaded spout is one of the most common ways this job goes wrong — most tub spouts are cast metal or finished zinc alloy, and forcing it well past hand-tight risks cracking the spout body or stripping the threads on the stub. If it doesn’t feel snug and leak-free within a half turn past hand-tight, stop and check the plumber’s tape and threads rather than continuing to force it.
Checking for a Diverter Match
Before you consider the job finished, confirm the new spout’s diverter situation actually matches your bathroom. If your old spout had a pull-up diverter for switching water to an overhead shower head and your new one doesn’t (or vice versa), that’s worth catching now rather than after everything’s installed. A tub-only setup with no shower head doesn’t need a diverter spout at all — one fewer moving part is one less thing to eventually wear out — but a combo tub-and-shower setup does. If you’re not sure which you bought, check the packaging or product listing before assuming.
Testing for Leaks
Turn the water on and run it through the spout for a minute or two. Check three places specifically: the connection at the wall (where the spout meets the stub), the base of the spout itself, and — if it has a diverter — pull the rod up and confirm water redirects cleanly to the shower head with no dripping from the spout below. A small amount of water at the wall connection right after installation is worth watching for a few minutes rather than assuming it will stop on its own; if it doesn’t clear up, the tape or fit likely needs to be redone rather than left as is.
US Regional Context: The two connection types covered here — 1/2 inch slip-fit copper and 1/2 to 3/4 inch IPS threaded — account for the large majority of US bathtub installations regardless of region. Threaded connections show up somewhat more often in older homes built before the 1980s, particularly across the Northeast and Midwest, while slip-fit copper is more common in newer construction — though this varies enough by individual home that checking your actual connection, as covered above, is always more reliable than assuming based on your home’s age.
When to Call a Professional
Bring in a licensed plumber if the pipe stub itself is damaged, corroded, or loose in the wall once the old spout is off — forcing a new spout onto compromised plumbing usually just creates a bigger leak later. The same goes for any sign of water damage inside the wall or around the tub surround discovered during removal, such as soft drywall, staining, or a musty smell; that points to an existing leak that predates this repair and needs its own diagnosis before a new spout goes on.
✏️ Our Take
A surprising number of “my tub spout is broken” complaints turn out to be a stuck or worn diverter rod, not the spout itself — worth ruling out first, since a diverter repair kit is a smaller, cheaper fix than a full spout swap. If it genuinely is the spout, the entire job comes down to one thing: identify whether you’re slip-fit or threaded before you start, since guessing wrong is how a pipe stub gets damaged or a new spout gets cracked from overtightening. Get that one detail right and the rest is a straightforward, well-under-30-minute job.
Prices and ratings may change. Always check Amazon for current prices.
Frequently Asked Questions
Q: My tub spout is loose or won’t hold the diverter up — do I need a new spout?
Probably not. A stuck, loose, or leaking diverter rod is usually a worn internal mechanism, not a failed spout — a diverter repair kit is the more targeted fix. See our shower diverter valve roundup for a dedicated repair kit built for this exact situation before assuming you need a full replacement.
Q: How do I know if my tub spout is slip-fit or threaded?
Remove the existing spout and look at the pipe stub. A bare, smooth copper pipe means slip-fit, held on by a small hex set screw. Visible threads cut into the pipe mean threaded (IPS), which screws on directly. The two connection types aren’t interchangeable, so confirm this before buying a replacement.
Q: Do I need plumber’s tape for a slip-fit spout?
No. Plumber’s tape is only used on threaded connections, where it helps seal the threads. A slip-fit spout seals through the physical fit against the pipe stub and the set screw, so tape isn’t part of that installation.
Q: How tight should a threaded tub spout be?
Hand-tight, plus roughly a quarter to half turn with a wrench — no more. Most tub spouts are cast or finished metal, and forcing it further risks cracking the spout or stripping the threads on the pipe stub. If it’s not snug and leak-free within that range, the issue is usually the plumber’s tape or thread alignment, not insufficient tightness.
Conclusion
Replacing a tub spout is a short, genuinely beginner-friendly job once you know two things: whether your connection is slip-fit or threaded, and whether it’s actually the spout that’s the problem rather than a stuck diverter rod. Confirm the diverter isn’t the real issue first, identify your connection type, and the removal-and-install process itself takes well under half an hour. If you’re still shopping for the right replacement, our best tub spouts roundup covers picks for both connection types and brand-matched versus universal options.
✍️ About This Guide
Written by Mike Reynolds, DIY Home Improvement Writer at PlumbingToolsReview — former residential contractor helping US homeowners tackle plumbing repairs with confidence. Learn how we test →