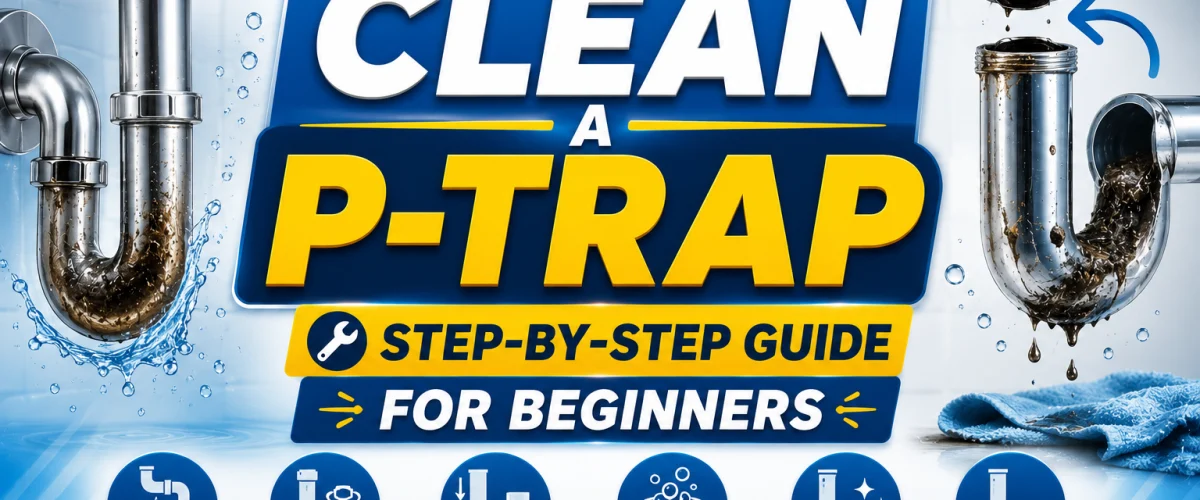
Introduction
The P-trap is the curved section of pipe underneath every sink in your home — that distinctive U-shaped bend you can see when you open the cabinet below your bathroom or kitchen sink. Its curve serves a vital purpose: it holds a small reservoir of water at all times, and that water plug physically blocks sewer gases from traveling back up through your drain and into the house. Without it, your home would smell like a sewer.
The same curve that keeps your home smelling fresh is also a trap for everything that goes down your drain. Grease, soap scum, hair, food debris, toothpaste — all of it collects in that curve over time. When enough builds up, you get a slow drain, a persistent bad smell, or eventually a complete blockage. Chemical drain unblockers struggle here because the debris sits in a physical curve that chemicals can’t always penetrate effectively. The solution is simple: remove the P-trap and clean it by hand.
The whole job takes 15 to 30 minutes, costs nothing, and clears the vast majority of sink drain problems in one go. If you’ve been dealing with a slow or blocked kitchen sink, cleaning the P-trap is the first thing to try — before reaching for chemicals or calling a plumber. If the blockage has moved deeper into the drain line, drain snakes are the next step up.
⚡ AT A GLANCE
| Difficulty |
Easy |
| Time |
15–30 Minutes |
| Cost |
Free |
| Tools Needed |
See guide below |
| Skill Level |
Beginner |
⭐ OUR TAKE
“Cleaning the P-trap is the most overlooked drain maintenance task in most homes — and the most effective. A blocked P-trap causes slow drains, bad smells and eventually complete blockages. The whole job takes under 30 minutes, costs nothing and clears the majority of drain problems that chemical unblockers cannot touch. Every homeowner should know how to do this.”
What Is a P-Trap and Why Does It Get Blocked?
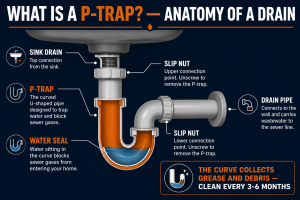
The P-trap gets its name from its shape — when viewed from the side, the curved pipe looks like the letter P (or U, depending on the orientation). Every sink in your home has one: kitchen sinks, bathroom sinks, utility sinks — all of them. It sits directly below the drain opening, connecting the sink drain pipe to the pipe that runs into the wall or floor.
The water that permanently sits inside that curve creates an airtight seal. This seal is what prevents hydrogen sulfide and other sewer gases from traveling back up through your drains and into your living space. If a P-trap dries out — from an unused sink, for example — you’ll notice a distinct sewer smell almost immediately.
The blockage problem comes from that same curve. Grease from cooking, soap residue, toothpaste, hair, and miscellaneous debris all travel down the drain and tend to stick in the curve rather than washing straight through. Over months and years, this buildup narrows the pipe opening progressively until water drains slowly, then stops altogether.
In older homes in the Northeast and Midwest built before 1970, P-traps are often made from galvanized steel rather than modern PVC — these corrode internally over time and catch grease and debris more easily. If your P-trap is steel and shows rust or pitting, replace it with a modern PVC equivalent while you have it removed. Replacement PVC P-traps are inexpensive and widely available at any hardware store.
💡 Tip: The P-trap is the first place to check for any slow or blocked drain — it catches most debris before it reaches the main drain line. Cleaning it takes 20 minutes and solves the majority of drain blockage problems instantly.
You don’t need any specialist plumbing tools to clean a P-trap. Everything listed below is either already in your home or available at any hardware store for a few dollars.
- Rubber gloves — essential; the contents of a P-trap are unpleasant
- Bucket — placed directly under the P-trap to catch water and debris
- Adjustable wrench or slip-joint pliers — for loosening the slip nuts if hand-tight
- Old toothbrush — for scrubbing the inside of the trap
- Mild dish soap — helps dissolve grease buildup
- Old cloths or paper towels — for spills and cleanup
- Flashlight — useful for inspecting the drain pipe once the trap is removed
Optional but useful: a small bottle brush for clearing stubborn blockages inside the P-trap tube, and a replacement rubber washer set in case the existing ones are worn. Washer sets cost next to nothing and are worth having on hand.
💡 Tip: Place the bucket directly under the P-trap before loosening anything — the trap will be full of water and debris, and it drains immediately once a slip nut is loosened.
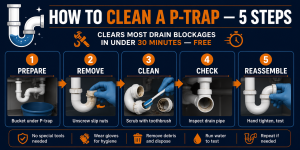
Step 1 — Prepare the Area
Before touching any pipe, take a few minutes to set up properly. Clear out everything stored under the sink — cleaning products, spare rolls, bottles — so you have clear access to the P-trap and enough room to work comfortably.
Place your bucket directly underneath the P-trap. Position it as close as possible directly below the lowest point of the curve. Have your cloths or paper towels within reach for any drips or spills around the slip nut connections.
As a precaution, turn off the water supply valves under the sink. These are the small oval handles on the pipes coming out of the wall — turn them clockwise until they stop. This prevents anyone from accidentally running the tap while you’re working. It also stops water draining down while the P-trap is removed.
💡 Tip: Take a quick photo of the P-trap connections on your phone before removing anything. It takes two seconds and gives you a clear reference for reassembly orientation — especially useful if the trap has an unusual angle.
Step 2 — Remove the P-Trap
The P-trap is held in place by two slip nuts — one at each end of the curved section. One connects to the pipe coming down from the sink drain (the tailpiece), and the other connects to the drain pipe going into the wall. Both slip nuts are designed to be hand-tightened, so you should be able to loosen them without tools in most cases.
Start with the slip nut closest to the wall pipe. Turn it counterclockwise. Try by hand first — a firm grip and steady pressure should be enough if it was last assembled by hand. If it won’t budge, use your slip-joint pliers or adjustable wrench. Grip the nut itself (not the pipe), apply steady counterclockwise pressure, and it will release.
Once both slip nuts are loose, hold the P-trap with one hand and lower it carefully into the bucket. Water and debris will pour out as soon as the trap drops below the pipe openings — this is completely normal. The bucket catches everything.
⚠️ Warning: Never use excessive force on PVC slip nuts — they crack easily under over-torqued pressure. Hand tight plus a quarter turn with pliers is all that’s needed. If a nut feels stuck, try warming the area gently or using penetrating oil rather than forcing it.
Step 3 — Clean the P-Trap
Empty the contents of the P-trap into your bucket. What comes out — grease, hair, soap residue, general debris — is the reason your drain was slow. Take the emptied trap to a second sink or outside, and rinse it under running water to flush out the loose material.
Apply a squirt of mild dish soap inside the trap and scrub the interior thoroughly with your old toothbrush. Work the bristles all the way around the inside of the curve, paying particular attention to any visible buildup on the walls of the pipe. If you have a bottle brush, use it to reach the straight sections of the trap that the toothbrush can’t fully get to.
Rinse again until the water runs clear and the trap looks clean inside. Hold it up to the light to check — you should be able to see through it clearly from one end to the other. If any stubborn blockage remains, soak the trap in warm soapy water for a few minutes before scrubbing again.
While the trap is out, inspect the rubber washers inside each slip nut. These are the ring-shaped gaskets that create the watertight seal when the nuts are tightened. If they look cracked, flattened, or deformed, replace them before reassembling — a worn washer is a guaranteed slow leak.
💡 Tip: Worn rubber washers cause drips and slow leaks at the slip nut connections after reassembly. Replacement washer sets are inexpensive and worth replacing every few years as standard maintenance while the trap is already out.
Step 4 — Check the Drain Pipe
With the P-trap removed, you now have direct access to the drain pipe that runs into the wall. This is an opportunity you rarely get, so use it. Shine your flashlight directly into the open drain pipe and look inside.
In many cases, especially on kitchen sinks, you’ll be able to see grease and debris buildup on the walls of the pipe, or even a partial blockage further in. If you can reach any visible debris by hand (with your gloves on), remove it now. Even clearing a partial buildup will improve drain flow significantly.
If you can see a blockage sitting further back in the pipe that you can’t reach by hand, this is the perfect moment to run a drain snake into the line. With the P-trap removed, the snake has a straight, unobstructed path into the drain — far more effective than trying to snake through the trap from above.
Also check the tailpiece — the vertical pipe coming down from the sink drain opening. Run a cloth around its interior to clear any buildup at the joint where it meets the trap.
💡 Tip: With the P-trap removed you have direct, unobstructed access to the drain line — the perfect time to run a drain snake if needed. You won’t get this clear a shot at the line any other way without calling a plumber.
Step 5 — Reassemble and Test
With the P-trap clean and inspected, reassembly is straightforward — the reverse of removal. Make sure the rubber washers are seated correctly inside each slip nut before you start. The washer should sit flat against the inside face of the nut, not tilted or folded.
Slide the slip nuts back onto the P-trap ends first, then position the trap so it aligns with both pipe openings — the tailpiece above and the wall drain pipe on the side. Refer to your phone photo if you’re unsure of the angle. Thread each slip nut onto its pipe by hand, turning clockwise.
Hand-tighten both slip nuts until they’re snug, then give each one a firm quarter turn with your pliers. Don’t over-tighten — the washer creates the seal, not brute force, and over-tightening cracks PVC nuts and deforms washers.
Turn the water supply valves back on and run the cold tap at a moderate flow for around 60 seconds. While the water runs, crouch down and watch both slip nut connections carefully. Look for any drips or beading of water at the joints. A slow drip that appears after 30–60 seconds is a sign of a washer that isn’t seating correctly or a nut that needs a little more tightening. Address it now, before putting everything back under the sink.
Once satisfied there are no leaks, run the tap at full flow for another minute. Water should drain quickly and freely — no gurgling, no slow drain, no odor. If you’ve cleared the P-trap but still have slow drainage, the blockage has moved deeper into the main drain line, and drain unblockers or a drain snake are the next tools to reach for.
⚠️ Warning: Watch both slip nut connections for at least 60 seconds after turning the water back on. Slow drips from these joints may not appear immediately. Never put items back under the sink until you’ve confirmed there are no leaks at the reconnection points.
How Often Should You Clean a P-Trap?
How often you need to clean a P-trap depends on the sink and how heavily it’s used. As a general guide:
- Kitchen sink: every 3–6 months — cooking grease and food debris build up fast
- Bathroom sink: every 6–12 months — hair and soap scum accumulate more slowly
- Utility/laundry sink: every 6–12 months depending on use
Don’t wait for a complete blockage to clean the P-trap. The warning signs of a trap that’s building up and needs attention are:
- Water draining noticeably more slowly than usual
- A persistent smell from the drain even after cleaning the sink surface
- Gurgling sounds from the drain as water clears
- Water pooling slightly in the basin before draining
Any of these signs means the trap is partially blocked and cleaning it now will take 20 minutes rather than the 30–40 minutes a full blockage requires.
💡 Tip: A monthly flush of baking soda followed by white vinegar — left for 15 minutes then rinsed with hot water — helps dissolve light grease buildup between full cleans and keeps P-traps cleaner for longer.
Need a Professional Plumber?
If cleaning the P-trap doesn’t solve the problem, the blockage is deeper in your drain line and may need professional attention. Search PlumberArchive.com — the US plumber directory with 12,151+ verified plumbers across all 50 states.
Find a trusted plumber near you →
Frequently Asked Questions
Q: How do I know if my P-trap is blocked?
The clearest signs are a sink that drains noticeably more slowly than it used to, a persistent unpleasant smell coming from the drain that doesn’t go away after cleaning the basin, a gurgling sound as water drains, or water that pools in the sink before slowly clearing. Any of these points to debris buildup in the P-trap. A fully blocked trap will cause the sink to drain extremely slowly or stop draining entirely.
Q: Can I clean a P-trap without removing it?
You can try a baking soda and vinegar flush, or use a drain snake through the drain opening — but neither method cleans the trap as effectively as removing it. The curve of the P-trap collects compacted debris that flushing from above can’t reach. Removing and manually cleaning the trap is the only way to guarantee it’s completely clear. It takes less than 30 minutes and requires no specialist tools, so removal is always the recommended approach.
Q: What causes a P-trap to smell?
Two things cause P-trap smells. The most common is debris buildup — accumulated grease, hair, and soap scum decomposing inside the trap creates a sulfur-like odor. The second cause is a dry trap: if a sink hasn’t been used for an extended period, the water seal inside the P-trap evaporates, allowing sewer gases to travel up through the drain. Running the tap for 30 seconds refills a dry trap immediately. If the smell persists after running water, cleaning the trap by hand is the next step — and if it’s not the P-trap at all, our smelly drain fix guide covers the other common causes.
Q: How long does a P-trap last?
Modern PVC P-traps last for decades under normal household use — 20 to 30 years or more is typical. The main failure modes are physical damage (cracks from impact or over-tightened slip nuts) and worn rubber washers at the connections, which can be replaced without changing the whole trap. Older galvanized steel P-traps corrode internally over time and have a shorter lifespan — if yours is steel and showing rust or pinhole leaks, replacement with a PVC trap is the right move.
Conclusion
Cleaning a P-trap is one of the simplest and most effective drain maintenance tasks a homeowner can do. Done twice a year on a kitchen sink and once a year on bathroom sinks, it prevents the majority of drain blockages entirely — without chemicals, without a plumber, and without any specialist tools.
The key takeaways: always have a bucket in position before loosening any slip nut, hand-tighten slip nuts and use no more than a quarter turn with pliers, and always check for leaks for at least 60 seconds after reassembly before putting the cabinet back together.
If your P-trap is galvanized steel and showing signs of corrosion, use this as the opportunity to replace it with a modern PVC trap — the parts are inexpensive and the replacement process is identical to what you’ve just done. Our roundup of the best P-trap kits covers rigid and flexible options for both kitchen and bathroom sinks.
If cleaning the P-trap doesn’t fully resolve a slow drain, the blockage has moved deeper into the drain line. Your next tools are drain snakes for physical blockages, or see our guide to unclogging a kitchen sink for a full step-by-step approach to stubborn drain problems.
✍️ About This Guide
PTR Editorial Team — Plumbing Guides. We compare manufacturer specifications, installation requirements, compatibility and available product documentation to help homeowners choose suitable tools and parts. How we review →