Please note: This guide is for general reference and covers water supply piping only. Always follow the instructions from your tubing and fitting maker and your local plumbing code.
Introduction
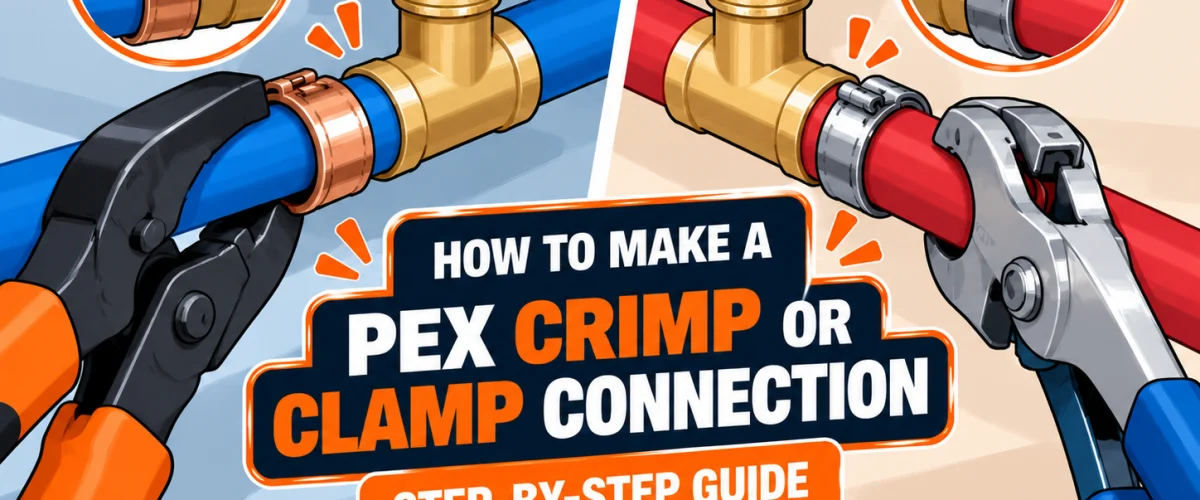
PEX is flexible plastic tubing for hot and cold water supply. Two common ways to join it to a fitting are a copper crimp ring and a stainless steel cinch clamp. Both squeeze a ring around the tubing on a barbed fitting, and both are covered here. This guide doesn’t cover expansion fittings or push-to-connect fittings; our push-to-connect vs. crimp comparison explains how crimping works against those, and our PEX crimp tools review helps you choose a tool. For tubing types and cost, see PEX-A vs. PEX-B and PEX vs. copper.
SharkBite and Zurn state that PEX tubing is for water only. It is not for gas lines.
At a Glance
| Difficulty |
Moderate |
| Time |
About 1 hour for a first repair |
| Cost |
$–$$ for the tool and gauge; $ for fittings and rings |
| Tools Needed |
PEX tubing cutter, crimp or clamp tool matched to your system, go/no-go gauge for ring systems, fittings and rings or clamps from your tubing maker’s system, tape measure and marker, and a scrap length of tubing to practice on |
| Skill Level |
Intermediate |
✏️ Our Take
A PEX joint takes minutes to make and is unforgiving if it’s wrong. Three things decide it: a square cut, a ring or clamp placed within your maker’s stated distance, and checking the joint the way your system’s maker says to, which differs between copper rings and stainless clamps.
- PEX tubing cutter
- Crimp or clamp tool that matches your rings or clamps and their size
- Go/no-go gauge, for copper ring systems
- Tubing, fittings and rings or clamps from one compatible system
- Tape measure and marker
- A scrap length of tubing to practice on first
Before You Start: Match the System
Use fittings, rings or clamps and a tool that belong to the same system as your tubing, and follow your tubing maker’s instructions. The manufacturers we read are clear on this: Apollo’s pinch tools are not for Zurn’s proprietary QickClamp, SharkBite says to use only fittings approved for its PEX connection system, and Zurn defers to the tubing maker’s instructions. Zurn also warns against using hose clamps on PEX.
Check the markings on the tubing, since the IPC requires PEX to be factory-marked with the standards of the fittings its maker specifies. If you’re unsure which fittings your tubing is listed for, ask the tubing maker before you buy.
What the Standards Cover
ASTM’s own page describes F1807 as covering fittings for PEX tubing and PE-RT that use a copper crimp ring or alternate stainless steel clamps, in sizes from 3/8 to 2 inches, for hot and cold water at 100 psi and up to 180 degrees Fahrenheit. ASTM describes F2098 as covering stainless steel clamps, an alternative to the copper rings in F1807. Both ASTM pages we read are marked as historical, so check which edition your fitting maker lists. The 2021 IPC lists both F1807 and F2098 in Table 605.5, so neither is the only option. Local codes can differ, so check yours.
Copper Ring or Stainless Clamp: What Differs
The two systems follow the same basic sequence, but the details in the manufacturers’ sheets are not identical.
- Distance from the cut end: rings go 1/8 to 1/4 inch from the end (SharkBite, Apollo, Zurn), and Sioux Chief specifies 3/16 inch plus or minus 1/16 inch. Clamps go 1/8 to 1/4 inch (SharkBite, Zurn), and Apollo specifies 1/8 inch.
- Tool: ring tools close over the ring, and Zurn says to hold its large tool at 90 degrees to the fitting. Clamp tools go over the raised tabs, and SharkBite and Zurn say they won’t release until the clamp is fully made. Apollo’s tools ratchet until they release on their own or, on one model, until a light comes on.
- Checking the joint: rings are checked with a go/no-go gauge (SharkBite, Apollo and Sioux Chief say every ring; Zurn recommends it). For clamps it varies: SharkBite gauges the tool rather than each clamp, Zurn has no gauge step, and Apollo says to inspect and pressure test.
- A failed joint: Zurn, Sioux Chief and SharkBite say to remove a bad ring, and Apollo’s two sheets differ, one saying to adjust the tool and re-crimp and the other saying to remove the ring, adjust and repeat.
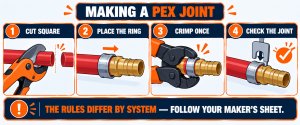
Whichever system you use, your tubing maker’s sheet is the one that counts.
Step-by-Step Installation
Step 1: Shut Off the Water and Drain the Line
Turn off the water supply to the section you’re working on and open a faucet at the lowest point to drain it.
Step 2: Cut the Tubing Square
Cut the end square with a cutter made for PEX. SharkBite calls for a clean, straight, square cut, Zurn for a square, burr-free cut, Apollo says to remove burrs, and Sioux Chief says to cut at 90 degrees without crushing the tube. A crooked or crushed end is a common cause of a joint that leaks.
Step 3: Slide On the Ring or Clamp, Then Insert the Fitting
Slide the ring or clamp over the tubing first, then push the barbed fitting into the tubing all the way to its shoulder. SharkBite and Zurn say to insert it up to the shoulder, Apollo says until it stops, and Sioux Chief says fully. ASTM’s description of F2098 outlines the same order for clamps: clamp on first, then the fitting to the shoulder or tube stop.
Step 4: Position the Ring or Clamp
Place the ring over the barbs about 1/8 to 1/4 inch from the cut end of the tubing. SharkBite, Apollo and Zurn all give that range, and Sioux Chief specifies 3/16 inch plus or minus 1/16 inch, which works out to the same window. Mark the distance and measure it rather than guessing. For stainless clamps, SharkBite and Zurn give the same 1/8 to 1/4 inch, while Apollo specifies 1/8 inch, so check your maker’s sheet.
Step 5: Make the Joint
Make a practice joint on scrap tubing first. SharkBite’s tool guide says to check the tool’s calibration daily and to test at least the first and last crimps of the day with the gauge, and a scrap joint is a low-cost way to catch a tool that is out of adjustment or the wrong size for the ring.
For a copper ring, center the tool jaws around the ring and keep the tool square to the fitting (Zurn gives 90 degrees for its large tool), and confirm the ring hasn’t moved before you compress it, as SharkBite does. Compress it once. Sioux Chief warns that a ring compressed more than once can develop a leak path.
For a stainless clamp, put the tool over the clamp’s raised tabs and squeeze. SharkBite and Zurn say their tools won’t release until the clamp is fully made, and Apollo’s tools ratchet until they release on their own or, on one model, until a light comes on.
Step 6: Verify the Joint
How you check depends on the system:
- Copper rings: use the go/no-go gauge on every ring. SharkBite, Apollo and Sioux Chief say to check every ring or all joints, and Zurn recommends checking every crimp. Zurn also gives crimped ring diameter limits of 0.700 to 0.715 inch for 1/2 inch tubing and 0.945 to 0.960 inch for 3/4 inch.
- Stainless clamps: the check differs. SharkBite uses the gauge to check the tool before the first clamp and after the last one on each job site, plus a visual check of the tab. Zurn’s instructions have no gauge step, and Apollo says to inspect and pressure test. Follow your maker’s method, not the ring routine.
Step 7: Deal With a Failed Joint
If a ring fails the gauge or looks wrong, Zurn says to cut the joint out and not to re-crimp it, Sioux Chief says to cut or remove it and use a new ring, and SharkBite says the ring must be removed. Apollo’s two sheets differ: one says to adjust the tool and re-crimp, and the other says to remove the ring, adjust and repeat. Removing the bad ring and starting over is the safer course, and it’s what Zurn, Sioux Chief and SharkBite instruct.
Step 8: Support the Tubing
The 2021 IPC (Table 308.5) calls for PEX of 1 inch and smaller to be supported every 32 inches horizontally and every 10 feet vertically, with a midway guide, and it requires piping to be installed to prevent stresses beyond the pipe’s strength (Section 305.2). SharkBite specifies 32 inches for both directions, and Zurn says to support vertical runs at each floor. Where a maker is stricter than the code, follow the maker.
Step 9: Protect It From Sun, Heat, Framing and Cold
- Sunlight: keep tubing out of the sun. SharkBite says to avoid any UV exposure, and Zurn says to avoid direct exposure and use an opaque cover.
- Heat: SharkBite says to keep PEX 12 inches vertically and 6 inches horizontally from high-heat sources such as recessed lights, gas flue vents and heating appliances, and Zurn says 6 inches from a gas exhaust vent.
- Bends: manufacturers publish different minimum bend radii. For 1/2 inch tubing SharkBite gives 5 inches and Zurn gives 3.75 inches, and for 3/4 inch they give 7 and 5.25 inches. Zurn says to triple its figure when bending against the coil. Use your tubing maker’s figure and a bend support rather than forcing a tight bend.
- Framing: the IPC (Section 305.6) requires shield plates where piping is less than 1-1/4 inches from the edge of the framing member.
- Freezing: the IPC (Section 305.4) requires protection from freezing for piping outside buildings, in attics or crawl spaces, in outside walls or anywhere else subject to freezing. Our guide to preventing frozen pipes covers how.
Step 10: Pressure Test
Turn the water back on slowly and check every joint. The IPC (Section 312.5) calls for a water test at working pressure held for at least 15 minutes, and it allows an air test only for non-plastic piping. Zurn allows air testing, so confirm the method with your local inspector. A leak at a joint means cutting it out and remaking it, not tightening something.
Troubleshooting
A joint leaks at the barb. The usual causes follow the steps above: the tubing end wasn’t cut square (Step 2), the fitting wasn’t pushed all the way to its shoulder (Step 3), the ring or clamp was outside your maker’s stated distance (Step 4), or the parts don’t belong to the same system (Before You Start). Cut the joint out and remake it with a new fitting and ring or clamp.
A ring won’t pass the gauge. The ring may be off position, the tool may be the wrong size or out of adjustment, or the tubing may not be fully seated on the fitting. Cut off the joint and redo it with a new ring.
A joint weeps after the water is on. Don’t try to compress it again, since Sioux Chief warns that repeated compression can leave a leak path. Cut it out and remake it.
The tool won’t close or release. Check that the tool matches the ring or clamp size and the system, and that its calibration is current. SharkBite’s tool guide says to check calibration daily.
The tubing kinks at a bend. Re-route it using your tubing maker’s minimum bend radius and a bend support, since makers publish different figures by size.
The tubing has been in the sun. SharkBite says to avoid any UV exposure and Zurn says to avoid direct exposure, so cover or replace exposed sections according to your tubing maker’s guidance.
When to Call a Licensed Plumber
- You’re connecting to the water service, the meter or a water heater, especially one with a gas vent or a tankless unit
- You’re replacing metal pipe that may be carrying the electrical grounding path. Zurn says PEX must not be used for grounding and to follow the NEC, so call an electrician first
- You’re joining to polybutylene or working on a system that has frozen
- The work is behind a wall and needs a permit or inspection
Never use PEX for gas lines.
Frequently Asked Questions
Q: Can I use hose clamps on PEX?
No. Zurn warns against it. Use the rings or clamps made for your system.
Q: Do I need a gauge for every joint?
For copper rings, the makers we read say to check every ring. For stainless clamps the check is different, so follow your maker’s method.
Q: How far from the end of the tube should the ring go?
SharkBite, Apollo and Zurn give 1/8 to 1/4 inch for rings, and Sioux Chief specifies 3/16 inch plus or minus 1/16 inch. For clamps, SharkBite and Zurn give 1/8 to 1/4 inch and Apollo gives 1/8 inch.
Q: Can I re-crimp a ring?
Zurn says not to re-crimp and to cut the joint out, Sioux Chief says to cut or remove it and use a new ring, and SharkBite says the ring must be removed. Apollo’s two sheets differ, one saying to adjust the tool and re-crimp and the other saying to remove the ring and repeat. Sioux Chief also warns that a ring compressed more than once can leak, so removing the bad ring and starting over is the safer course.
Q: Do codes require copper rings?
Not according to the 2021 IPC, whose Table 605.5 lists both F1807 and F2098. Check your local code, since adoption varies.
Q: Can I mix brands?
Only if your tubing maker says the parts are compatible. SharkBite says to use only fittings approved for its PEX connection system, and Apollo’s pinch tools are not for Zurn’s QickClamp.
Q: Can I leave PEX outdoors?
Keep it out of direct sunlight. SharkBite says to avoid any UV, and Zurn says to use an opaque cover. See Step 9.
Q: Can I use PEX for gas?
No. SharkBite and Zurn state that PEX tubing is for water only.
Conclusion
A good PEX joint comes from a square cut, a ring or clamp in the right position, and a check that matches your system. Where the manufacturers differ, follow the maker of your own tubing and fittings, and bring in a licensed plumber for anything involving the water service, a heater, grounding or permits. To choose a tool, see our PEX crimp tools review, and to tell what pipe you have, see how to identify your pipe material.
✍️ About This Guide
Written by Mike Reynolds, DIY Home Improvement Writer at PlumbingToolsReview — former residential contractor helping US homeowners tackle plumbing repairs with confidence. Learn how we test →