Please note: Information in this comparison is based on our research at time of writing and is subject to change. If you’re planning a large-scale or behind-the-wall installation, check your local plumbing code or consult a licensed plumber before choosing a connection method.
Introduction
Once you’ve decided to work with PEX pipe, the next decision is how to actually join it. Push-to-connect and crimp (or clamp) fittings are the two most common approaches, and they solve the same basic problem — a watertight, secure connection between pipe and fitting — in genuinely different ways, with different tools, different costs, and different tradeoffs depending on how big your project actually is.
This comparison covers the practical differences in cost, tooling, and reliability for a homeowner deciding between the two in 2026. If you’ve already settled on push-to-connect, our Best Push-to-Connect Fittings review covers current options, and if you’re leaning toward crimp connections, our Best PEX Crimp Tools review compares the tools you’d need to buy.
✏️ Our Take
Both methods can make a reliable, permanent connection on PEX pipe when the fitting is approved for your tubing and installed as its maker directs — the real difference is mainly in tooling, per-fitting cost and how each performs in specific situations. Push-to-connect fittings need no crimping or clamping tool, which can make them the faster choice for a single repair or an occasional DIYer, though they still need a square, clean pipe cut and a check of the insertion depth. Crimp and clamp fittings require a dedicated tool and gauge (a real upfront cost), but once you own them, each individual fitting is typically cheaper. Which suits your project depends on the fitting system your tubing’s maker approves, the tools you would need to buy and the actual prices where you shop.
How Push-to-Connect Fittings Work
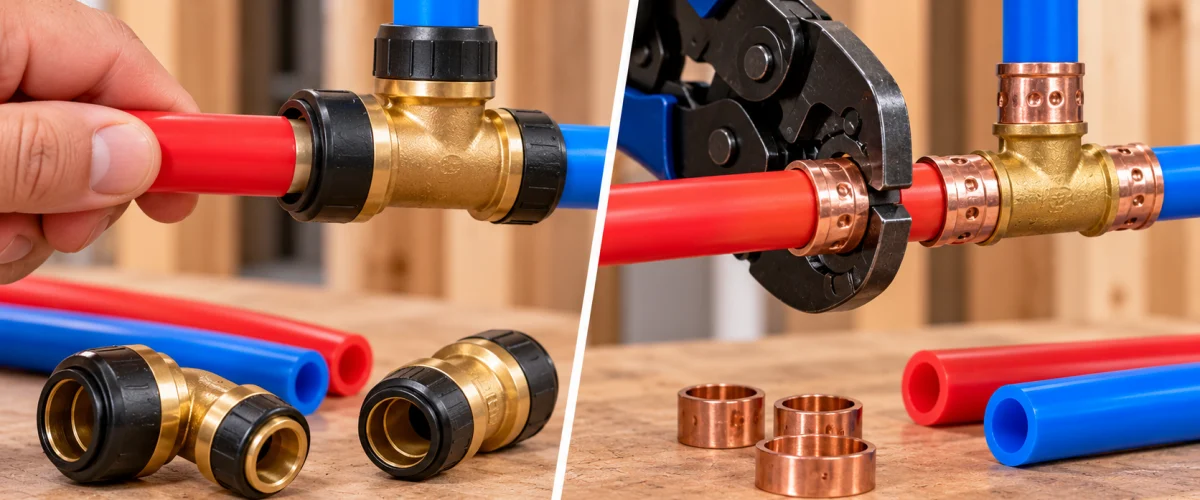
Push-to-connect fittings work exactly the way the name suggests: you insert the pipe directly into the fitting body, and an internal O-ring and grab ring do the rest. The O-ring compresses against the outside of the pipe to create a watertight seal, while the grab ring’s small stainless steel teeth bite into the pipe surface to hold it firmly in place under water pressure. No crimping, clamping, or heat is required at any point.
The appeal is obvious the first time you use one. Installation is simple in principle, but it has steps: cut the pipe square and clean, make sure the end is round and free of scratches, mark the insertion depth, push the pipe in until it reaches the tube stop, and check the mark. For its Max fittings, SharkBite’s installation guide has you mark the depth with its depth deburr gauge (sold separately) and then check that the mark is within 0.005 in. (0.13 mm) of the end of the release collar; other brands’ instructions differ, so follow the ones for your fitting. There’s no crimping or clamping tool to buy, but a good pipe cutter is needed. That simplicity is exactly why push-to-connect fittings have become a go-to for quick repairs, tight spaces, and situations where a dedicated crimping tool simply isn’t practical to bring along.
Push-to-connect fittings can be released with a disconnect clip or tongs, which crimp connections cannot. SharkBite treats that as a way to correct an installation, not as routine re-use: its Max guide says Max fittings are intended to be permanent connections and are not designed for repeated connection and disconnection, and that a removed fitting must be inspected, the pipe must be clean and free of marks (or cut back), the depth marked again and the joint pressure tested.
💡 Tip: Always push the pipe in fully until it bottoms out against the internal stop — an incompletely seated push-to-connect fitting can leak, which is why the maker has you mark the insertion depth and check it.
How Crimp Fittings Work
Crimp-style PEX fittings take a more mechanical approach. A barbed fitting is inserted into the tubing and held by a ring or band placed over the tube: either a copper crimp ring or a stainless-steel clamp band. The two are installed with different tools and verified in different ways, so follow the instructions for the one your fittings use.
Copper-ring crimp. A copper crimp ring (ASTM F1807 fittings) is slid over the tube, the fitting is inserted until its shoulder meets the tube end, the ring is positioned about 1/8 to 1/4 inch from the cut end, and a crimping tool sized to your pipe compresses it. SharkBite’s crimp tool guide says to check all crimps with the go/no-go gauge: the “GO” opening should fit over the crimped ring and the “NO-GO” should not. An over- or under-crimped ring must be removed and the connection remade with a new copper ring, and the tool’s calibration should be checked daily (at least the first and last crimps of the day).
Stainless-steel clamp. A stainless-steel clamp band (ASTM F2098) is slid over the tube, the fitting is inserted until its shoulder meets the tube end, the band is positioned about 1/8 to 1/4 inch from the cut end, and a clamp tool closes it over the clamp’s raised tab. SharkBite’s PEX guide says a properly calibrated clamp tool eliminates the need to check each ring with a go/no-go gauge; instead the tool is checked with its calibration gauge before you begin and after the last clamp, and each connection is verified by visually checking the clamp tab. SharkBite says the previously clamped section of pipe should be cut off before a new connection is made.
The tradeoff is permanence. Once a copper ring is crimped or a clamp is closed, the joint isn’t designed to be taken apart — there’s no clip or release mechanism the way there is with push-to-connect. If you need to rework a crimped or clamped joint, the usual approach is cutting the pipe below the fitting and starting over with a fresh section of pipe and a new ring or clamp.
💡 Tip: For copper-ring crimps, check every crimp with the go/no-go gauge, not just visually, as SharkBite’s crimp tool guide directs. For stainless-steel clamps, follow the clamp maker’s verification steps instead: check the tool’s calibration with its gauge and confirm each connection by looking at the clamp tab.
Push-to-connect needs no crimping or clamping tool, but you still need a cutter that leaves a square, burr-free end (SharkBite’s Max guide names rotary cutters for copper and shears for plastic pipe) and a way to mark the insertion depth. A disconnect clip is only needed if you expect to remove a fitting later, for example to correct a mistake. For someone with no existing plumbing tools, this is about as low-friction as a repair method gets.
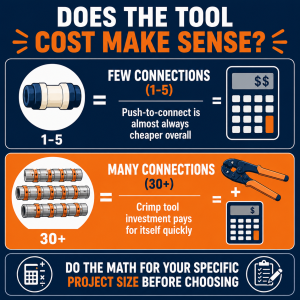
Crimp and clamp connections ask for more upfront. A crimp or clamp tool sized correctly for your PEX diameter, plus the gauge your fittings call for (a go/no-go gauge for copper rings, a calibration gauge for clamp tools), represents a genuine cost before you’ve installed a single fitting. Crimping tools range fairly widely in price depending on build quality and whether they’re designed for occasional homeowner use or daily professional use, and our Best PEX Crimp Tools review compares current options across that range.
That upfront cost isn’t wasted money if you’ll use the tool again, but it’s worth being honest about how often that actually happens. A crimping tool that sits in a drawer after one project can be a worse value than the higher per-fitting cost of push-to-connect would have been for that same single job, depending on actual prices.
💡 Tip: If you’re only doing one or two repairs, compare the cost of a crimp or clamp tool and gauge with the extra per-fitting cost of push-to-connect fittings approved for your tubing; for occasional work, avoiding the tool purchase may come out cheaper.
Per-Fitting Cost at Scale
Individual push-to-connect fittings typically cost more per piece than crimp fittings and rings, though the difference varies by brand, size and retailer, so compare current prices.
Crimp and clamp fittings can reverse that equation once you already own the tool. Fittings and crimp rings are typically cheaper per piece, and that difference adds up on projects with many connections. On a whole-house repipe with dozens of joints, the per-fitting savings can outweigh the tool purchase; compare current prices for your own connection count.
💡 Tip: Do the math for your specific project: count your connections, price the approved fittings for each method at current prices, and add the cost of any tool you would need to buy.
Connection Strength and Reliability
Both methods, correctly installed with fittings listed for your tubing, are accepted for residential plumbing in many places, and your local code decides what is allowed. PPI says each fitting standard requires leak-free performance (it lists ASSE 1061 for push-fit and ASTM F1807 for crimp), and the working pressure is limited by the pipe and by the fitting’s own rating: SharkBite’s Max guide, for example, defers to the pipe’s rating when its fittings are used on PEX. Both methods are widely used in new installations and repairs.
For joints that will be buried or concealed, follow the fitting maker’s limits. SharkBite’s Max guide, for example, says Max fittings are suitable for burial in most applications subject to local plumbing code, calls for its silicone tape on buried fittings, and says not to place joints within a concrete slab.
Some makers list push-to-connect fittings for permanent installations, not just quick DIY fixes; SharkBite describes its Max fittings as intended to be permanent connections.
⚠️ Warning: With either method, reliability depends heavily on correct installation. An improperly seated push-to-connect fitting or an under-crimped ring can both leak, whichever method you choose.
Ease of Use for a First-Timer
Push-to-connect is often the easier method for someone who has never made a PEX connection before, because there is no crimp or clamp tool to learn. There’s no crimp tool technique to learn, no calibration to worry about and no ring to over- or under-compress, but a joint can still fail if the pipe is cut crooked, scratched or not fully inserted.
Copper-ring crimps have a real, if modest, learning curve. Correct tool positioning matters — follow your tool’s instructions for placing it over the ring — and checking every crimp with the go/no-go gauge afterward adds a couple of extra steps per connection that a first-timer needs to internalize before the process feels routine. Stainless-steel clamps swap the per-ring gauge check for a tool-calibration check and a visual check of the clamp tab.
Crimp, clamp and cold-expansion connections are all widely used by professionals on new construction and repiping (PPI lists each as a common PEX fitting system); we don’t have survey data on which is most common, and the lower per-fitting cost of crimp and clamp is one reason many installers choose them. Push-to-connect fittings are popular for repairs and renovations because they need no crimping or clamping tool. Some local plumbing codes have specific requirements or restrictions on which connection methods are approved for certain applications — check your local code or consult a licensed plumber before a large-scale project that will be behind walls or otherwise not easily inspectable later.
💡 Tip: If this is your very first PEX repair and you’re not planning further plumbing work after this project, push-to-connect fittings approved for your tubing avoid having to learn a crimp or clamp tool, though you still need a square, clean cut and a check of the insertion depth.
Which Should You Choose?
The table below lists the factors covered above and which method is usually associated with each, assuming fittings approved for your tubing; it is not a project-wide verdict.
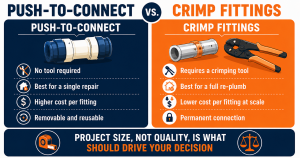
| Factor |
Usually |
| No crimping tool required |
PUSH-TO-CONNECT |
| Typically lower cost per fitting (crimp or clamp) |
CRIMP |
| Often easier for a first-time DIYer |
PUSH-TO-CONNECT |
| Can be released to correct an install |
PUSH-TO-CONNECT |
Choose Push-to-Connect If:
- You have a small number of connections and push-to-connect fittings approved for your tubing are available at a price that works for you
- You’d rather not buy a crimp or clamp tool and are prepared to cut the pipe square and clean and check the insertion depth
Our Best Push-to-Connect Fittings review compares current options if this fits your project.
Choose Crimp or Clamp If:
- You have many connections and, at current prices, the lower per-fitting cost outweighs the cost of the tool and gauge you would need
- Your tubing’s maker lists crimp or clamp fittings for it, and you’re comfortable following the verification steps (go/no-go gauge for copper rings; calibration check and clamp-tab check for stainless-steel clamps)
Frequently Asked Questions
Q: Are push-to-connect fittings as reliable as crimp fittings?
For most residential applications, both can give a leak-free joint when the fitting is listed for your tubing and installed as its maker directs. For concealed or buried joints, follow the fitting maker’s limits and your local code.
Q: Do I need special training to use a crimping tool correctly?
No formal training is required, but there is a real learning curve worth taking seriously. Correct tool positioning, even pressure, and checking every completed copper-ring crimp with a go/no-go gauge (or, for stainless-steel clamps, checking tool calibration and the clamp tab) are all things a first-timer should practice on scrap pipe before working on an actual installation. Manufacturer instructions for your specific crimping tool are worth reading closely, since technique can vary slightly between tool designs.
Q: Can I mix push-to-connect and crimp fittings on the same PEX system?
Often, yes. It’s common to see both used within the same home — crimp connections behind walls from the original installation, with push-to-connect fittings added later for an accessible repair or modification. As long as each fitting system is approved for your tubing (check the tubing’s markings and the manufacturer’s instructions), there’s no compatibility issue at the pipe level; each fitting simply needs to be installed correctly for its own method.
Q: Which method do professional plumbers usually prefer?
Professionals use crimp, clamp, cold-expansion and push-to-connect connections. Many use crimp or clamp for large jobs, and push-to-connect for repairs, tight spaces and situations where speed matters; we found no survey showing which is more common.
Conclusion
Both methods can make a reliable connection when the fitting is approved for your tubing and installed as its maker directs — the decision comes down to which fittings your tubing’s maker approves, the tools you would need to buy and the actual prices for your project. Neither is inherently a compromise when used as directed.
Push-to-connect fittings avoid buying a crimp or clamp tool and need little technique beyond a clean square cut and a depth check, which can suit a small job; crimp and clamp fittings are typically cheaper per piece, which can matter on a job with many connections once the tool cost is counted. Price the approved fittings for each method before you decide.
If you haven’t already confirmed what’s actually running through your walls, our How to Identify Your Pipe Material guide is worth checking first. From there, our Best Push-to-Connect Fittings review and Best PEX Crimp Tools review cover current options for whichever method fits your project. If a third connection type — compression fittings — is also on your shortlist, our compression fitting vs push-to-connect comparison covers that matchup too.
✍️ About This Comparison
PTR Editorial Team — Product Comparisons. We compare manufacturer specifications, installation requirements, compatibility and available product documentation to help homeowners choose suitable tools and parts. How we review →