Comparisons
2 Oct 2026

Pop-Up Drain vs Grid Drain: Which Should You Choose?
Pop-up drains seal to hold water; grid drains never close but resist clogs better and cost less. Here's how to choose between them for your bathroom sink.
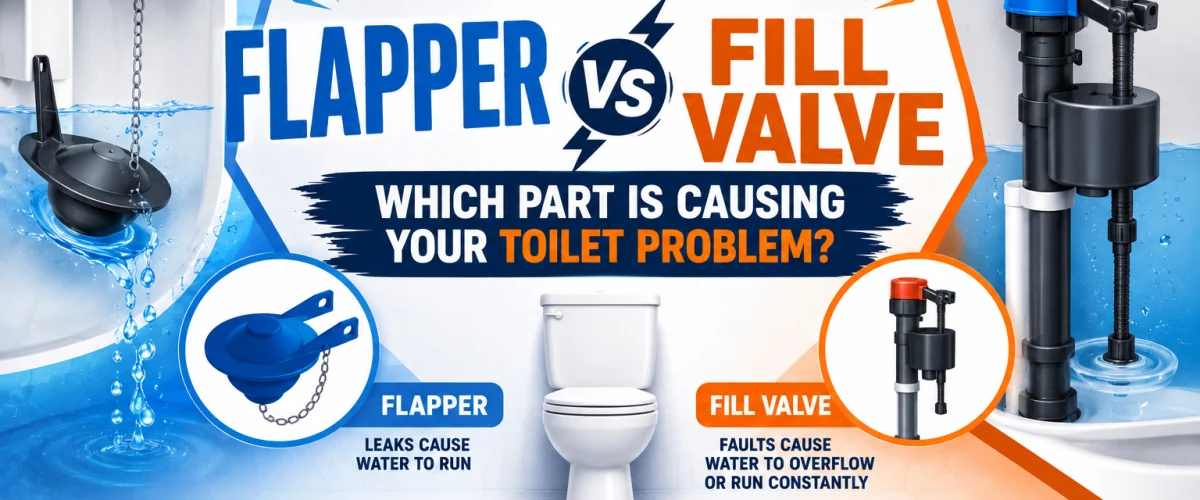
Toilet flapper vs fill valve — learn how to tell which part is causing your running toilet before you buy the wrong replacement.
Please note: Information in this guide is based on our research at time of writing and is subject to change. Always consult a licensed plumber for diagnosis of serious plumbing issues before attempting repairs.
Both a toilet flapper and a fill valve live inside the same tank, and both can be the reason your toilet is running, hissing, or refilling on its own — which makes it easy to assume they’re interchangeable culprits. They aren’t. Each part controls a completely different function, and each fails in a way that produces its own distinct symptom, which means you don’t need to guess or replace both parts speculatively to fix the problem.
This guide breaks down exactly what each part does, how to identify which one has failed from the symptom alone, and a free 15-minute test that confirms a flapper leak with certainty. Once you’ve identified the culprit, see our roundup of the best toilet flappers or the best toilet fill valves for replacement options.
✏️ Our Take
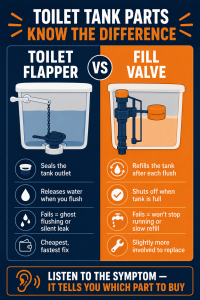
These two parts control completely different functions inside the toilet tank, and their failure symptoms are distinct enough that you can diagnose which one is the problem without taking anything apart. A flapper seals the tank outlet and releases water when you flush — when it fails, water silently leaks from tank to bowl continuously, producing a ghost flush or a toilet that runs constantly. A fill valve refills the tank after each flush — when it fails, the tank either won’t refill properly, takes too long to refill, or keeps running because it can’t shut off. Listen to what your toilet is doing to identify which part to buy before you open the tank lid.
IN THIS GUIDE
A toilet flapper is a rubber seal that sits over the tank outlet — the opening at the bottom of the tank that connects to the bowl below. When the tank is at rest, the flapper’s own weight and water pressure hold it closed, sealing the tank so it can hold its full volume of water between flushes.
Pressing the flush handle pulls a chain connected directly to the flapper, lifting it away from the outlet and releasing the tank’s water into the bowl in a single rush. Once the tank empties, the flapper drops back down and reseals the outlet, allowing the fill valve to begin refilling the tank for the next flush. It’s a simple mechanical part with exactly one job, but a worn or misshapen seal fails at that one job constantly rather than occasionally. See our roundup of the best toilet flappers for current replacement options.
A fill valve controls the flow of water into the tank from the supply line after every flush. It’s the tall assembly usually positioned on the left side of the tank, connected to a float — either a ball on an arm or a cylindrical float that rides up and down the valve’s stem — that tracks the water level as the tank refills.
As the water rises and lifts the float to a preset height, the fill valve shuts off automatically, stopping the flow at the correct tank level. When a fill valve fails, the problem shows up as either too much water — flowing past the intended shutoff point and into the overflow tube — or not enough, where the tank never reaches the level needed for a full, effective flush. See our roundup of the best toilet fill valves for current replacement options.
The clearest sign of a failing flapper is intermittent running — the tank briefly refills every few minutes with nobody having flushed, a pattern often called ghost flushing. What’s happening is water slowly seeping past a worn or warped flapper seal into the bowl, and once the tank level drops enough, the fill valve kicks in automatically to top it back up, creating that periodic refill cycle you can hear from another room.
A continuous, quiet hissing sound from the tank even when it appears completely full and undisturbed is another strong indicator, since it points to water actively passing the flapper seal in a slow, steady trickle rather than the brief burst of a normal flush cycle. If you’re hearing this pattern, our dedicated guide to ghost flushing covers the fix in full detail.
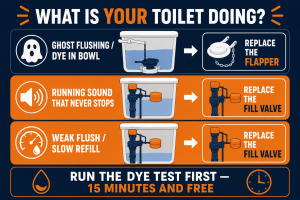
A tank that takes noticeably longer than usual to refill after a flush points toward the fill valve rather than the flapper — the valve mechanism itself is restricting flow more than it should, often due to mineral buildup or a worn internal diaphragm. This is a different symptom from ghost flushing: it’s a slow, single refill after an actual flush, not an unprompted periodic cycle.
A continuous running sound that never resolves on its own — rather than the intermittent pattern of a flapper leak — usually means water is flowing past the fill valve’s shutoff point and running directly into the overflow tube. A weak or incomplete flush is a related symptom: if the fill valve isn’t shutting off at the correct height, or is shutting off too early, the tank may never hold enough water to produce a full, effective flush.
The dye test is the definitive way to confirm a flapper leak without removing anything from the tank. Add a few drops of food coloring, or a dedicated leak-detection dye tablet, directly to the water in the tank — not the bowl. Make sure the color is strong enough to be visible even diluted in the bowl’s water.
Wait 10 to 15 minutes without flushing the toilet at all. Afterward, check the bowl: if color has appeared in the bowl water without anyone flushing, the flapper is leaking and letting tank water past the seal. If the bowl water is still clear after the full wait, the flapper is sealing properly and the fill valve is the more likely cause of whatever symptom prompted the test.
Flappers sit at the lowest end of the price scale for any toilet part, and replacing one is a genuinely beginner-level job — no tools are required beyond your hands, and the whole process takes about 5 minutes once the water is shut off and the tank is drained. Unclip the old flapper, attach the new one to the same mounting pegs or over the same overflow tube, connect the chain, and turn the water back on.
Fill valves cost somewhat more than a flapper but are still firmly in the beginner category — you’ll need basic tools like adjustable pliers and possibly a small bucket to catch residual water, and the job typically takes 15 to 20 minutes including adjusting the water level once the new valve is installed (see our step-by-step fill valve replacement guide for the full walkthrough). In hard water states like Arizona, Texas, Nevada and parts of California, both flappers and fill valves wear out faster than in soft water regions — mineral deposits degrade the rubber flapper seal and build up inside the fill valve mechanism. Homeowners in these areas should expect to replace both parts every 2–3 years rather than the 4–5 year lifespan typical in low-mineral water areas.
Yes — a flapper and a fill valve are entirely independent parts, and there’s nothing preventing both from wearing out around the same time, particularly on an older toilet where both have been exposed to the same water quality and years of daily use. It’s entirely possible to have a leaking flapper producing ghost flushes and a fill valve that won’t shut off properly, both happening at once.
On a toilet that’s already several years old, replacing both parts at the same time you fix whichever one has clearly failed is a reasonable and often more efficient approach than fixing one now and discovering the other needs attention a few months later. Since both parts are inexpensive and quick to install, doing them together while the water is already shut off saves a second round of the same work.
The table below matches the symptom you’re seeing to the part most likely responsible:
| Symptom | Likely Part |
|---|---|
| Ghost flushing (periodic refilling with nobody flushing) | Flapper |
| Continuous running sound that never stops | Fill Valve |
| Dye appears in bowl without flushing | Flapper |
| Tank takes too long to refill | Fill Valve |
| Weak or incomplete flush | Fill Valve |
| Water running into the overflow tube | Fill Valve |
| Toilet several years old, replacing one part already | Consider Replacing Both |
Choose to Replace the Flapper if:
Choose to Replace the Fill Valve if:
If replacing the flapper and fill valve doesn’t resolve a running or leaking toilet, or if you notice water damage around the base of the toilet itself, the problem may be elsewhere in the tank assembly or the wax seal beneath the bowl. A licensed plumber can diagnose issues that go beyond these two parts.
Find a licensed plumber in your area at PlumberArchive.com — the US plumber directory with 12,000+ verified local plumbers across all 50 states.
Get weekly plumbing tips, honest tool reviews and DIY maintenance guides delivered straight to your Facebook feed. We cover toilet repairs, tool comparisons, drain maintenance and everything in between — written for US homeowners who want to handle more themselves.
Listen to the pattern first. Intermittent running — the tank briefly refilling every few minutes with nobody flushing, sometimes called ghost flushing — points to a leaking flapper letting water seep past the seal into the bowl. A continuous running sound that never stops on its own, or water audibly flowing into the overflow tube, points to the fill valve failing to shut off. If you’re still not sure after listening, the dye test settles it definitively in 15 minutes for free.
Yes — replacing a flapper is one of the simplest plumbing repairs a homeowner can do. Turn off the toilet’s shutoff valve behind the bowl, flush to drain most of the tank, unclip the old flapper from its mounting pegs or overflow tube, attach the new one, reconnect the chain to the flush handle with a small amount of slack, and turn the water back on. The whole process takes about 5 minutes and requires no tools.
Most flappers and fill valves last around 4 to 5 years under normal water conditions before the rubber seal degrades or the internal mechanism wears out. In hard water states like Arizona, Texas, Nevada and parts of California, mineral deposits accelerate wear on both parts, and homeowners in these areas should expect to replace them every 2 to 3 years instead. Regular use and water chemistry both affect the actual lifespan more than the brand of the part itself.
If your toilet is several years old and one part has clearly failed, replacing both at the same time is a reasonable approach since the other part has been exposed to the same wear and water conditions and is likely approaching the end of its own lifespan. Since both parts are inexpensive and the water is already shut off for the repair, doing them together avoids a second round of the same job a few months later. Toilet repair kits that bundle both parts are widely available and cost only slightly more than the flapper alone.
Listen to the symptom before buying either part. Ghost flushing — the tank periodically refilling with nobody flushing — points to the flapper. A continuous running sound that never resolves on its own points to the fill valve. If you’re still unsure after listening, the dye test confirms a flapper leak in 15 minutes for free, with no tools and no cost.
Both repairs are firmly beginner-level and cost very little, so there’s no real downside to replacing both parts together on an older toilet once one has clearly failed. See our roundup of the best toilet flappers and best toilet fill valves for current recommendations, and if ghost flushing is your specific symptom, our dedicated guide to ghost flushing walks through the fix from diagnosis to replacement.
✍️ About This Comparison
PTR Editorial Team — Product Comparisons. We compare manufacturer specifications, installation requirements, compatibility and available product documentation to help homeowners choose suitable tools and parts. How we review →
Pop-up drains seal to hold water; grid drains never close but resist clogs better and cost less. Here's how to choose between them for your bathroom sink.
Test strips, digital meters or send-to-lab testing? Match the method to your situation — screening, ongoing monitoring, or a real health concern.
25-foot vs 50-foot drain snake: compare handling, the cable diameter trade-off and the jobs that justify extra length, plus where 50 feet stops.

