Please note: Information in this guide is based on our research at time of writing and is subject to change. This guide is not a substitute for professional water testing or medical advice — for specific health concerns, consult a doctor, and for bacteria test results or treatment decisions, consult a certified testing lab, your state or county health department, or a qualified water treatment professional.
Introduction
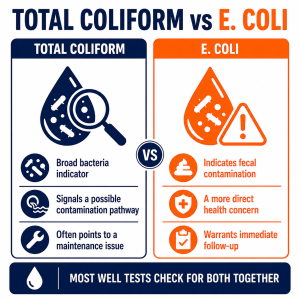
Municipal water systems are legally required to test regularly for bacteria and report the results, which is one of the quiet advantages of being on a public supply — someone else is watching this for you. Private well owners don’t have that safety net. There’s no utility running routine tests on your behalf, no regulatory requirement forcing an annual check, and no report card showing up in the mail. If a well owner wants to know whether their water is safe from a bacteriological standpoint, testing it themselves is the only way to find out.
This makes bacteria testing one of the most important, and most commonly skipped, routine tasks for well owners. Part of the reason it gets overlooked is that bacterial contamination typically gives no warning at all — water can look perfectly clear, smell completely normal, and taste exactly the way it always has, while still testing positive for total coliform or E. coli. There’s no sensory cue prompting a homeowner to act, which is exactly why a regular testing schedule matters more here than it does for problems you can see, smell, or taste coming. Bacteria is also a different concern from the other contaminants we’ve covered on this site — it’s a biological risk specific to private wells, distinct from our how to test for radon in your water supply guide, which covers a dissolved gas rather than a living organism, and from our how to test your water for hardness guide, which covers mineral content rather than a health-related contaminant. This guide walks through why testing matters, what’s actually being tested for, and the full process from scheduling a test through understanding and responding to your results.
At a Glance
| Who This Applies To |
Homes on a private well — municipal water customers are already covered by supplier testing |
| What’s Tested For |
Primarily total coliform bacteria and E. coli |
| How Often |
Most health departments recommend annual testing at minimum |
| Where to Get Tested |
A certified local lab or your state/county health department — not a general at-home strip test for a reliable result |
✏️ Our Take
Bacteria testing is arguably the single most important routine test for any private well owner, precisely because contamination gives no warning signs — water can look, smell, and taste completely normal while still testing positive for bacteria. The test itself is simple and inexpensive through a certified lab, but sample collection technique matters enormously; a contaminated sample from poor collection can produce a false positive, while careless technique can also mask a real problem. Annual testing, plus testing after any well work or flooding, is the standard recommendation — and if a result does come back positive, the fix is usually straightforward (shock chlorination) rather than a sign of a deeper well problem.
Why Well Water Needs Bacteria Testing
Municipal water systems operate under regulatory requirements that mandate regular bacteriological testing, with results reported to a state agency and, in many cases, to customers directly. A private well isn’t part of that system. Well water falls outside routine municipal or state monitoring in most jurisdictions, which means the well owner is the only party responsible for knowing whether their water is actually safe from a bacterial standpoint. Our well water vs municipal water comparison covers this distinction in more depth — it’s a core difference between the two water sources, and testing responsibility is one of its most practical consequences.
Bacterial contamination in a well is a genuine, testable risk rather than a hypothetical one, and it typically traces back to a handful of common pathways. A nearby septic system, particularly an older or poorly maintained one, can allow bacteria to migrate through soil and reach groundwater. Surface water infiltration — rain or floodwater running across the ground into the well — is another common route, especially for shallow wells or wells in low-lying areas. A compromised well cap or casing is a third: any gap, crack, or seal failure at the top of the well creates a direct path for surface contaminants, insects, or debris to enter the water supply.
None of these sources are unusual or a sign of neglect — they’re simply part of owning a well, the same way a roof needs periodic inspection regardless of how well it was built. What matters is catching contamination early, since none of these pathways produce a noticeable change in your water. Regular testing is that process.
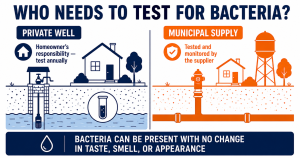
Most well water bacteria tests check for two related but distinct things: total coliform and E. coli. Understanding the difference helps make sense of a lab report rather than just seeing “positive” or “negative” without context.
Total coliform is a broad category of bacteria found widely in the environment — in soil, on vegetation, and in the digestive tracts of animals, among other places. Most coliform bacteria themselves aren’t dangerous. The reason labs test for them isn’t that total coliform is inherently harmful, but that its presence functions as a general indicator: if coliform bacteria have found a way into your well, it signals that a pathway exists for other, potentially more harmful organisms to get in as well. Think of it less as the problem itself and more as a smoke detector — it’s telling you a pathway exists, not necessarily that something dangerous is currently present.
E. coli is a more specific indicator, and a more direct health concern. It’s a type of bacteria found specifically in the digestive tracts of humans and warm-blooded animals, so its presence in a water sample points to fecal contamination rather than a general environmental source. A positive E. coli result is treated as a more serious signal than total coliform alone, since it indicates a more concerning contamination pathway. Most certified well water tests screen for both together in a single sample, which is why understanding what each one means on your results matters.
💡 Tip: A positive total coliform result without E. coli present is common and often points to a maintenance issue (like a well cap that needs resealing) rather than a serious contamination event — but any positive result is worth acting on and retesting to confirm.
Step 1: Determine Your Testing Schedule
Bacteria testing works best as a routine habit rather than a one-time check, since contamination can develop at any point after your last clean result. The CDC and most state and local health departments converge on similar baseline guidance.
- Test at least once a year as a baseline. Annual testing is the standard recommendation from the CDC and most health departments for any private well used as a household drinking water source.
- Test again after any well repair or new well installation. Work on the well itself — a new pump, a repaired casing, a newly drilled well — creates an opportunity for contaminants to enter before everything is fully sealed and settled.
- Test after flooding or heavy rain events near the well. Surface water intrusion is one of the more common contamination pathways, and a significant rain or flood event is a reasonable trigger for an extra test outside your annual schedule.
- Test if anyone in the household develops unexplained gastrointestinal illness. While there are many possible causes for GI symptoms, checking well water is a reasonable and inexpensive step to rule in or out as a contributing factor.
Step 2: Find a Certified Testing Lab
Not every lab is set up for bacteriological testing specifically, and the type of lab you use matters for how much confidence you can place in the result.
- Look specifically for a lab certified for bacteriological water testing. A lab that handles hardness or mineral content testing isn’t automatically equipped for bacteria analysis — confirm the specific certification before ordering.
- Check your state health department’s list of certified labs. Most state health departments maintain a directory of labs certified for drinking water bacteriological testing, and this is typically the most reliable starting point.
- Ask your county health department or extension office about testing programs. Many counties run their own low-cost or subsidized well water testing programs, sometimes at a lower cost than a private lab.
- Order a sample kit from the lab in advance. Bacteriological testing requires a sterile collection bottle supplied by the lab — you can’t simply use any clean container, since a non-sterile bottle can introduce bacteria that didn’t come from your water.
- Confirm the lab’s sample drop-off or shipping window before you collect. Bacteria samples are time-sensitive, and knowing the deadline in advance helps you plan collection around it rather than rushing afterward.
⚠️ Warning: General at-home bacteria test strips can give a rough initial indication, but they are not a substitute for certified lab testing when it comes to confirming whether your water is actually safe. For any result you plan to act on, use a certified lab.
Step 3: Collect the Water Sample Correctly
Collection technique matters more for bacteria testing than for almost any other water test, since the sample itself can easily become contaminated by the collection process rather than by your actual water — producing a false positive that doesn’t reflect reality.
- Sterilize the tap briefly before collecting, following your lab’s specific instructions. This often involves flaming the tap with a lighter for a few seconds or wiping it with a disinfecting solution, depending on the lab’s protocol.
- Avoid touching the inside of the sterile sample bottle or its cap at any point. The bottle is pre-sterilized specifically for this test — touching the inside surface or the underside of the cap can introduce bacteria from your hands, invalidating the result.
- Collect from a tap as close to the well as possible, before any filtration or treatment system. Sampling after a filter or softener tests the treated water rather than what’s actually coming from the well, which isn’t what you’re trying to learn.
- Fill the bottle to the fill line indicated, without overfilling or rinsing it first. Unlike some containers, sterile sample bottles typically shouldn’t be rinsed with sample water first — follow your specific kit’s instructions exactly.
- Get the sample to the lab within the specified time window. Bacteria samples are time-sensitive in a way that many other water tests aren’t — bacteria levels in the sample itself can change the longer it sits, so prompt delivery matters for an accurate result.
Step 4: Understanding Your Results
Bacteria test results typically look different from other water test reports you may have seen. Rather than a numeric concentration — parts per million, grains per gallon, or a similar scale — most bacteriological results simply report presence or absence of total coliform and E. coli. You’ll generally see something like “absent” or “present” for each, rather than a number to compare against a chart.
A “present” result for either total coliform or E. coli warrants follow-up action rather than being ignored, even if it’s your first positive result after years of clean tests. The EPA’s general guidance is that drinking water should have zero detectable total coliform and E. coli — worth knowing as informational context, though your certified testing lab or state health department is the right resource for guidance specific to your result, including next steps and whether retesting is recommended.
US Regional Context: Bacterial contamination risk in well water can vary by region depending on factors like soil type, well depth, and proximity to septic systems or agricultural land. Many state health departments and county extension offices offer low-cost or subsidized well water testing programs, which can be a more affordable option than a private lab for well owners testing annually.
Step 5: What to Do If Bacteria Is Present
A positive result is not a reason for alarm — it’s a reason to move to a well-established next step. Shock chlorination is the standard first response, and it’s a well-documented, routine process rather than an emergency measure.
Shock chlorination involves introducing a strong chlorine solution into the well, circulating it through the plumbing system, letting it sit to disinfect the well and pipes, and then thoroughly flushing the system before use. It’s a well-established process that many owners perform themselves using guidance from their state health department, though homeowners who’d rather not handle it personally can hire a licensed well contractor instead.
Retesting after shock chlorination is essential, not an optional follow-up — it’s the only way to confirm the treatment actually resolved the issue rather than assuming it worked. If a retest comes back clean, that’s typically the end of the process until your next scheduled annual test. If bacteria persists or recurs across more than one round of treatment, that pattern suggests a structural issue — a damaged well cap, a cracked casing, or a similar physical entry point — that needs professional inspection rather than repeated chlorination alone.
Beyond the annual baseline, a handful of specific situations are worth testing for outside your regular schedule. None of these are cause for alarm on their own — they’re simply reasonable triggers for an extra check.
- Any visible change in water clarity, color, or odor, even if it seems minor or resolves on its own.
- Nearby flooding or a period of unusually heavy rainfall, which can introduce surface water into the well.
- Any well servicing or repair work, including pump replacement, casing repair, or new well construction.
- A neighboring well testing positive for contamination, since shared groundwater sources can mean shared risk.
- A home purchase transaction involving a well — bacteria testing is often a standard part of due diligence for both buyers and lenders.
Frequently Asked Questions
Q: Can boiling well water make it safe if bacteria is present?
Boiling water at a rolling boil for about a minute is generally understood to kill most disease-causing bacteria, including E. coli, and it’s a reasonable short-term measure if you have a confirmed positive result and need water for drinking or cooking in the meantime. It doesn’t fix the underlying source of contamination, though — a well with a positive bacteria result still needs shock chlorination or another treatment approach to actually resolve the issue, followed by retesting. Boiling is a temporary workaround, not a substitute for addressing the well itself.
Q: How much does well water bacteria testing typically cost?
Bacteria testing is generally one of the more affordable water tests available, and pricing varies by lab, region, and whether you use a private lab or a subsidized county or state health department program — the latter is often less expensive. Rather than referencing a specific figure here, which can quickly go out of date, check with your local health department or a certified lab directly for current pricing in your area; many county extension offices also offer periodic low-cost or free testing events for well owners.
Q: Does a water softener or filter remove bacteria?
Standard water softeners and most general-purpose filters, including basic carbon filters, are not designed or certified to remove bacteria and shouldn’t be relied on for that purpose. Some specialized treatment methods — like UV disinfection systems or certain reverse osmosis setups — can address bacteria, but that’s a different category of equipment than a standard softener or sediment filter. If a bacteria test comes back positive, the appropriate first response is shock chlorination, covered in Step 5 above, not simply installing a filter.
Q: If my well tested clean last year, do I still need to test again this year?
Yes. A clean result reflects your water’s condition at the moment the sample was collected, not a permanent guarantee. Because bacterial contamination can develop at any time — after heavy rain, following work on the well, or from a gradually failing well cap — and produces no noticeable change in taste, smell, or appearance, last year’s clean result doesn’t tell you anything about today’s water. Annual testing exists precisely because a well’s condition can change between tests, which is why it remains the standard recommendation even for wells with a long history of clean results.
Conclusion
Bacteria testing is a routine, manageable part of owning a private well, not a cause for alarm. Because contamination produces no warning signs of its own, an annual test through a certified lab — plus extra testing after well work, flooding, or any unexplained illness in the household — is the only reliable way to know your water is safe. If a result does come back positive, shock chlorination is a well-established, well-documented fix that resolves the vast majority of cases, and a well contractor can handle it for you if you’d rather not do it yourself. Approached this way, bacteria testing is simply one more item on the same maintenance checklist as your well pump or pressure tank — not a source of ongoing worry.
Prices and ratings may change. Always check Amazon for current prices.
✍️ About This Guide
Written by Mike Reynolds, DIY Home Improvement Writer at PlumbingToolsReview — former residential contractor helping US homeowners tackle plumbing repairs with confidence. Learn how we test →