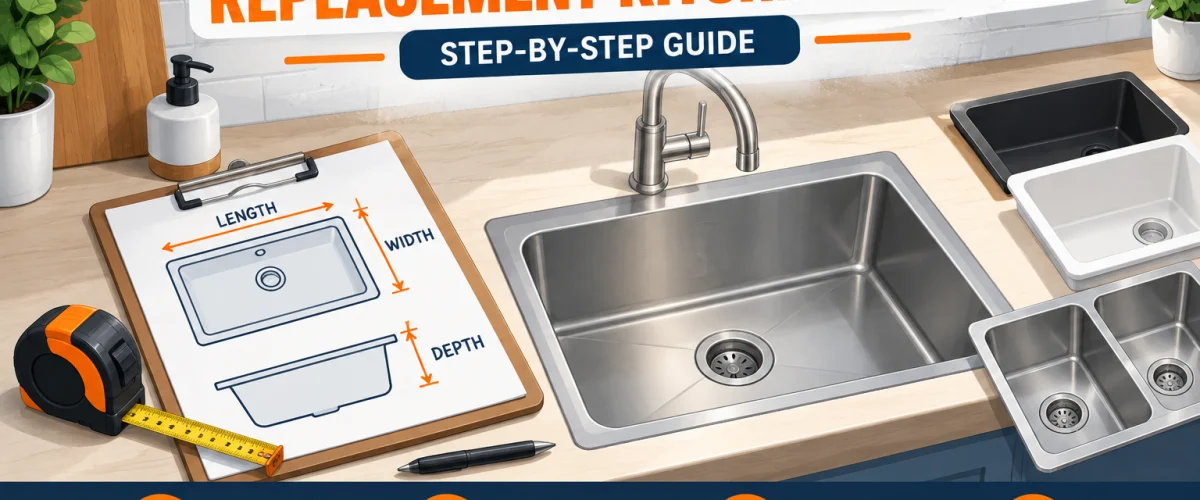
Please note: This guide is based on our research and general US sizing conventions at time of writing. Sink, cabinet, and faucet dimensions vary by manufacturer and by home — always verify every measurement against your specific existing sink, faucet, and cabinet before purchasing a replacement or scheduling any countertop work.
Introduction
A kitchen sink is one of the few fixtures where the box says almost nothing useful until you already know your own numbers. Two sinks can look nearly identical in a product photo and still be a half-inch too long for your cutout, wrong for your countertop material, or drilled for a faucet configuration your deck doesn’t have. Get any of that wrong and you’re not looking at a quick exchange — you’re looking at a countertop fabricator, a filler strip, or a sink that sits in the return line until you order the right one. The fix costs nothing but ten minutes with a tape measure, done before you shop rather than after a box shows up.
This guide covers exactly that ten minutes: measuring your existing cutout, understanding which mounting styles your countertop can actually support, counting and measuring faucet holes, and checking cabinet clearance for anything larger than what you have now. It deliberately does not get into which material or bowl configuration to buy — our Stainless Steel vs Granite Composite comparison and our roundup of the best kitchen sinks already cover those decisions in depth. Read this one first — it’s the groundwork that makes the material and bowl-configuration decision meaningful, because a sink that doesn’t fit your cutout is off the table regardless of how good the material comparison makes it look.
At a Glance
| Skill Level |
Beginner — no tools beyond a tape measure and a notepad, no disassembly required to take most measurements. |
| Tools Needed |
Tape measure, notepad or phone notes app, and painter’s tape if you want to mark measurement points before committing them to memory. |
| Time Needed |
10 to 15 minutes for a straightforward like-for-like replacement; longer if you’re also checking cabinet clearance for a larger sink. |
| Critical First Step |
Measure your existing cutout before you shop. Don’t buy a sink you like and hope it fits — confirm the fit first, then shop within what actually works. |
Measuring Your Existing Cutout
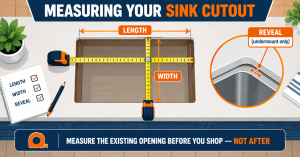
Every kitchen sink cutout has two core numbers: length (the side-to-side dimension, typically the longer of the two) and width (the front-to-back dimension, measured from the front edge of the counter to the backsplash side). Standard single-bowl cutouts commonly land around 33 by 22 inches, and double-bowl cutouts run similar overall dimensions with the divider positioned inside that footprint — but “commonly” is not “always,” and the only number that matters is the one you measure yourself.
If your old sink is still installed, you have two options. The less accurate one is measuring the visible opening around the sink’s rim with a tape measure, corner to corner — workable for a rough estimate, but the sink’s overhang can make it hard to get an exact reading. The more accurate option is to open the cabinet below and look up at the underside of the countertop: with the sink out of the way, the true cutout edge is visible from underneath, and you can measure it directly with the tape measure held flat against the counter’s underside. This is worth doing even if you don’t plan to remove the old sink until installation day, since it gives you the real number to shop against now.
If you’ve already removed the old sink, measure the cutout opening itself directly: length across the longest straight edge, width across the shorter edge, and — if the corners are rounded rather than square — the corner radius, since some manufacturers’ cutout templates use a tighter or wider radius than others and a mismatch can leave a visible gap or require minor trimming.
💡 Tip: Measure twice and write every number down immediately — on paper or in your phone, not from memory. A difference of even a half inch between what you remember and what you actually measured is enough to send you home with the wrong sink, and it’s a far more common mistake than people expect.
For undermount sinks specifically, there’s a third number: the reveal, meaning how the edge of the countertop relates to the edge of the sink once it’s installed. A zero reveal means the counter edge and the sink’s outer edge sit flush; a negative reveal means the counter overhangs the sink slightly (the most common style, since it protects the cut stone edge and makes wipe-off easier); a positive reveal means the sink’s edge sits slightly proud of the counter. If you’re replacing an undermount sink with another undermount sink, check what reveal your current installation uses before assuming a same-size replacement will look identical once it’s in — a different reveal on the new sink can shift how much of the counter’s cut edge is visible, which matters more for appearance than for fit but is worth knowing before you order.
Understanding Mounting Styles and Compatibility
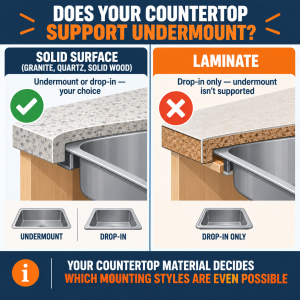
A quick recap, since this guide is about fit rather than material: drop-in (top-mount) sinks rest in the cutout with their rim visible above the counter surface, held in place by clips underneath and sealed with a bead of silicone or plumber’s putty around the rim. Because the weight and the seal are both handled at that visible rim, a drop-in sink works with virtually any countertop material — laminate, tile, solid surface, stone, butcher block, all of it. Undermount sinks mount beneath the counter, attached to the underside of the countertop material with clips or epoxy, with no rim interrupting the counter surface — which is what gives undermount its clean, wipe-straight-into-the-sink look.
That clean look is also exactly why mounting style isn’t just a cosmetic choice — it’s a compatibility question your countertop material answers for you. Undermount hardware attaches directly to the underside of the counter and relies on the cut edge around the opening being finished, sealed, and structurally solid enough to bear the sink’s weight and hold mounting clips. Granite, quartz, solid-surface material, and solid wood or butcher block can all do that. Laminate cannot: the cut edge exposes the particleboard or MDF core underneath the laminate layer, which isn’t strong enough to hold undermount hardware and, without lamination sealing that exposed edge, is vulnerable to swelling from moisture at the sink opening.
⚠️ Warning: Never install an undermount sink under a laminate countertop. It is not a matter of the installation being difficult — the countertop material physically cannot support undermount hardware or hold a seal at the exposed cut edge, and attempting it risks both the sink pulling loose and moisture damage to the counter’s core. If your countertop is laminate, your replacement sink needs to be drop-in, full stop.
Once you know which mounting style your countertop can actually support, the remaining decision is material — and that’s a genuinely separate question from fit. Stainless steel and granite composite behave differently on durability, heat resistance, noise, and cleaning, and both are available in drop-in and undermount versions where your countertop allows it. This guide isn’t the place to work through that comparison; our Stainless Steel vs Granite Composite Kitchen Sink comparison covers it factor by factor. Confirm your mounting-style compatibility here first, then use that comparison to pick the material within whatever mounting style your counter supports.
Counting and Measuring Faucet Holes
Count every predrilled hole in your current sink deck or countertop, and note what each one is for: the faucet itself, separate hot and cold handles, a side sprayer, a soap or lotion dispenser, an air gap for a dishwasher or reverse osmosis system, or a hot-water dispenser. A single-handle faucet with an integrated sprayer might only need one hole; a traditional widespread faucet with separate handles, plus a soap dispenser and a sprayer, can use four or more.
Then measure the spacing: for a widespread setup, measure center to center between the outer holes, and note the distance to any center hole as well. Measure each hole’s diameter too — most standard faucet holes run about 1-3/8 to 1-1/2 inches, but accessory holes for a soap dispenser or air gap are often smaller. Write down the count, the spacing, and the diameters before you shop, the same way you did for the cutout.
A mismatch between your new sink’s predrilled holes and what you actually need is manageable either direction, but it’s better to plan for it than discover it during installation. If the new sink has fewer holes than your current setup uses, the unused holes in the countertop deck (not the sink itself, if the extra holes were in the counter rather than an integrated deck) can typically be covered with an escutcheon or deck plate. If the new sink has more holes than you need, most manufacturers include blank inserts for unused holes. What’s harder to work around is a new sink with too few holes for accessories you want to keep — a soap dispenser or sprayer you’re used to having may simply not have anywhere to go unless you’re comfortable drilling an additional hole, which is a straightforward job on stainless steel but requires a professional with the right stone bit for granite composite or natural stone.
US Regional Context: US kitchen sink and faucet manufacturers largely build to the same handful of conventions nationwide, which is part of why measuring your own setup rather than assuming standard sizes still matters — “standard” covers several common variants, not one universal number. The most common single-bowl cutout is roughly 33 by 22 inches; faucet hole spacing is most often either a 4-inch centerset (handles and faucet grouped close together) or an 8-inch widespread (handles and faucet spaced independently), though some faucets use their own baseplate to adapt across a range of spacings. None of this varies meaningfully by region — a sink bought in the Pacific Northwest and one bought in the Southeast are built to the same conventions — but model-to-model variation within those conventions is common enough that your own tape measure is still the authoritative source.
Checking Cabinet Clearance
If you’re replacing like-for-like — same overall footprint, same general bowl depth — cabinet clearance usually isn’t a concern, since whatever was under the old sink will accommodate a similarly sized new one. Clearance becomes a real question the moment you’re upsizing: moving to a workstation-style sink, going from a single bowl to a double bowl, or choosing a noticeably deeper basin than what you have now.
Open the cabinet and measure the interior width between the side walls, the depth from the front face frame to the back wall, and the height from the cabinet floor up to the underside of the countertop. Then account for what’s already living in that space: the P-trap and drain assembly, supply lines and shutoff valves, and — if you have one — a garbage disposal hanging beneath the basin. A larger or deeper sink reduces the vertical clearance available for the disposal and the trap assembly beneath it, and a double-bowl or workstation sink’s wider footprint can crowd supply lines that were positioned for a narrower single-bowl setup. If your cabinet has a center stretcher or support rail running front-to-back for structural bracing, check that it won’t interfere with a wider basin before you buy — cutting or relocating cabinet bracing is a bigger job than it sounds and isn’t something to discover after the new sink arrives.
Basin Depth and Faucet Height Considerations
Basin depth is a fit consideration as much as a preference one. Standard bowl depth runs around 8 inches; deeper basins in the 10- to 11-inch range are popular for hiding stacked dishes and reducing splash, but a deeper bowl changes the distance between the faucet’s spout and the bottom of the basin. A short or low-arc faucet paired with a deep basin can end up positioning the water stream too close to the back wall or too shallow into the bowl, which increases splash rather than reducing it — the opposite of what a deep basin is supposed to do.
If you’re moving to a noticeably deeper basin, plan on a taller or higher-arc faucet to match it, and check that faucet’s base configuration against the hole count and spacing you measured in the section above — a new faucet is its own predrilled-hole compatibility question, on top of the sink’s.
When to Consider a Different Mounting Style Than What You Have
Switching from drop-in to undermount during a straight sink replacement is possible but rarely simple, and it isn’t a countertop-agnostic decision — it only works if your existing countertop is already a solid-surface material capable of supporting undermount hardware. Even then, the existing cutout typically needs its cut edge reworked: a drop-in cutout is cut for a rim to rest on top of it, not for a finished, sealed edge that will be visible from underneath with nothing covering it, so this is close to countertop fabrication work rather than a sink swap.
Going the other direction — undermount to drop-in — is more forgiving in principle, since a drop-in sink’s visible rim can sit over and mask an existing undermount cutout, as long as the new sink’s overall footprint fully covers the old opening with enough margin for the rim to seat properly. It’s still worth confirming that margin with your actual measurements rather than assuming a “bigger” sink automatically covers a “smaller” cutout in every direction.
Either direction, treat a mounting-style change as a countertop project with a sink attached to it, not a sink project with a countertop as an afterthought — see the next section on when that means bringing in a professional.
Putting It Together: What to Bring to Your Shopping Decision
Before you start comparing actual sinks, you should have every one of these written down:
- Cutout length and width (and corner radius, if replacing a removed sink)
- Reveal measurement, if your current or planned sink is undermount
- Confirmed mounting style your countertop material supports (drop-in works with anything; undermount needs solid-surface)
- Faucet hole count, purpose of each hole, center-to-center spacing, and hole diameters
- Cabinet interior width, depth, and height, plus the position of the P-trap, supply lines, and disposal if present
- Desired basin depth and whether your faucet (existing or new) can accommodate it without excess splash
With that list in hand, you’re actually ready to shop — not before. Armed with your measurements, see our full roundup of the best kitchen sinks for picks across mounting styles, materials, and price tiers, and once the new sink is installed, a bottom grid or protector is an inexpensive way to protect the basin finish from day one rather than waiting for the first scratch to think about it.
When to Call a Professional
A straightforward like-for-like sink swap — same mounting style, same general footprint, existing plumbing reused — is a reasonable DIY project for most homeowners. Bring in a professional when either of these comes up:
Switching mounting styles. Any move between drop-in and undermount involves cutting, finishing, or sealing the countertop material itself, which for stone or solid-surface counters means a fabricator with the right tools, not a DIY cut.
Signs of water damage. If removing your old sink reveals soft, swollen, discolored, or spongy wood in the cabinet deck or subfloor beneath it, address that before a new sink goes in, not after. Installing a new sink over a compromised base just hides the problem under a fresh fixture — get the damaged material replaced and confirmed dry first, then install.
✏️ Our Take
Nearly every expensive kitchen sink mistake we hear about traces back to skipping the ten minutes this guide is about. A sink that doesn’t match the cutout, a mounting style the countertop can’t support, a faucet hole configuration that doesn’t line up — all of it is completely avoidable with a tape measure and a notepad, before you’ve spent anything. Measure first, compare products second, and the actual buying decision gets a lot easier because half the field has already ruled itself out for reasons that have nothing to do with which sink is “better.”
Prices and ratings may change. Always check Amazon for current prices.
Frequently Asked Questions
Q: If I buy the same brand as my old sink, will it definitely fit?
Not necessarily. Manufacturers revise model dimensions over time, discontinue and replace specific models, and often offer the “same” product line in multiple sizes. Brand matching can narrow your search, but it isn’t a substitute for measuring your actual cutout — treat every replacement as needing its own fit check, regardless of brand history.
Q: What if the new sink I want is slightly larger or smaller than my existing cutout?
A slightly larger drop-in sink can sometimes be accommodated by carefully trimming the cutout, though this requires the right tools and is easier on laminate than on stone or solid-surface material. A smaller sink leaves a visible gap that typically needs a filler strip or a countertop patch, which affects appearance more than function. In both cases, getting as close to an exact match as possible is the simplest path — treat resizing the cutout as a fallback, not a plan.
Q: Is faucet hole spacing the same across all kitchen sinks?
No. Four-inch centerset and eight-inch widespread are the two most common spacings in US kitchens, but they aren’t universal, and some sinks and faucets use other configurations or an adjustable baseplate. Always measure your actual hole centers rather than assuming a standard spacing applies.
Q: Can I go from a single-bowl to a double-bowl sink without changing my cutout?
Sometimes, if the double-bowl sink’s overall length and width match your existing cutout closely enough — the bowl divider sits inside that footprint rather than changing the outer dimensions. What’s more likely to trip you up is clearance underneath: a double-bowl sink often repositions the drain and disposal mounting point, so check cabinet clearance and existing plumbing position before assuming the swap is a direct one.
Q: How long does this whole measuring process actually take?
For a straightforward like-for-like replacement, plan on 10 to 15 minutes: cutout dimensions, faucet hole count and spacing, and a quick look under the cabinet. Add extra time if you’re also checking clearance for a larger or deeper sink, since that involves measuring around existing plumbing rather than just the opening itself.
Conclusion
The groundwork in this guide isn’t glamorous, but it’s the difference between a replacement sink that drops in and works the same day and one that turns into a countertop project you didn’t plan for. Measure your cutout, confirm what mounting style your countertop actually supports, count and measure your faucet holes, and check clearance if you’re sizing up. Once you’ve got those numbers, the material and bowl-configuration decision — the part that’s actually fun to shop for — has a lot less room to go wrong.
✍️ About This Guide
Written by Mike Reynolds, DIY Home Improvement Writer at PlumbingToolsReview — former residential contractor helping US homeowners tackle plumbing repairs with confidence. Learn how we test →