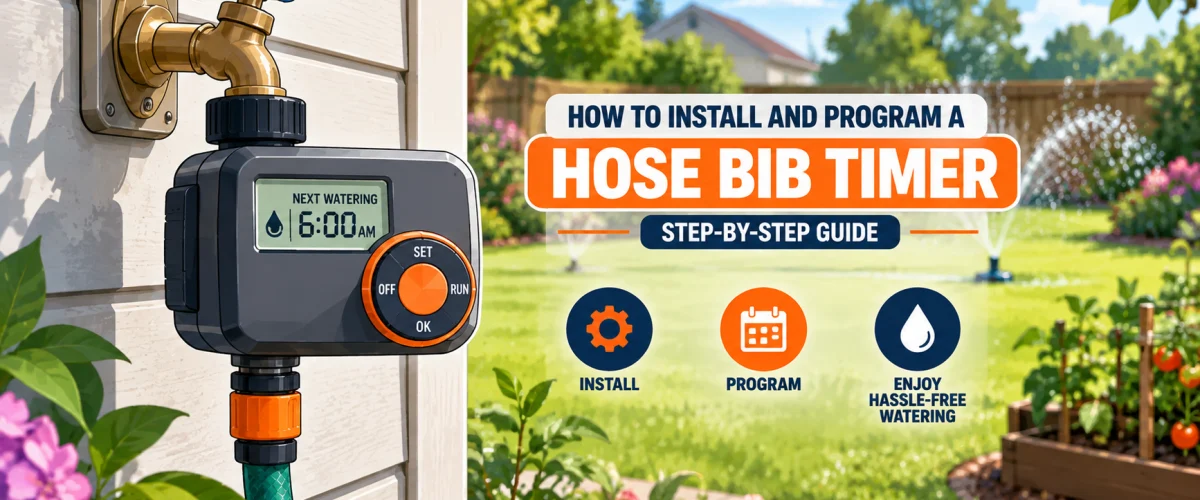
Please note: This guide covers single-zone hose bib timers that thread onto an outdoor faucet. Button layouts, menus, and battery types vary by model — if your timer’s controls don’t match what’s described here, follow your manual for the exact key presses.
Introduction
A hose bib timer screws onto your outdoor faucet and opens and closes the water on a schedule you set, so a garden bed, drip line, or lawn gets watered without you standing there with a hose. The physical installation is about as simple as plumbing gets: it threads on hand-tight, no tools required. The part people get wrong is the setup — batteries, the clock, start times, and run duration — and that’s where most “my timer didn’t run” complaints come from. This guide covers both, with the emphasis where it belongs.
If you haven’t bought one yet, our 5 Best Hose Bib Timers roundup covers digital, dial, and brass-inlet options. This guide assumes you have a single-zone timer in hand and are ready to set it up.
At a Glance
| Skill Level |
Beginner — no plumbing experience needed. |
| Tools Needed |
None — the timer threads on hand-tight. Fresh batteries in the size your timer uses. |
| Time Needed |
5 to 10 minutes to install; a bit longer the first time you program a digital model. |
| Critical First Step |
Check the condition of your faucet’s washer and the timer’s inlet filter before threading it on — a worn washer will leak no matter how good the timer is. |
Installing the Timer
Start with the two small parts that cause most leaks. Look inside the timer’s inlet for a rubber washer, and confirm it’s seated flat, not cracked or missing. If your timer has a small inlet filter screen, make sure it’s clean and in place. Then glance at the faucet’s spout threads for corrosion or damage.
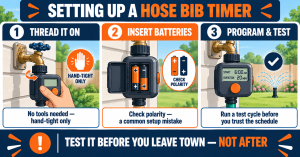
Turn the faucet fully off. Hold the timer straight against the spout and turn its coupling nut clockwise by hand, starting slowly so the threads catch evenly — if it feels like it’s fighting you, back off and re-seat it rather than forcing it, since cross-threading is the one way to damage a timer or a spout. Tighten until snug by hand only; pliers or a wrench crush the washer and crack plastic inlets. Then thread your hose onto the timer’s outlet the same way, hand-tight.
Installing Batteries
Most hose bib timers run on two alkaline AAA or AA batteries, though the size varies by model, so check the compartment or manual first. Open the battery compartment and match the plus and minus marks to the compartment’s diagram — backward batteries are the most common reason a brand-new timer shows a blank screen or never opens the valve. Close the compartment fully so the seal seats; a loose cover is how moisture gets in.
Programming a Digital Timer
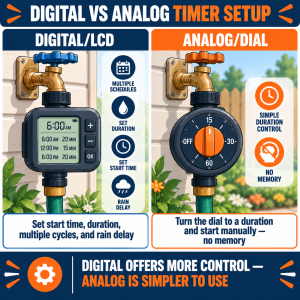
Menus differ by brand, but nearly every digital timer walks you through the same handful of settings. Work through them in this order:
- Set the current time. Schedules run off the clock, so a wrong time means watering at the wrong hour.
- Set the start time. Early morning is a common choice, since less water is lost to evaporation and foliage dries during the day.
- Set the run duration. How long the valve stays open each cycle — start shorter than you think you need and adjust after watching results.
- Set the frequency or extra cycles. Choose which days it runs, and add a second daily cycle only if your setup needs one, such as seed beds or containers.
- Set the rain delay, if your model has one. This pauses watering for a set number of days after wet weather.
- Choose the mode. Automatic follows your schedule; manual lets you open the valve on demand and is handy for testing.
Confirm each setting on the screen before leaving the menu. Many timers time out and discard a setting you didn’t confirm.
Setting an Analog or Dial Timer
Dial timers trade scheduling for simplicity. There’s no clock to set and no start-time memory in the way a digital model has: you turn the dial to the number of minutes you want, and the valve opens and runs until the dial counts back to zero. Some single-dial models add an interval setting for repeating watering — check your model’s markings. The tradeoff is that you’re starting each cycle yourself unless your model has a repeat setting, so it suits quick, predictable jobs better than hands-off scheduling.
Running a Test Cycle
Turn the faucet on slowly to full, then start a manual cycle. Check the faucet-to-timer connection and the timer-to-hose connection for drips. A weep at the inlet almost always means the washer isn’t seated or the connection needs a slight re-seat; a leak from the faucet’s own handle or spout is a faucet problem, not a timer problem. Then confirm the valve actually opens and closes when it should: a short manual run proves the valve works, and setting the next automatic start a few minutes ahead of the clock proves the schedule does.
💡 Tip: Run a full test cycle, and ideally watch one scheduled start actually fire, before you leave town. Setting a timer for vacation is the most common reason people buy one, and it’s the worst moment to discover the clock was wrong or the batteries were backward.
Pairing with Drip Irrigation
Drip and micro-irrigation are what these timers do best: the tubing or manifold connects to the timer’s outlet. Most drip setups want a pressure regulator downstream of the timer, and a filter helps keep emitters from clogging. Low-pressure gravity-fed systems generally won’t open a battery-driven valve reliably, so a timer is meant for a pressurized faucet. Drip zones usually run longer, less frequent cycles than a sprinkler, which is easy to set on any of the digital models above. One side note: a timer runs one zone. Multi-zone and smart sprinkler controllers are a different product category, and this guide doesn’t cover them.
Seasonal Removal
Where winters freeze, the timer comes off before the first hard freeze, along with the hose. Our guide to winterizing outdoor faucets covers the whole process, so follow it rather than leaving the timer attached.
US Regional Context: Seasonal removal is a cold-climate task — across the northern half of the US and higher elevations it’s routine. In much of the Deep South, Southwest, and coastal California, a timer can often stay on year-round, though a rare hard freeze is still worth planning for.
When to Call a Professional
Installing a timer never needs a plumber. If the faucet itself drips, won’t shut off fully, or leaks around the handle, fix that first — our guide to fixing a leaking outdoor faucet walks through it. Call a licensed plumber only if the faucet leaks inside the wall or has a cracked stem.
✏️ Our Take
The install takes a minute; the habit that matters is the test cycle. A timer you’ve watched open and close on schedule is one you can trust while you’re away. A timer you set up in a hurry and never verified is a gamble — either a dry garden or a hose running all day. Run the test before you rely on it, especially before a trip.
Prices and ratings may change. Always check Amazon for current prices.
Frequently Asked Questions
Q: Do I need tools to install a hose bib timer?
No. It threads onto the faucet by hand. Pliers or a wrench tend to crush the washer or crack a plastic inlet.
Q: Why won’t my timer open the valve?
The usual causes are backward or weak batteries, the mode set to off or a paused rain delay, or too little water pressure. Recheck the batteries and the mode first.
Q: Which timer should I buy?
That depends on how much scheduling you want versus how simple you’d like it. Our hose bib timers roundup compares digital, dial, and brass-inlet options.
Conclusion
Check the washer, thread the timer on by hand, get the batteries in the right way round, then work through the schedule in order: time, start, duration, frequency. Run a test cycle before you count on it, and pull the timer off before winter where it freezes. Still choosing a model? See our best hose bib timers roundup.
✍️ About This Guide
Written by Mike Reynolds, DIY Home Improvement Writer at PlumbingToolsReview — former residential contractor helping US homeowners tackle plumbing repairs with confidence. Learn how we test →