Please note: Information in this guide is based on our research at time of writing and is subject to change. Always follow the specific instructions included with your product, since exact steps vary by model.
Introduction
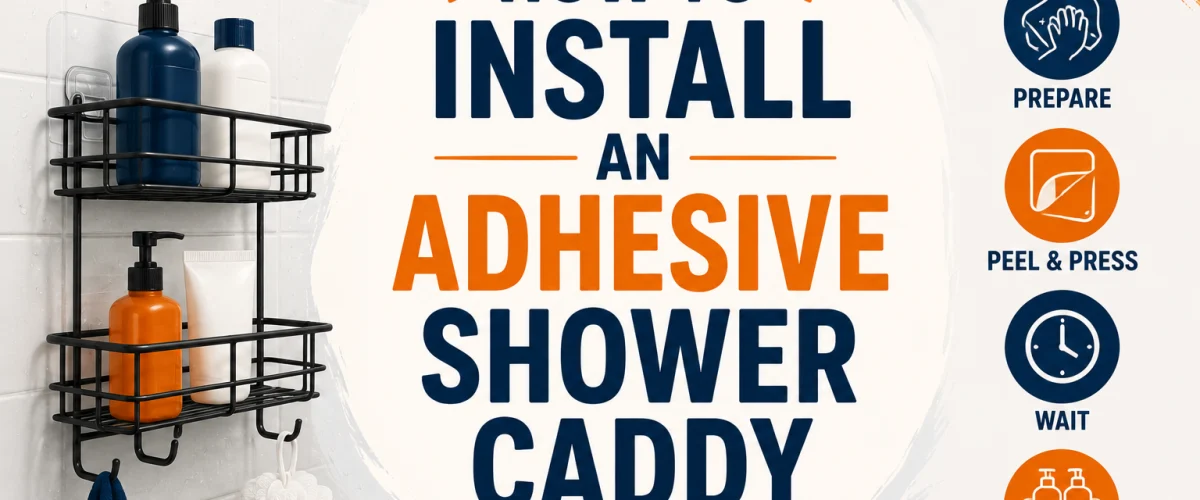
An adhesive shower caddy is one of the quickest bathroom upgrades you can tackle, and for most people it really is a no-drill, five-minute job — no anchors, no hardware, and no wall damage if you ever need to move it. Peel the backing, press it against a clean spot on your tile or glass, and you have a shelf. That simplicity is exactly why adhesive caddies are so popular for renters and anyone who’d rather not put holes in bathroom tile.
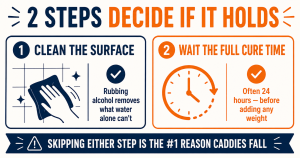
What that simplicity hides, though, is that the actual holding strength of the caddy depends almost entirely on two steps that are easy to rush or skip altogether: cleaning the mounting surface properly before you stick anything to it, and waiting out the full cure time before you load it with shampoo bottles and soap. Skip either one, and even a well-reviewed, high-quality caddy can end up back on the shower floor within days. Get both right, and the same caddy will hold reliably for years. This guide walks through the full process — choosing the right spot, prepping the surface, applying the adhesive, and respecting the cure time — so your installation lands in the second category. If you’re still deciding which caddy to buy, our shower caddy reviews compare adhesive, tension-pole, and hanging styles side by side. And if a hanging or corner-shelf design is also on your shortlist, our hanging shower caddy vs corner shower shelf comparison is worth a look before you commit to adhesive mounting.
At a Glance
| Skill Level |
Beginner-friendly — no tools required |
| Tools Needed |
Rubbing alcohol, a clean cloth, and the caddy itself — no drill or hardware needed |
| Time Needed |
5–10 minutes for the actual installation, plus a required cure time before use that varies by product, often 24 hours |
| Critical First Step |
Clean and fully dry the tile surface — this single step determines whether the caddy holds long-term |
✏️ Our Take
Installing an adhesive shower caddy is genuinely one of the easiest bathroom upgrades you can do — there’s no drilling, no tools beyond a clean cloth, and the whole process takes just a few minutes. The part that determines whether it actually works long-term isn’t the installation itself, it’s the surface prep beforehand and the patience to wait out the full cure time afterward. Skipping either of those two steps is the single most common reason adhesive caddies fail and end up back on the shower floor. Take the extra few minutes upfront, and the caddy will hold reliably for years.
Before You Start — Choosing the Right Spot
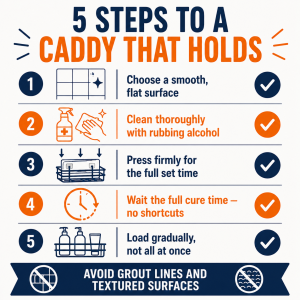
Adhesive holds well on some bathroom surfaces and poorly on others, so picking the right spot before you commit to sticking anything down matters more than most people expect. Smooth, non-porous surfaces are what adhesive is designed for — glazed ceramic tile, glass shower doors and enclosures, and fiberglass or acrylic shower surrounds all give the adhesive a flat, sealed surface to bond against. These materials don’t have the tiny pores or texture that let moisture and residue work their way underneath the adhesive over time.
Textured tile, natural stone, and unsealed grout lines are a different story. Textured surfaces reduce the actual contact area between the adhesive and the wall, since the adhesive can only bond to the raised portions of the texture rather than a continuous flat area. Natural stone is often slightly porous depending on the sealant used, and grout is porous by nature — both are considerably less reliable for long-term adhesive mounting, even when the rest of the installation is done correctly.
Once you’ve identified a suitable material, think about height and water exposure. Pick a spot at a comfortable reaching height so you’re not straining to grab items mid-shower, and if possible, position the caddy somewhere that isn’t in the direct line of the showerhead spray. Constant, direct water contact doesn’t necessarily cause an immediate failure, but it can gradually shorten the adhesive’s effective lifespan compared to a spot that only gets incidental splash and runoff.
💡 Tip: Avoid placing an adhesive caddy directly over a grout line — the uneven surface reduces the adhesive’s contact area and makes a secure hold much less likely. A flat, unbroken section of tile or glass holds best.
Step 1: Clean and Prepare the Surface
This is the step that determines whether your caddy holds for years or falls off within the first week, so it’s worth doing properly rather than rushing through it. Start by wiping the chosen spot thoroughly with rubbing alcohol on a clean cloth. Regular water rinsing, and even a normal soapy sponge, doesn’t fully clear the thin film of soap scum, body oil, and mineral residue that builds up on shower surfaces — rubbing alcohol cuts through that film in a way plain water can’t, leaving a genuinely clean surface for the adhesive to bond to. If your surface has visible hard water spots or mineral buildup, our guide to removing hard water stains from shower glass and fixtures covers how to clear that buildup fully before you start.
Once you’ve wiped the area down, let it air dry completely before moving on — don’t towel it dry or rush this part. Any remaining moisture on the surface, even a thin, barely visible film, significantly weakens how well the adhesive bonds on initial contact. Give it a few minutes of open air and confirm the surface looks and feels fully dry before you proceed to positioning the caddy.
Finally, once the surface is clean and dry, try not to touch it again with bare hands before applying the adhesive. Skin naturally carries oils, and even a light touch can transfer a small amount of that oil back onto the exact spot you just cleaned, undermining the work you just did. If you need to double-check the spot or reposition your plan, touch the surrounding tile instead of the cleaned target area itself.
⚠️ Warning: This is the step most people rush or skip entirely, and it’s also the single biggest reason adhesive caddies fail. A quick wipe with a regular towel isn’t enough — soap scum and oil residue need rubbing alcohol specifically to fully clear.
Step 2: Position and Mark the Placement
Before committing to the adhesive, hold the caddy up in your intended spot to confirm it actually fits comfortably. Check that it doesn’t interfere with the shower door swinging open, a shower curtain sliding along its rod, or any other fixture nearby, since these clearance issues are much easier to catch now than after the caddy is permanently stuck in place.
If it helps, lightly mark the corners or top edge of the caddy’s position with a small piece of removable tape. This gives you a reference point so you can confirm the exact placement and alignment right before you apply the adhesive, without having to hold the caddy up and eyeball it at the same time you’re trying to press it into place. A minute spent confirming placement here saves you from an off-center or awkwardly angled install you can’t easily correct afterward.
Step 3: Apply the Adhesive and Press Firmly
With your surface clean, dry, and your placement confirmed, it’s time to commit. Remove the adhesive backing according to your specific product’s instructions — some caddies use a single adhesive pad, while others use multiple smaller pads at different mounting points, so check the packaging rather than assuming a one-size-fits-all process.
Press the caddy firmly against your marked spot, lining it up with the reference points you set in the previous step. Once you make contact, apply steady, firm pressure across the entire adhesive surface — not just the center — for the full duration specified by the manufacturer, which is often somewhere in the 30 to 60 second range. Uneven pressure, where you press hard in the middle but leave the edges only lightly touching, is a common reason a caddy holds initially but starts peeling at the corners within a few days.
Once you’ve made initial contact and started applying pressure, avoid rocking, sliding, or repositioning the caddy. It’s tempting to nudge it slightly if you notice it’s a touch off-level, but doing so after contact has been made can actually weaken the bond before the adhesive has had a chance to properly set, since you’re disturbing the very surface contact you’re trying to establish. If the placement is genuinely off, it’s better to remove the caddy, re-clean the surface, and start the process over than to try to adjust it mid-application.
Step 4: Respect the Cure Time
Once the caddy is pressed firmly in place, the temptation is to immediately load it up with shampoo bottles and start using it. Resist that urge. Most adhesive products need a full cure period — often around 24 hours, though this varies by brand and adhesive formula — before the bond reaches its full holding strength. During this window, the adhesive is still chemically setting and hasn’t yet developed the strength it’s rated for.
Loading the caddy with any real weight before this cure time has finished is one of the single most common reasons an otherwise properly installed caddy fails within the first few days. The install can look completely secure right after you press it into place, which is exactly what makes this step easy to underestimate — the failure doesn’t show up until later, after weight has been placed on a bond that wasn’t actually ready for it yet.
💡 Tip: Check the specific cure time listed on your product’s packaging or instructions — it varies by brand and adhesive type. When in doubt, waiting the full 24 hours is the safer choice over guessing.
Step 5: Load the Caddy Gradually
Once the full cure time has passed, resist the urge to immediately load the caddy to full capacity with every bottle in your shower. Instead, add items gradually — start with one or two lighter bottles and use the caddy normally for a day or two before adding the rest.
This gradual approach lets you confirm the hold is genuinely secure under real, everyday use before you commit to a fully loaded shelf of heavier bottles, razors, and other items. If something about the installation wasn’t quite right — a spot on the surface that wasn’t fully clean, or a section of adhesive that didn’t get full pressure during application — a lightly loaded caddy will typically show early signs like slight sagging or edge lifting well before it fails outright, giving you a chance to catch and fix the problem before you lose a full shelf’s worth of contents.
Troubleshooting a Caddy That Won’t Stick
If your caddy falls within the first day or two of installation, the most likely culprit is one of the two steps covered above: either the surface wasn’t cleaned thoroughly enough with rubbing alcohol before installation, or weight was added before the full cure time had finished. In either case, the fix is to remove the caddy, thoroughly clean both the wall surface and the back of the caddy’s adhesive pad (or replace the pad if your product includes replacements), and reinstall following the full process — clean, dry, press, and wait — from the beginning.
If the caddy held successfully for weeks or months and only recently failed, the cause is often different. Over time, soap scum and mineral residue from hard water can gradually work their way in around the edges of the adhesive pad, slowly weakening the bond from the perimeter inward. This is a normal part of long-term wear in a wet environment rather than a sign anything was done wrong initially, and the fix is generally the same: clean both surfaces and reapply, ideally with a fresh adhesive pad if your caddy uses replaceable ones.
If a specific spot repeatedly won’t hold an adhesive caddy no matter how carefully you prep it, the surface itself may simply be a poor match for adhesive mounting — textured tile and grout lines are the most common offenders. In that case, it’s worth considering a different mounting style, such as a tension-pole caddy that wedges between the floor and ceiling or a hanging caddy that hooks over the showerhead, rather than continuing to fight an adhesive bond against a surface that was never going to hold it reliably.
US Regional Context: Bathroom tile types vary widely across US homes, from older ceramic tile to newer large-format porcelain or natural stone. If your bathroom uses a textured, porous, or natural stone surface, a tension pole or hanging shower caddy is often a more reliable long-term choice than adhesive mounting, regardless of how carefully the surface is prepped.
Need a Professional Plumber?
Installing an adhesive shower caddy is a genuine no-tools DIY job for almost everyone. But if you’re dealing with a larger bathroom project, a shower surround that needs repair before you can mount anything to it, or plumbing work you’d rather leave to a professional, search PlumberArchive.com — the US plumber directory with 12,000+ verified local plumbers across all 50 states.
Find a trusted plumber near you → PlumberArchive.com
Frequently Asked Questions
Q: How long should I wait before using an adhesive shower caddy?
Most adhesive shower caddies require a full cure time before you should place any real weight on them, often around 24 hours, though this varies by brand and adhesive formula. Check your specific product’s packaging or instructions for the exact recommended time. Loading the caddy too early, before the adhesive has reached its full bonding strength, is one of the most common reasons an otherwise properly installed caddy fails within the first few days.
Q: Why did my adhesive shower caddy fall off the wall?
The two most common causes are inadequate surface cleaning before installation and loading the caddy with weight before the cure time finished. A quick wipe with a regular towel or wet cloth isn’t enough — soap scum and oil residue need rubbing alcohol specifically to fully clear, and skipping that step is the single biggest reason adhesive caddies fail. If a caddy fails after weeks or months of otherwise successful use, gradually accumulated soap scum working in around the adhesive’s edges is often the culprit instead.
Q: Can I reuse the same adhesive if I need to reposition the caddy?
Generally, no — once an adhesive pad has been pressed into place and removed, its bonding strength is significantly reduced, and reusing it in a new spot typically won’t hold as reliably as a fresh pad. Many adhesive caddies are sold with replacement pads specifically for this reason, so if you need to reposition, use a new pad and follow the full cleaning and application process again on the new spot rather than reapplying the original one.
Q: Does adhesive mounting work on natural stone tile?
It can, but it’s less reliable than glazed tile or glass, since natural stone is often somewhat porous depending on how it’s sealed, and that porosity gives adhesive a less consistent surface to bond against. If you have natural stone in your shower and want a mounting option you can count on long-term, a tension-pole or hanging caddy is generally a safer bet than adhesive, regardless of how carefully you prep the surface.
Conclusion
Installing an adhesive shower caddy is about as simple as bathroom upgrades get — no drilling, no hardware, and the actual application takes just a few minutes. The real work, and the part that determines whether the caddy lasts, happens in the two steps that are easiest to rush: cleaning the surface thoroughly with rubbing alcohol until it’s completely free of soap scum and oil, and waiting out the full cure time before loading it with anything heavier than a bar of soap. Handle those two steps properly, and a well-chosen spot on smooth tile or glass will hold reliably for years.
If you haven’t picked a caddy yet, our shower caddy reviews compare adhesive, tension-pole, and hanging styles to help you choose the right mounting type for your bathroom. And if you’re tackling other shower-area upgrades at the same time, our shower squeegee reviews and our PEVA vs. fabric shower curtain liner comparison cover two more quick, no-tools improvements worth making at the same time.
Prices and ratings may change. Always check Amazon for current prices.
✍️ About This Guide
PTR Editorial Team — Plumbing Guides. We compare manufacturer specifications, installation requirements, compatibility and available product documentation to help homeowners choose suitable tools and parts. How we review →