
Guides
19 Oct 2026

Can’t Reach the Faucet Nut? Choose the Right Tool Before You Buy
Not sure which tool fits your faucet nut? Identify the fixing, see how it lets go and check your clearance first. Then choose a tool, or use one you own.
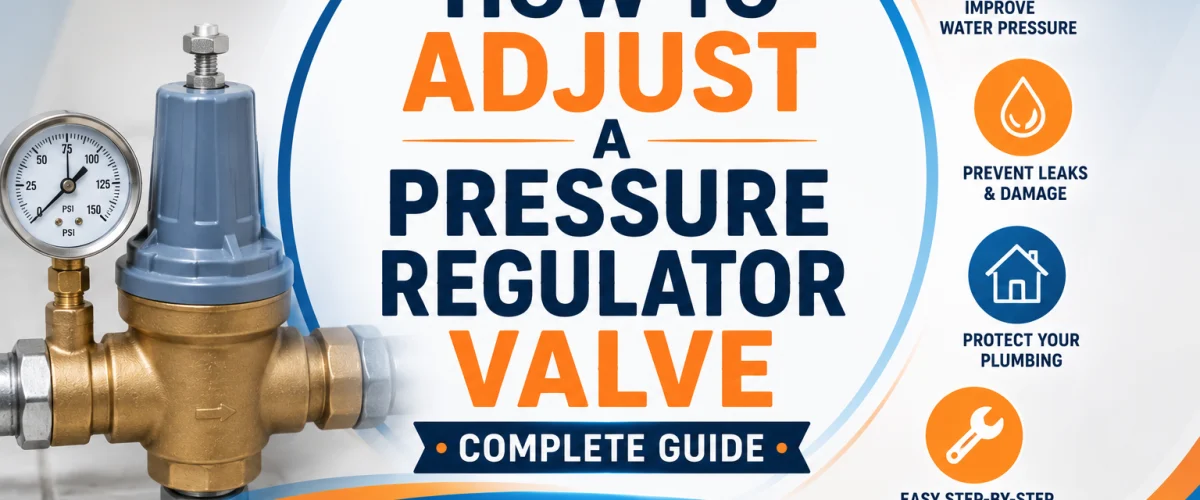
How to adjust a pressure regulator valve step by step — locate it, check PSI, make quarter-turn adjustments, and confirm the fix.
Please note: Information in this guide is based on our research at time of writing and is subject to change. Always consult a licensed plumber for diagnosis of serious plumbing issues before attempting repairs.
A pressure regulator valve (PRV) is the device that controls how much of your municipal water supply’s pressure actually reaches your home’s plumbing. Municipal systems often deliver water at well over 80 PSI, and without a regulator stepping that down to a safe range, every pipe joint, appliance, and fixture in your house takes on unnecessary wear. If you’ve already confirmed your pressure is too high or too low, adjusting the regulator valve is usually the direct fix.
The good news is that adjusting a PRV is a genuinely simple, beginner-level task once you know where to look and how to confirm the result — it’s a single adjustment screw or nut, not a full valve replacement. This guide walks through the entire process step by step, from locating the valve to confirming the new pressure holds across multiple fixtures. If you haven’t measured your current pressure yet, our guide to test your water pressure covers that first step in detail.
At a Glance
| Difficulty | Easy |
| Time | 15–30 Minutes |
| Cost | $ — no parts needed for adjustment, only if the valve itself needs replacing |
| Tools Needed | Adjustable wrench, pressure gauge (hose bib gauge), flathead or Phillips screwdriver (depending on valve type) |
| Skill Level | Beginner |
✏️ Our Take
Adjusting a pressure regulator valve is one of the simplest plumbing fixes a homeowner can do — it’s a single adjustment screw or nut, and the whole process takes under 15 minutes once you know where to look. The part people get wrong isn’t the adjustment itself, it’s skipping the before-and-after pressure check. Without a pressure gauge confirming the actual PSI, you’re just guessing whether a quarter turn helped or made things worse. Buy an inexpensive hose bib pressure gauge before you start — it turns this from guesswork into a five-minute confirmed fix.
IN THIS GUIDE
This is a short list, and most homeowners only need to buy one item before getting started:
If your existing regulator turns out to be failing rather than just misadjusted, our roundup of the best pressure regulator valves covers replacement options.
Step 1 — Locate Your Pressure Regulator Valve
Your pressure regulator valve is usually found where the main water line enters the house, often near the water meter or the main shutoff valve. Look for a bell-shaped or cone-shaped brass fitting on the main line, typically with an adjustment screw or bolt on top.
Not every home has one. Homes built without a PRV rely entirely on whatever pressure the municipal system delivers, with nothing stepping it down before it reaches your plumbing.
Screw the pressure gauge onto an outdoor spigot or a washing machine valve. Turn the water on fully and read the PSI. For a more detailed walkthrough of this step, our guide to test your water pressure covers gauge placement and reading technique in more depth.
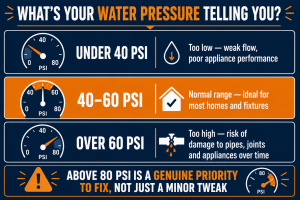
Plumbing codes cap static water pressure at 80 PSI and require a regulator above that, and many homes run comfortably in the 50–60 PSI range — EPA WaterSense specifications cap pressure at 60 PSI. Whatever you read here is your baseline reading — you’ll compare every adjustment against it.
Most regulator valves have a locknut that secures the adjustment screw in place. Use an adjustable wrench to loosen the locknut slightly — just enough to allow the adjustment screw to turn, not fully removed.
Turning the screw clockwise typically increases pressure, and counterclockwise typically decreases it — but confirm the direction for your specific valve model, since this can vary by manufacturer.
Make small adjustments — a quarter turn at a time. Resist the urge to make a larger turn just because the pressure change feels slow.
Read the pressure gauge again after each adjustment. Repeat Steps 4 and 5 until the reading falls within the 50–60 PSI range that many homes run comfortably in.
Municipal water pressure varies significantly by region and even by neighborhood elevation — homes at the bottom of a hill in hilly cities across the Pacific Northwest and parts of the Northeast often receive dangerously high incoming pressure from the municipal system, while homes at higher elevations or at the end of a long supply line may receive naturally low pressure regardless of a properly functioning regulator. If your regulator is adjusted correctly but pressure still reads far outside the 50–60 PSI range many homes run comfortably in, the issue may be your municipal supply pressure itself rather than the valve — contact your water utility to ask about typical incoming pressure for your specific address.
Once the pressure is correctly set, hold the adjustment screw steady and tighten the locknut back down. Do not overtighten — snug is sufficient to hold the setting in place.
Check pressure and flow at a few different fixtures around the house — not just the one near the gauge. Confirm both hot and cold water pressure feel consistent.
If turning the adjustment screw has no effect on the pressure reading at all, the valve itself may be failing internally rather than simply being out of adjustment.
Visible corrosion, leaking around the valve body, or a screw that won’t hold its position are all signs of a valve that needs replacing, not adjusting. Our roundup of the best pressure regulator valves covers models worth considering if yours needs to be swapped out.
If adjusting the regulator doesn’t resolve your pressure issue, or if the valve shows signs of failure, that’s a good point to bring in a professional rather than continuing to troubleshoot on your own. Find a licensed plumber in your area at PlumberArchive.com — the US plumber directory with 12,000+ verified local plumbers across all 50 states.
Get weekly plumbing tips, honest tool reviews and DIY maintenance guides delivered straight to your Facebook feed. We cover water pressure, leak protection, pipe maintenance and everything in between — written for US homeowners who want to handle more themselves.
On most residential regulator valves, turning the adjustment screw clockwise increases pressure and turning it counterclockwise decreases it. However, this can vary by manufacturer and valve design, so confirm the direction for your specific model before making adjustments — and always start with a quarter turn to see which way the pressure moves before continuing.
Plumbing codes cap static water pressure at 80 PSI and require a regulator above that, and many homes run comfortably in the 50–60 PSI range, with EPA WaterSense specifications capping pressure at 60 PSI. Pressure well below that range often shows up as weak flow at fixtures, while pressure above 60 PSI — and especially above 80 PSI — puts unnecessary strain on appliances, water heaters, and pipe joints over time. Our guide to water pressure too high or too low covers how to recognize the symptoms of each.
Most homeowners can safely adjust a PRV themselves — it’s a beginner-level task involving an adjustable wrench, a screwdriver, and a pressure gauge, with no cutting into pipes or plumbing modification required. Call a licensed plumber if the adjustment screw has no effect on pressure, if you see corrosion or leaking around the valve body, or if you’re not comfortable working near your home’s main water line.
A properly functioning PRV doesn’t need routine adjustment — once it’s set correctly, it should hold that setting for years. That said, it’s worth checking your pressure with a gauge once or twice a year, or any time you notice a change in water flow, since municipal supply pressure can shift over time and valves can drift or begin failing as they age. Regulator service life is often said to run roughly 10 to 15 years, but it varies with water quality, pressure and maintenance, and many valves can be repaired with a service kit instead of being replaced.
Adjusting a pressure regulator valve is a simple, beginner-friendly fix — but only when a pressure gauge is confirming the results at every step. Skipping that check turns a five-minute confirmed fix into pure guesswork.
Make small quarter-turn adjustments and recheck after each one rather than assuming a bigger turn will get you there faster. If adjustment doesn’t resolve the issue — the screw has no effect, or the valve shows signs of corrosion or leaking — the valve itself may need replacing rather than continued troubleshooting.
If you haven’t yet confirmed whether your pressure is actually out of range, start with our guide to water pressure too high or too low, and our guide to test your water pressure covers how to take an accurate reading. If your existing regulator needs to be replaced rather than adjusted, our roundup of the best pressure regulator valves covers the options worth considering.
✍️ About This Guide
PTR Editorial Team — Plumbing Guides. We compare manufacturer specifications, installation requirements, compatibility and available product documentation to help homeowners choose suitable tools and parts. How we review →
Not sure which tool fits your faucet nut? Identify the fixing, see how it lets go and check your clearance first. Then choose a tool, or use one you own.
Check your manual and the drain route first: gravity hose, built-in pump or external pump. Then see whether you need a dehumidifier hose at all.
Explore portable bidets that need no water-line connection, from bottle caps and squeeze bottles to battery-powered handhelds.

