Introduction
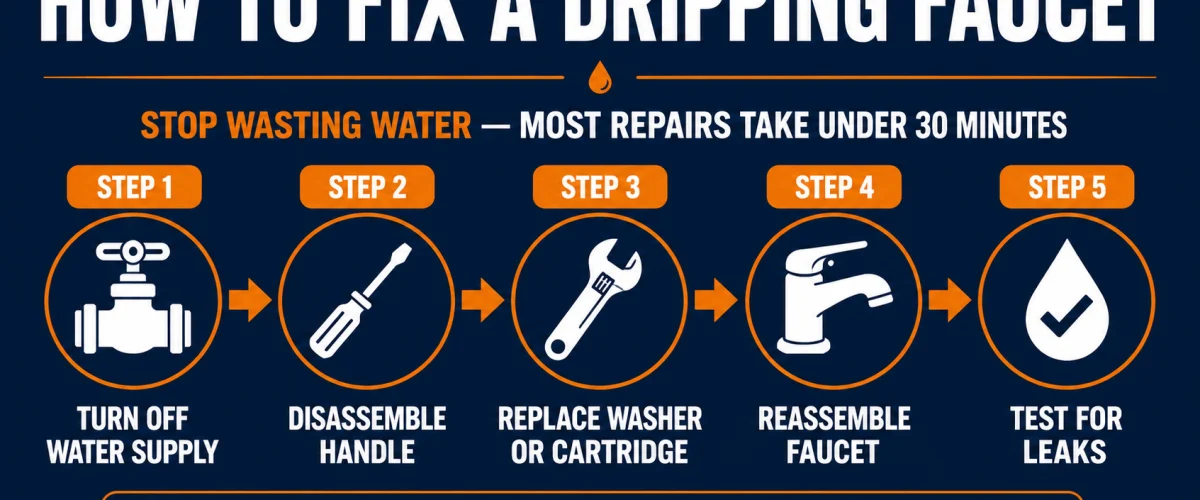
A dripping faucet is one of those household problems that’s easy to ignore — but the cost of doing nothing adds up fast. A single faucet dripping once per second wastes more than 3,000 gallons of water per year, and a faster leak can push that well above 10,000 gallons annually. That’s real money quietly disappearing from your water bill every month.
The good news: most faucet repairs take under 30 minutes with a basic set of hand tools, and you don’t need any prior plumbing experience. There are four main residential faucet types — ball, cartridge, ceramic disc, and compression — and each has a slightly different fix. This guide walks you through identifying your faucet type and repairing the drip yourself, step by step.
If you’ve already noticed water pooling under the sink alongside your drip, also check our guide on how to fix a leaking pipe — a faucet drip and a supply line leak can sometimes occur together. And if you’re concerned about hidden water damage elsewhere in the home, our roundup of the best water leak detectors will help you stay one step ahead before damage sets in.
Tools & Materials You’ll Need
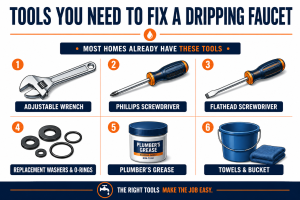
You won’t need any specialist plumbing equipment for most faucet repairs. Here’s what to have ready before you start:
Tools
- Adjustable wrench — for loosening packing nuts and retaining collars
- Flathead screwdriver — for prying off decorative caps and slotted screws
- Phillips screwdriver — for handle screws on most modern faucets
- Needle-nose pliers — for gripping small parts like springs and retaining clips
- Towels and a small bucket — to catch residual water when you open the faucet body
Replacement Parts & Supplies
- Replacement washers and O-rings — the most common fix on compression and cartridge faucets
- Replacement cartridge — needed when the whole cartridge unit has worn out
- Replacement ball, springs, and seats — the repair kit for ball-type faucets
- Plumber’s grease — to lubricate O-rings and rubber seals before reassembly
For a quality set of hand tools that covers every repair in this guide, see our roundup of the best plumbing tool kits — a good kit is worth having on hand for every DIY plumbing job.
How to Fix a Dripping Faucet: Step-by-Step
Step 1 — Identify Your Faucet Type
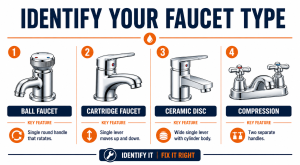
Before you reach for any tools, identify which type of faucet you’re working with. The internal mechanism determines which parts wear out and exactly how you fix the drip. The four types found in most US homes are:
- Ball faucet — A single handle that rotates in all directions: left and right for temperature, up and down for flow. Common in kitchens. A slotted rotating ball inside the body controls water through springs and rubber seats.
- Cartridge faucet — Single or double handle that moves up and down to control flow. Action feels smooth and consistent. Repairs involve pulling out and replacing a self-contained cartridge unit.
- Ceramic disc faucet — Single lever with a noticeably wide, cylindrical body beneath the spout. Moves side to side for temperature and up and down for flow. Uses two ceramic discs that slide against each other to control water.
- Compression faucet — The oldest and most common type in older homes. Two separate handles — one hot, one cold — that you turn and tighten down to stop the flow. A rubber washer at the base of each stem creates the seal.
💡 Tip: Not sure which type you have? Check under the sink for the brand name on the faucet body or the supply line packaging. Search that brand name plus “faucet type” and your model number — most manufacturers publish parts diagrams that confirm the mechanism in seconds.
Step 2 — Turn Off the Water Supply
Before touching anything inside the faucet, cut the water supply. Look under the sink for two shutoff valves — one on the hot supply line and one on the cold. Turn both clockwise until they stop. If the valves feel stiff or haven’t been turned in years, use a cloth for extra grip and turn slowly — never force them. If a valve won’t budge at all, use your home’s main shutoff valve instead.
Once both valves are closed, open the faucet handle fully to release any water pressure remaining in the supply lines. Let it run until the flow stops completely. Place a towel or small bucket under the faucet and beneath the supply connections under the sink to catch any residual drips as you work.
⚠️ Warning: Never skip the shutoff step. Working on a faucet with live water pressure can flood the cabinet under your sink in seconds. Water damage to cabinets, flooring, and subfloor can cost thousands of dollars to repair — far more than any faucet fix.
Step 3 — Disassemble the Faucet Handle
With the water off, you can safely open up the faucet. The exact steps vary slightly by faucet type, but the general disassembly process is the same across all four:
- Remove the decorative cap — Look for a small plastic or chrome cap on the top or front of the handle, typically covering a screw hole. Pry it off carefully with a flathead screwdriver. On some faucets it simply pulls off by hand.
- Unscrew the handle screw — With the cap off, you’ll find a screw — usually Phillips head. Remove it completely and set it somewhere safe.
- Pull off the handle — Lift or pull the handle straight up and off the stem. If it feels stuck, check for a second hidden screw before using force. A gentle side-to-side wiggle usually frees a stubborn handle.
- Access the internal mechanism — Depending on your faucet type, you may need to unscrew a packing nut or retaining collar with your adjustable wrench to expose the cartridge, ball, or stem underneath.
💡 Tip: Take a photo of the faucet interior on your phone before removing any parts. Reassembly is far easier when you have a reference image, and it also helps when matching parts at the hardware store.
Step 4 — Fix by Faucet Type
This is where the repair diverges depending on the faucet type you identified in Step 1. Work through the section that applies to you:
Ball Faucet
A dripping ball faucet is almost always caused by worn springs and seats — the small rubber-tipped springs inside the housing that press against the rotating ball. With the handle off and the cap and collar removed, lift out the ball and set it aside. Inspect it for cracks or scoring and replace it if it looks worn. Use needle-nose pliers to pull out the old springs and their rubber seat inserts. Drop in new springs and seats (ball faucet repair kits include everything you need), then reseat the ball. Check the O-rings around the faucet body and swap those out too while you have it open.
Cartridge Faucet
With the handle removed and any retaining clips or nuts taken off, the cartridge pulls straight out of the faucet body — it should come free with a firm upward pull. Note its orientation before removing: cartridges are keyed and must go back in facing the same direction. Take the old cartridge to your local hardware store to match it exactly, or look up your faucet brand and model number to order an OEM replacement. Press the new cartridge fully into the body until it seats, refit the retaining clip or nut, and reassemble the handle.
Ceramic Disc Faucet
Remove the wide cylindrical cartridge from the faucet body — this is the housing that contains the two ceramic discs. Open the cylinder and inspect the discs carefully. In many cases they aren’t cracked; mineral deposits from hard water are simply breaking the seal between them. Soak the discs in white vinegar for an hour and scrub gently with a soft-bristle brush to remove scale buildup. If either disc is cracked or has visible scoring, replace the entire cylinder. Ceramic disc faucets are among the most durable on the market — a good cleaning often resolves the drip with no new parts needed.
Compression Faucet
Compression faucets drip because the rubber washer at the bottom of the stem no longer presses firmly enough against the seat. With the handle off and the packing nut removed, pull the stem straight out. Look at the very bottom of the stem — you’ll see a rubber washer held in place by a brass screw. Remove the screw, take out the old washer, and replace it with an exact match (bring it to the hardware store to compare). While the stem is out, check the O-ring around its middle and replace that too. This is the simplest and cheapest of all four faucet repairs — the parts typically cost under a dollar.
Step 5 — Reassemble and Test
Reassemble the faucet by reversing the disassembly steps. Refit the internal mechanism first, then the retaining nut or collar, then the handle, then the handle screw, and finally the decorative cap. Before fitting any rubber O-rings, apply a thin coat of plumber’s grease — this extends the life of the rubber and gives the mechanism a smoother feel.
Once everything is back in place, turn the shutoff valves back on slowly — counterclockwise, one quarter-turn at a time — rather than opening them fully all at once. This is especially important in older plumbing where sudden pressure changes can stress connections. With both valves open, test the faucet by turning it on and off several times. Inspect the spout for any remaining drip and check under the sink for moisture around the supply connections.
If water pressure seems lower or higher than usual after the repair, a simple gauge reading will confirm whether it’s within the normal range. See our guide to the best water pressure gauges for the most reliable options for home use.
🔧 DIY OR HIRE A PLUMBER?
Not sure if this is a job you can do yourself?
Use our free Plumbing Cost Estimator to compare DIY costs vs hiring a licensed plumber — takes just 30 seconds.
Try the Free Estimator →
When to Call a Plumber
Most dripping faucet repairs are solidly within DIY reach. But there are a few situations where the problem goes beyond a worn washer or cartridge, and calling a licensed plumber is the right call:
- Crack in the faucet body — If the faucet body itself is cracked, no washer or cartridge replacement will fix the drip permanently. The whole faucet needs replacing, and a plumber can ensure the supply connections and shutoff valves are in good shape at the same time.
- Corroded valve seat — The valve seat is the metal surface inside the faucet body that the washer or cartridge presses against to form a seal. Run your finger around the inside — if it feels rough, pitted, or uneven, the seat is corroded. Resurfacing or replacing a valve seat requires a seat wrench and some experience; if you’re not confident, a plumber is the better option.
- Multiple fixtures dripping simultaneously — If more than one faucet, showerhead, or fixture starts dripping at the same time, that’s rarely a coincidence. It can indicate a water pressure problem or a fault in the supply lines that goes beyond any single faucet fix.
- Shutoff valves that won’t fully close — If the valves under your sink are stuck open or dripping themselves, don’t force them. A plumber can replace them cleanly without risking damage to the supply lines.
Frequently Asked Questions
Q: How much water does a dripping faucet waste per day?
A faucet dripping at roughly one drip per second wastes around 8 gallons of water per day — that’s over 3,000 gallons per year from a single faucet. A faster drip or a faucet that’s more than just trickling can waste far more. According to the EPA, household leaks collectively waste close to 1 trillion gallons of water every year across the US, and dripping faucets are consistently among the biggest contributors. Fixing even a slow drip is one of the most impactful things you can do to cut your water bill.
Q: How long does it take to fix a dripping faucet?
Most faucet repairs take 20 to 45 minutes for a first-timer with the right replacement parts on hand. A compression faucet washer swap is the fastest — experienced DIYers get it done in under 15 minutes. Cartridge replacements typically take around 20 to 30 minutes. Ball faucet repairs run a little longer at 30 to 45 minutes because there are more small parts to manage. Budget extra time for your first repair — the second one will go significantly faster once you know how the faucet comes apart.
Q: Can I fix a dripping faucet without a plumber?
Yes — the vast majority of dripping faucets are entirely DIY-fixable without any special training or a plumbing license. The two things you need are the correct replacement part and the patience to work carefully without forcing anything. If you follow the steps in this guide and the drip continues after reassembly, check that the replacement part is the right size and inspect the valve seat for corrosion. A plumber is only necessary when the faucet body is cracked, the valve seat is beyond cleaning or resurfacing, or the shutoff valves themselves have failed.
Q: Why does my faucet drip after I replaced the washer?
If the drip continues after a washer replacement, there are three common causes to check. First, confirm the washer size — one that’s even slightly too small won’t create a complete seal against the seat. Second, inspect the valve seat itself: run your finger around the circular ridge the washer presses against. If it feels rough, pitted, or uneven, mineral buildup or corrosion is preventing a proper seal, and no washer will fix it until the seat is resurfaced or replaced. Third, make sure the handle screw is fully tightened and the stem is correctly seated — a loose assembly can allow water past the washer even when it’s the right fit.
Conclusion
A dripping faucet is one of the most approachable plumbing repairs a homeowner can tackle. Whether you’re dealing with a vintage compression faucet on an older home or a modern cartridge-based single handle in the kitchen, the process is the same: identify the type, shut off the water, disassemble carefully, swap the worn part, and test. Most people who attempt this repair are surprised by how straightforward it is — and by how satisfying it is to finally silence that drip for good.
If you need to stock up on tools before you start, our guide to the best plumbing tool kits covers everything you need for this repair and keeps you prepared for whatever your plumbing throws at you next. A basic kit is a one-time investment that pays for itself the first time you fix something yourself instead of calling someone out. The cartridge is the part behind most drips: our best faucet cartridges guide covers replacements, and cartridge vs aerator helps you confirm which part is actually the problem.
Please note: Product availability and information are based on our research at time of writing and are subject to change. Always check Amazon for the latest details before purchasing.
✍️ About This Review
PTR Editorial Team — Plumbing Guides. We compare manufacturer specifications, installation requirements, compatibility and available product documentation to help homeowners choose suitable tools and parts. How we review →