
Guides
19 Oct 2026

Can’t Reach the Faucet Nut? Choose the Right Tool Before You Buy
Not sure which tool fits your faucet nut? Identify the fixing, see how it lets go and check your clearance first. Then choose a tool, or use one you own.
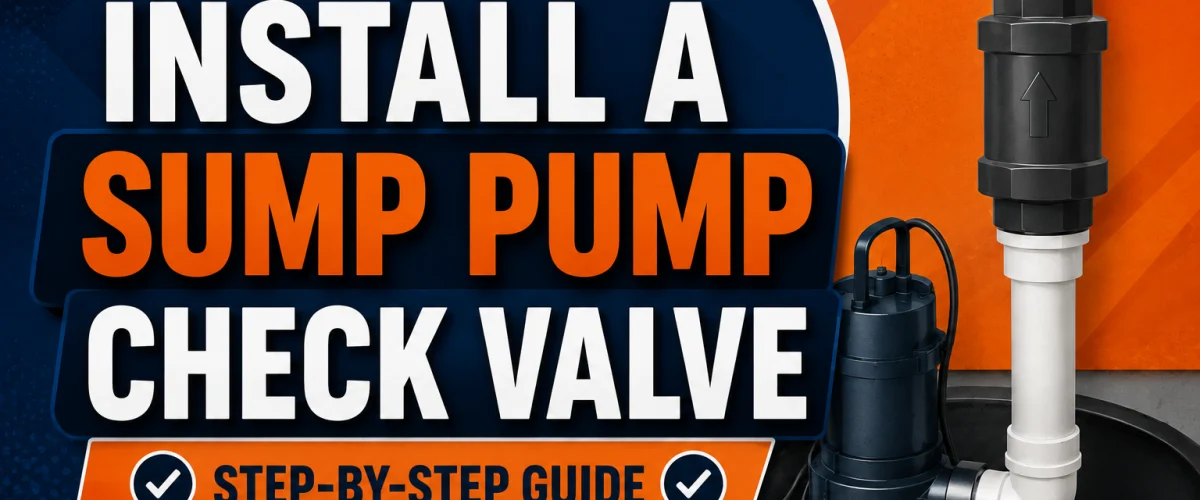
A sump pump check valve stops discharged water from flowing back into the pit — here's how to install one correctly, including the mistake that causes most installation problems.
Please note: Information in this guide is based on our research at time of writing and is subject to change. Always follow the instructions supplied with your specific check valve and sump pump, and consult a licensed plumber if you encounter conditions beyond the scope of this guide.
A sump pump check valve is a one-way valve that sits in the discharge pipe and keeps water the pump has already pushed upward from draining back down into the pit once the pump shuts off. Without it, that column of water falls straight back in, the float switch trips again within seconds, and the pump runs far more often than it needs to — extra cycling that wears the motor out ahead of schedule.
Installing one, or replacing a valve that has stopped sealing, is an approachable project. The mechanical part is simple: cut the discharge pipe, set the valve into the gap, and clamp or thread it tight. The detail that trips people up is orientation — every check valve has a flow arrow, and a valve installed backward blocks nothing, so the pit refills as if no valve were there. This guide walks through it step by step, with the flow-direction check up front where it belongs. If you’re still deciding which valve mechanism to install, our swing vs spring-loaded check valve comparison covers that decision first.
At a Glance
| Skill Level | Beginner-friendly DIY |
| Tools Needed | Hacksaw or pipe cutter; adjustable wrench or a screwdriver/nut driver for the hose clamps, depending on valve type; tape measure and a marker |
| Time Needed | Roughly 20–30 minutes |
| Critical First Step | Confirm the flow arrow direction on the valve before cutting or installing anything |
✏️ Our Take
Installing a sump pump check valve is a quick, approachable project, and the mechanical part of the job — cutting the pipe and securing the valve — is genuinely simple. The detail that actually matters is orientation: every check valve has a flow arrow indicating the correct direction water should travel, and installing it backward defeats the entire purpose. Take a moment to confirm that arrow before you cut anything, and the rest of the installation goes smoothly.
IN THIS GUIDE
When a sump pump shuts off, the discharge pipe above it is still full of water. With nothing to stop it, that water falls back down through the pump into the pit, which refills and restarts the pump almost immediately — often within a second or two. That rapid on-off pattern, short-cycling, is what wears a sump pump out: the motor is worn by how many times it starts, not by hours run, so every needless cycle costs service life.
A check valve closes the instant the pump stops, trapping the discharged water in the pipe above it so nothing flows back, and the pump only restarts when real groundwater raises the level. If you are also shopping for the pump, our sump pump reviews cover current options; this guide assumes the pump is in place and you are adding or replacing the valve.
Install the check valve on the vertical discharge pipe, close to the pump — within the first foot or two above the outlet, before the pipe turns horizontal or leaves the building. Low on the vertical run, the valve holds back water in the entire length of pipe above it.
Mount it too high, or on a horizontal section, and the pipe below it still drains into the pit every cycle — partly defeating the purpose and making the valve slam harder. You only need a few inches of straight pipe below the valve for the coupling to grip; on most installations the obvious spot is between the pump outlet and the first elbow.
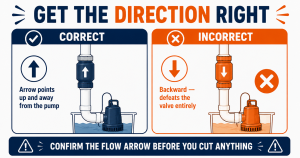
Before any cutting, find the flow arrow on the valve — molded or printed on the body, usually on the side. It shows the direction water is meant to travel.
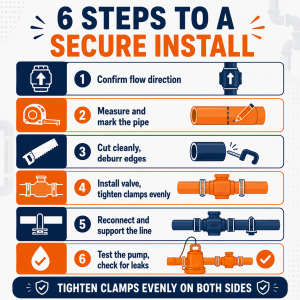
1. Set the valve beside the pipe in the orientation you plan to use.
2. Confirm the arrow points up and away from the pump, not back toward it. On a vertical pipe, that means straight up.
3. If the valve body is clear, look inside: upward flow should push the flapper open, downward flow should push it shut.
1. Hold the valve against the discharge pipe at the spot you chose, centered where you want it to end up.
2. Account for how it connects: a slip-on valve needs the pipe to slide a set depth into each rubber coupling, so the gap you cut is shorter than the valve body. A threaded or union valve mates to the pipe ends or adapters directly.
3. Mark a top cut line and a bottom cut line. The gap between them equals the valve body length minus the pipe that seats into each end.
4. Check that both marks run square around the pipe, not at an angle.
1. Support or hold the pipe so it will not drop or twist when it is cut through.
2. Cut cleanly at both marks with a hacksaw or pipe cutter. A pipe cutter gives the squarest edge; with a hacksaw, keep the blade perpendicular so the cut stays straight.
3. Lift out the removed section. You now have a gap sized for the valve.
4. Deburr both cut ends with a utility knife, file, or sandpaper. Smooth ends seat fully and seal; burrs can hold a coupling open just enough to weep.
How the valve attaches depends on its type — our sump pump check valve reviews cover the slip-on, union, and threaded styles if you have not bought one yet.
Slip-on / rubber-coupling valves:
1. Loosen the hose clamps and slide a coupling onto each pipe end (or onto the valve first, depending on the design).
2. Position the valve in the gap with the flow arrow pointing up, away from the pump.
3. Push the pipe ends fully into the couplings, against the internal stop.
4. Tighten the hose clamps with a nut driver or screwdriver.
Threaded or union valves:
1. Apply pipe thread sealant or PTFE tape to the male threads, wrapping in the tightening direction.
2. Hand-thread each connection, then snug it with a wrench — firm, not forced; overtightening cracks plastic fittings.
3. On a union valve, hand-tighten the union nut, then a modest turn more with the wrench.
With either type, check once more that the flow arrow points away from the pump before moving on.
1. With the valve secured at both ends, check that the rest of the discharge line is properly supported — the new fitting should not be carrying the weight of the pipe above it.
2. Re-secure any pipe straps, hangers, or brackets loosened or removed for the work.
3. If the line runs far before its next support, add a strap within a foot of the valve so vibration and the valve’s closing force are not driven into the couplings.
4. Confirm the pump still sits flat in the pit and its float has clear room to move.
1. Restore power to the pump if you unplugged it.
2. Pour a bucket or two of water into the pit until the float rises and the pump starts (a test button works too).
3. Watch the valve fitting through the whole cycle for water beading at the couplings or threads under pressure.
4. Let the pump shut off. It should stay off — an immediate restart means water is getting back past the valve, so recheck the arrow and the seating.
5. Run two or three more cycles and re-inspect — a coupling that will weep often does so only after a few pressure cycles.
Installing the valve backward. The most common mistake by far — a reversed valve holds nothing back. Confirm the flow arrow before cutting and again after clamping.
Mounting it too far from the pump. High on the run or on a horizontal section, it leaves a tall column of pipe draining into the pit every cycle and slams harder when it closes. Keep it low on the vertical pipe.
Overtightening. Crushing a rubber coupling or cranking a plastic body past snug can crack it, and a cracked fitting leaks under pressure. Tighten to firm and stop.
Leaving the line unsupported. The pipe above the valve needs its hangers back. An unsupported run puts a constant bending load on the new couplings and works them loose over months.
Banging or thumping when the pump shuts off. This is water hammer — the moving column of water stopping abruptly as the valve snaps shut. It is worse with basic swing-style flapper valves and with valves mounted high on the run. A spring-loaded or union-style “quiet” check valve closes more gradually, and mounting the valve lower helps. Pipe insulation where the line contacts framing dampens the sound carried into the room.
A weeping coupling. Almost always a tightening or seating issue, not a bad valve. Re-tighten the clamps evenly, a little on each side in turn. If it still weeps, loosen the coupling, confirm the pipe end is deburred and pushed fully to the stop, and re-clamp.
The pump cycles more than before. Check the flow arrow first — a backward valve makes cycling worse, not better. If the arrow is right, make sure the flapper is not held open by a burr or debris and that the valve matches your discharge pipe size.
If the discharge pipe is in an awkward spot, or the pump keeps short-cycling after you have checked the valve, bringing in a professional is a reasonable call. Search PlumberArchive.com — the US plumber directory with 12,000+ verified local plumbers across all 50 states.
Get weekly plumbing tips and DIY guides delivered straight to your Facebook feed.
The arrow points the way water flows when the pump runs — away from the pump, toward the outlet. On the vertical pipe above a sump pump, that means straight up. An arrow pointing down toward the pump means the valve is backward and water will drain right back into the pit. Confirm it before cutting and again after clamping.
On the vertical discharge pipe, within the first foot or two above the pump outlet, before the pipe turns horizontal or leaves the building. Low on the vertical run, it holds back water in all the pipe above it. Higher up, or on a horizontal run, leaves pipe that still drains into the pit each cycle and makes the valve slam louder.
That noise is water hammer — the water column in the discharge pipe stopping suddenly when the valve closes. It is normal to a degree with basic flapper valves, and louder when the valve sits high on the run. A spring-loaded or union-style “quiet” valve closes more gradually; mounting the valve lower and insulating the pipe where it touches framing also help.
Only if the discharge line already has a union, threaded joint, or flexible coupling you can open to insert the valve. Most sump lines are a continuous PVC run, so installing a check valve means cutting the pipe to make a gap. The cut is quick with a hacksaw or pipe cutter, and a slip-on valve rejoins the pipe without solvent welding.
Installing a sump pump check valve is a short job with one detail that outweighs the rest: the flow arrow has to point away from the pump. Get that right, keep the valve low on the vertical discharge pipe near the outlet, tighten the couplings evenly to firm rather than forced, put the pipe supports back, and run the pump through several cycles while watching the fitting before you call it done.
A working check valve is one of the cheapest things protecting your pump from premature wear. It pairs well with our how to winterize a sump pump guide for seasonal shutdown, and our sump pump check valve reviews if you still need to choose the valve.
Prices and ratings may change. Always check Amazon for current prices.
✍️ About This Guide
PTR Editorial Team — Plumbing Guides. We compare manufacturer specifications, installation requirements, compatibility and available product documentation to help homeowners choose suitable tools and parts. How we review →
Not sure which tool fits your faucet nut? Identify the fixing, see how it lets go and check your clearance first. Then choose a tool, or use one you own.
Check your manual and the drain route first: gravity hose, built-in pump or external pump. Then see whether you need a dehumidifier hose at all.
Explore portable bidets that need no water-line connection, from bottle caps and squeeze bottles to battery-powered handhelds.

