Product availability and information are based on our research at time of writing and are subject to change. Always check Amazon for the latest details before purchasing.
A running toilet is more than just an annoyance — it’s one of the most wasteful (and expensive) problems in the average home. That constant hissing or trickling from your bathroom can waste over 200 gallons of water per day, adding $100 or more to your annual water bill without you even noticing. And in the vast majority of cases, the culprit is a single worn-out rubber part: the toilet flapper.
The toilet flapper is the rubber seal at the bottom of your tank that opens when you flush and closes to hold water until the next flush. Over time, rubber degrades, warps, and collects mineral deposits — and it stops sealing properly. The result? Water silently leaks from the tank into the bowl, and your fill valve runs constantly to compensate.
The good news is that learning how to replace a toilet flapper is one of the simplest DIY plumbing repairs you can make. You don’t need a plumber, special tools, or any plumbing experience. With a $5–$10 replacement flapper from your local hardware store or Amazon, you can fix a running toilet in under 30 minutes — often less. This step-by-step guide walks you through the whole process, from turning off the water to testing your fix.
While you’re here, take a look at our best toilet repair kits guide — a complete kit gives you the flapper, fill valve, and flush valve in one box for a full toilet tank rebuild if needed.
What You’ll Need
🔧 DIY OR HIRE A PLUMBER?
Not sure if this is a job you can do yourself?
Use our free Plumbing Cost Estimator to compare DIY costs vs hiring a licensed plumber — takes just 30 seconds.
Try the Free Estimator →
Toilet flapper replacement requires almost no tools. Here’s what to have on hand before you start:
Tools
- Rubber gloves — optional, but keeps things clean
- Towel or sponge — for any residual water in the tank bottom
- Scissors — occasionally needed to trim a new chain
Replacement Flappers
These are the two most reliable universal flappers on the market, compatible with the majority of toilet brands including American Standard, Kohler, TOTO, and most other standard 2-inch flush valves:
| Flapper |
Best For |
Material |
Price |
Korky 5030BP
TOP PICK |
Chlorinated water, long life |
Chloramine-resistant rubber |
~$8 |
| Fluidmaster 502P21 |
Easy install, first-timers |
Durable rubber + easy-clip chain |
~$7 |
Korky 5030BP Universal Toilet Flapper — The Korky is our top pick for toilet flapper replacement. Made from chloramine-resistant rubber that outlasts standard flappers, with a universal fit that works on most toilets right out of the box. Adjustable float lets you fine-tune water usage.
🛒 Check Price on Amazon →
Fluidmaster 502P21 Toilet Flapper — Fluidmaster is the name most plumbers reach for first. This adjustable flapper fits most 2-inch flush valves and includes a chain with an easy-to-use clip. Excellent seal and long-lasting material.
🛒 Check Price on Amazon →
Not sure which to choose? Both are excellent. The Korky tends to last slightly longer in areas with heavily chlorinated water; the Fluidmaster is marginally easier to install for first-timers. You can’t go wrong with either.
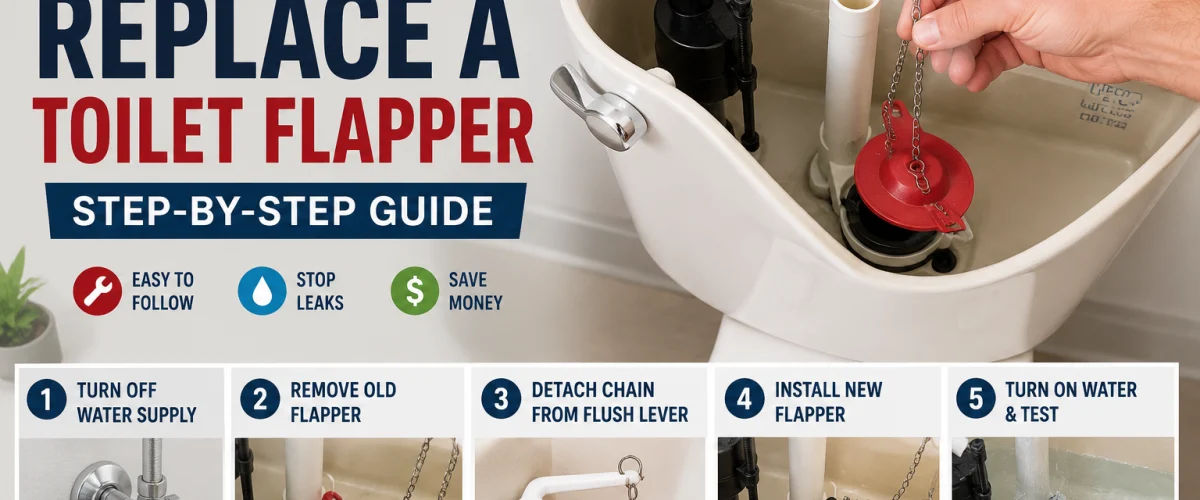
How to Replace a Toilet Flapper: Step-by-Step Instructions
Step 1: Turn Off the Water Supply
Before you do anything else, shut off the water to the toilet. Look for the shutoff valve on the wall or floor behind and to the right of the toilet base — it’s usually a small oval or football-shaped handle, or a flat-head screwdriver slot on a round valve.
Turn it clockwise until it stops. Don’t force it — if it hasn’t been turned in years, it may feel stiff. If the valve won’t budge or begins to drip, use the main house shutoff and call a plumber to replace the valve separately. Once it’s closed, no more water will enter the tank.
⚠️ Warning: If the shutoff valve hasn’t been used in many years, it may seize or begin to leak when turned. Close it gently — forcing it can crack older valves. If it drips from the packing nut, wrap with plumber’s tape or replace the valve before proceeding.
Step 2: Flush to Empty the Tank
Hold the flush handle down for a full flush to drain as much water as possible from the tank. Most of the water will drain out, leaving just an inch or two in the bottom. You can use a sponge or folded towel to soak up the remaining water — this makes the next steps cleaner and easier, especially if you’re sensitive about reaching into a wet tank.
You don’t need the tank to be bone dry to proceed, but removing that last bit of standing water prevents splashing when you lift the flapper out.
Step 3: Remove the Old Flapper
Remove the toilet tank lid and set it somewhere safe — they’re ceramic and break easily. Now look at the bottom of the tank. You’ll see the large overflow tube (the tall vertical tube in the center) with the flapper sitting over the opening at its base.
Most flappers attach via two side ear pegs that clip onto tabs on either side of the overflow tube. Pinch or unclip each ear from its peg. Then disconnect the chain from the flush handle arm (the metal or plastic lever connected to the flush handle) — the chain usually clips onto one of several holes along the arm.
Lift the old flapper out and set it aside. If yours slides over the overflow tube rather than clipping to the side, pull straight up and off.
💡 Tip: Before unclipping the old flapper, take a quick photo with your phone showing exactly how the ears attach to the pegs and where the chain clips onto the handle arm. This takes two seconds and gives you a perfect reference when installing the replacement — especially useful if this is your first time.
Step 4: Note the Flapper Size and Type
Before heading to the hardware store or ordering online, take a moment to identify what you need. The two most common flapper sizes are:
- 2-inch flappers — by far the most common, used on most toilets manufactured before 2005 and many made after.
- 3-inch flappers — used on larger flush valves found in many newer toilets, particularly those with a single larger hole at the tank bottom.
💡 Tip: The quickest size test: if you can cover the flush valve opening with a standard coffee mug, it’s a 2-inch valve. If the opening is wider than that, you likely have a 3-inch valve. You can also check the brand and model number stamped inside the back of the tank and look up the manufacturer’s recommendation online.
Or simply bring the old flapper with you to match it in person — hardware stores carry both sizes.
Step 5: Choose the Right Replacement Flapper
For most standard toilets, a universal flapper like the Korky 5030BP or Fluidmaster 502P21 will work perfectly. Universal flappers are designed to fit the ear-peg style overflow tube found in the vast majority of American toilets and are the simplest toilet flapper replacement option.
However, a few brands require specific flappers:
- Kohler Class Five flush systems often need a Kohler-branded flapper
- American Standard Flushometer and some TOTO models may require manufacturer flappers
- Older tower-style flush valves use a different mechanism entirely
If your toilet is a standard residential model from any major brand, a quality universal flapper is your safest, most cost-effective bet. Save yourself the trip back to the store and grab a 2-pack — flappers are cheap, and having a spare means you’re ready next time.
Step 6: Install the New Flapper
Installation is the reverse of removal. Position the new flapper so the rubber cup is face-down over the flush valve opening at the base of the overflow tube.
- If your flapper has side ears, clip them onto the pegs on either side of the overflow tube. Press firmly until you feel each ear snap into place.
- If your new flapper came with a ring collar that slides over the overflow tube, remove the ear tabs first (some universal flappers include both options), then slide the collar down the tube until the flapper seats over the valve opening.
Once attached, gently press down on the flapper with your finger. It should sit flat and centered over the valve seat — the circular ridge at the base of the overflow tube. If it’s off-center, adjust the ears or collar until the seal is even all the way around.
Step 7: Reconnect the Chain
Hook the chain clip onto the flush handle arm. The chain length matters more than most people realize:
- Too short: the flapper gets pulled open when the handle is at rest, causing a constant slow leak — exactly the running toilet problem you’re trying to fix.
- Too long: excess chain can get trapped under the flapper, preventing it from sealing properly.
The ideal length leaves about 1/2 inch of slack when the handle is at rest. Try a few different holes along the handle arm until the flapper lifts fully when you pull the handle and drops flat when you release it. Trim any significant excess chain with scissors to keep it tidy and tangle-free.
⚠️ Warning: After your first test flush, peek into the tank and confirm no chain links have slipped underneath the flapper. A single link caught under the edge creates a slow, invisible leak — identical to a worn flapper. This is the most common reason a toilet keeps running after a flapper replacement.
Step 8: Turn the Water Back On and Test
Turn the shutoff valve counterclockwise to restore the water supply. You’ll hear the tank begin to fill — this usually takes 60–90 seconds. Replace the tank lid once the tank is full.
Now test your repair:
- Flush the toilet and watch the flapper. It should lift cleanly, stay open while the tank empties, then drop squarely back onto the valve seat as the tank refills.
- Once the tank is full, listen carefully. The fill valve should go completely silent. No hissing, no trickling.
- If the running sound continues, check the chain — it may be too short, or a link may have slipped under the flapper edge. Adjust and test again.
- If the toilet still runs after adjusting the chain, the problem may be the float height or a damaged flush valve seat — see the FAQ below.
In most cases, that’s it. Your toilet flapper repair is complete, and your running toilet is fixed.
How to Know Your Flapper Needs Replacing
Before you diagnose a running toilet as a flapper problem, it helps to confirm that the flapper is actually to blame. Here are four clear signs your flapper has reached the end of its life:
1. Constant Running Toilet Sound
The most obvious sign is a persistent hissing or trickling sound coming from the toilet tank, even when no one has recently flushed. This means water is continuously leaking from the tank into the bowl, and the fill valve keeps running to compensate. This is the classic running toilet fix symptom — and in about 85% of cases, a worn flapper is responsible.
2. Toilet Randomly Refills on Its Own (“Phantom Flush”)
If your toilet suddenly starts filling on its own every few minutes — as if someone flushed it — you have a phantom flush. This happens when a slow flapper leak gradually drops the water level in the tank low enough to trigger the fill valve. The flapper isn’t failing dramatically; it’s just losing its seal slowly. Toilet flapper replacement solves this completely.
3. Unusually High Water Bill
A leaking flapper can waste anywhere from 30 to 500 gallons of water per day, depending on how badly it’s sealing. If you notice a spike in your water bill without any obvious explanation, lift the lid off every toilet tank in the house and listen carefully at each one. A silent but steady drip from the tank into the bowl adds up to serious money over a billing cycle.
4. The Food Coloring Dye Test
This is the definitive at-home test for a leaking flapper. Remove the tank lid and add 5–6 drops of food coloring (or a dye tablet, which many water utilities hand out for free) to the tank water. Do not flush. Wait 15 minutes. Now look in the toilet bowl — if any color has appeared in the bowl water without you flushing, your flapper is leaking. No color in the bowl means the flapper is still sealing.
💡 Tip: If the dye test comes back negative but your toilet is still making noise, the problem is likely your
fill valve, not the flapper. A hissing fill valve usually means the float is set too high and water is trickling into the overflow tube. Check your
toilet repair kits guide for fill valve replacement options.
Choosing the Right Replacement Flapper
Walk into any hardware store and you’ll find an entire section devoted to flappers. Here’s how to make sense of your options:
Universal vs. Brand-Specific Flappers
Universal flappers (sold by Korky, Fluidmaster, and similar brands) are designed to fit the standard 2-inch overflow tube and ear-peg configuration used by the majority of residential toilets. For most homeowners, a universal flapper is the right choice — they’re widely available, cost $5–$12, and install in minutes.
Brand-specific flappers are engineered to match proprietary flush valve geometries. Kohler, TOTO, American Standard, and Mansfield all make toilets that perform better with their own replacement parts. If you’ve tried a universal flapper and still have a running toilet, check your toilet’s model number against the manufacturer’s recommended replacement part.
2-Inch vs. 3-Inch Flappers
The size refers to the diameter of the flush valve opening, not the flapper itself. 2-inch is the standard for older and mid-range toilets. 3-inch flush valves became common in the early 2000s in high-efficiency and pressure-assisted toilets, where a larger opening allows for a faster, more powerful flush.
Getting the wrong size is the most common mistake in toilet flapper replacement. A 2-inch flapper on a 3-inch valve will never seal properly, no matter how many times you adjust it. Measure or bring the old flapper to the store if you’re unsure.
Adjustable Flappers
Adjustable flappers (like the Korky 5030BP) have a float or dial that controls how long the flapper stays open during a flush. Opening the flapper longer uses more water per flush; closing it sooner uses less. If you’re trying to reduce water usage — or if your toilet is double-flushing (not getting enough water to clear the bowl in one flush) — an adjustable flapper lets you dial in the perfect balance.
💡 Tip: If your home uses municipal water that’s treated with chloramine (increasingly common in US cities as a replacement for standard chlorine), standard rubber flappers can degrade in as little as 2 years. Check your water utility’s annual report — if chloramine is listed, spend the extra dollar or two on a chloramine-resistant flapper like the Korky 5030BP. It’ll last significantly longer.
Need a Professional Plumber?
Sometimes a job is too big for DIY. If your shutoff valve is seized, your flush valve seat is cracked, or you’ve found a leak coming from the base of the toilet — it’s time to call a pro. Find a licensed plumber in your area at PlumberArchive.com — the US plumber directory with 12,000+ verified plumbers across every state.
Find a trusted plumber near you →
Looking for our top recommended tools in one place? Browse our curated Amazon Storefront →
Frequently Asked Questions
Q: How long does a toilet flapper last?
Most rubber toilet flappers last 4–5 years under normal use. In homes with heavily chlorinated water or water that’s treated with chloramine (used by many municipal water systems), a standard rubber flapper may degrade in as little as 2–3 years. Chloramine-resistant flappers — like the Korky 5030BP — are specifically formulated to hold up in these conditions and can last significantly longer. If you’ve replaced your flapper and it’s failing again within a year or two, switching to a chloramine-resistant model is worth the small extra cost.
Q: Why does my toilet keep running after replacing the flapper?
If your toilet still runs after a toilet flapper replacement, there are three common culprits:
- Chain problem: The chain is too short and is holding the flapper slightly open, or excess chain has fallen under the flapper and is breaking the seal. Adjust the chain length and check that it hangs freely.
- Wrong size flapper: A 2-inch flapper on a 3-inch valve (or vice versa) will not seal properly. Measure your flush valve opening and confirm you have the right size.
- Damaged flush valve seat: The circular ridge the flapper presses against can develop mineral deposits or cracks over time. Run your finger around the valve seat — if you feel rough edges or pitting, the seat may need to be replaced. In that case, a full toilet tank repair kit with a new flush valve is the better fix. See our best toilet repair kits guide for the best all-in-one options.
Q: Can I replace a toilet flapper without turning off the water?
Technically, yes — you can work quickly enough to swap the flapper without shutting off the supply valve. However, we strongly recommend turning the water off first. Without doing so, water continues to flow into the tank as you work, which can make it harder to keep the chain in the right position, and any fumbling with the old flapper can cause water to overflow the tank edge. It takes five seconds to close the valve and it makes the job noticeably cleaner and easier. There’s no good reason to skip it.
Q: What size flapper do I need?
Most toilets use a 2-inch flapper. You can confirm this by placing your hand over the flush valve opening at the bottom of the tank — if your palm covers it easily, it’s a 2-inch valve. If the opening is roughly the size of an orange, it’s a 3-inch valve, typically found in newer water-saving toilets and pressure-assist models.
When in doubt, check the model number stamped inside the back of your tank and look up the manufacturer’s specifications online, or take your old flapper to the hardware store for a direct comparison. Most packages also have a toilet brand compatibility list on the back that makes matching straightforward.
Conclusion — Which Toilet Flapper Should You Buy?
A running toilet is one of those household problems that’s easy to ignore — but it quietly drains your wallet every single day. The great news is that once you know how to replace a toilet flapper, it becomes a quick, low-cost fix you can handle yourself in less time than it takes to watch an episode of TV. If you are not sure which replacement to buy, our best toilet flappers guide covers the common fits.
For most toilets, grab the Korky 5030BP — it’s our top pick thanks to its chloramine-resistant rubber that outperforms standard flappers in areas with treated municipal water. If you want the easiest possible install, the Fluidmaster 502P21 is the choice most professional plumbers keep in their van: simple clip chain, perfect fit on 2-inch valves, and available everywhere. Both are around $5–$10 and will outlast the cheap OEM flappers that come installed from the factory.
Follow the eight steps above, take your time with the chain adjustment, and your toilet should be completely silent after the first test flush.
If you’re dealing with other toilet or bathroom issues while you’re in there, check out our best plungers guide for the most effective options on the market, or read our guide on how to unclog a toilet without a plunger if you’ve got a stubborn blockage alongside your running toilet. And if your flapper replacement reveals a more worn-out tank interior — corroded hardware, a failing fill valve, or a cracked flush valve seat — a complete toilet repair kit will get everything back in working order for under $20.
Happy fixing.
✍️ About This Review
Mike Reynolds, DIY Home Improvement Writer — Mike Reynolds spent over a decade working as a residential contractor before turning his expertise into practical writing for homeowners. He specialises in step-by-step how-to guides that make plumbing repairs accessible for beginners and experienced DIYers alike. Learn how we test →