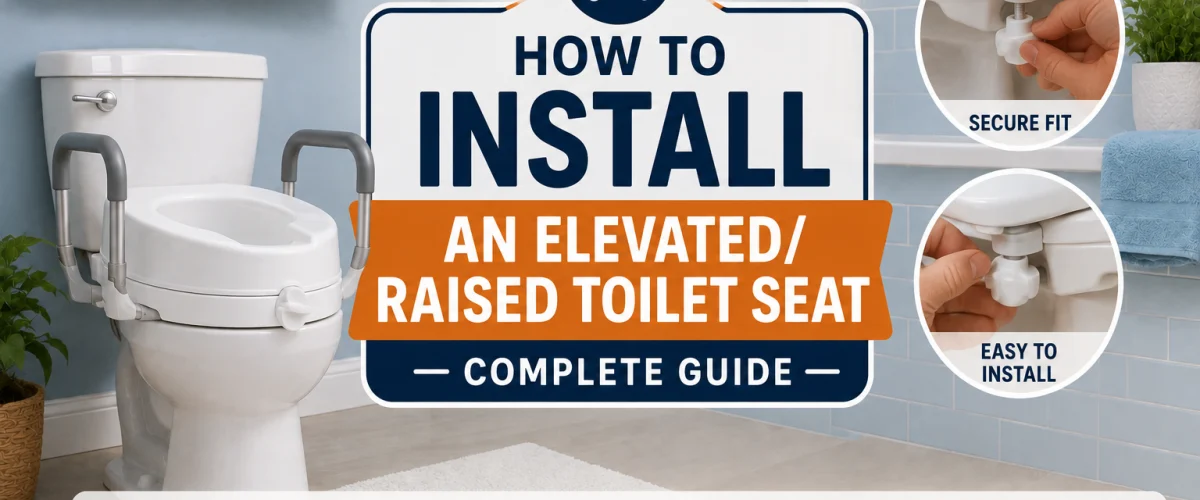
Please note: Information in this guide is based on our research at time of writing and is subject to change. Always follow the specific instructions included with your product, since exact steps vary by model.
Introduction
Installing an elevated or raised toilet seat is one of the more approachable home projects you can take on, whether you’re setting it up for yourself, a family member recovering from surgery, or an aging parent who’s finding the standard toilet height increasingly difficult. Most installations take well under half an hour, and the vast majority require no specialized tools beyond what’s already included in the box.
That said, “elevated toilet seat” actually covers two genuinely different products with two different installation processes. An integrated replacement seat swaps out your existing toilet seat entirely, attaching through the same hinge bolt holes on the bowl that any standard seat uses. A riser frame, by contrast, clamps around the outside of your existing bowl and seat rather than replacing anything, adding height without removing what’s already there. Knowing which type you’re working with — and confirming your toilet’s bowl shape matches the product — before you start is what separates a smooth fifteen-minute installation from a frustrating mid-project surprise. Most of the installation mistakes people run into with these products trace back to skipping that one check, not to the actual mounting or clamping steps themselves.
This guide walks through both installation paths step by step, along with troubleshooting for the most common fit issues. If you haven’t chosen a product yet, our elevated toilet seat reviews compare the top integrated and riser-frame options. And if you’re simply replacing a worn-out standard seat with no added height, that’s a different project covered in our how to install a toilet seat guide instead. If you’re weighing a bigger change — replacing the entire toilet with a taller fixture rather than adding a seat or riser — our comfort height toilet comparison covers that separate decision.
At a Glance
| Skill Level |
Beginner-friendly for most riser-frame models, basic DIY for integrated seats |
| Tools Needed |
Varies by product — typically just the included hardware, sometimes a screwdriver |
| Time Needed |
Roughly 15–25 minutes for most installations |
| Critical First Step |
Confirm your toilet bowl shape — round or elongated — matches the product before starting |
✏️ Our Take
Installing an elevated or raised toilet seat is one of the more forgiving home projects — most riser-frame models need no tools at all, and integrated seats use the same basic hardware as a standard seat swap. The step that actually matters is confirming bowl shape before you buy or start installing, since a round-bowl product won’t fit an elongated toilet and vice versa. Once that’s confirmed, the rest of the installation is quick, and taking an extra minute to check for wobble before first use is worth far more than rushing through the setup.
Before You Start — Confirm Bowl Shape and Product Type
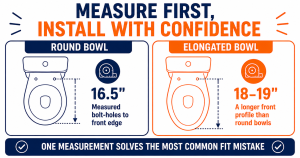
The single most important thing to confirm before you install anything is whether your toilet has a round bowl or an elongated bowl, since this determines whether the product you have will actually fit. Round bowls typically measure roughly 16.5 inches from the two bolt holes at the back of the seat to the front edge of the bowl, while elongated bowls typically measure roughly 18 to 19 inches over that same distance. This one measurement resolves more fit problems than any other single check you can do, and it takes less than a minute with a tape measure.
Once you’ve confirmed bowl shape, take a moment to identify which type of product you’re installing, since the two require noticeably different steps. An integrated replacement seat attaches using the same hinge bolt holes that any standard toilet seat uses — it replaces the seat itself rather than sitting on top of it. A riser frame, on the other hand, clamps around the outside of the existing bowl and seat, adding height without removing anything underneath. If you’re not sure which category your product falls into, check the packaging or product listing; most manufacturers describe this clearly, and it’s worth confirming before you start rather than assuming based on appearance alone. It’s also worth noting whether your product includes handles or arm support as a fixed part of the frame or as a separate attachment, since that affects how many steps are involved later on.
Finally, before you begin, lay out all the included hardware — bolts, clamps, washers, or handles — and take a minute to read through your specific product’s included instructions. Steps and hardware vary meaningfully by model, and while this guide covers the general process both product types follow, your manufacturer’s instructions are the authoritative reference for your specific unit.
💡 Tip: If you’re not sure whether your toilet is round or elongated, measure from the two bolt holes at the back of the seat to the front edge of the bowl. This single measurement resolves the most common fit mistake before you’ve even opened the box.
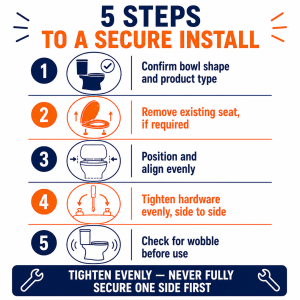
Step 1: Remove the Existing Seat (If Required)
Whether this step applies to you at all depends entirely on which type of product you’re installing, so check your specific instructions before assuming you need to remove anything.
- Confirm whether your product requires seat removal. Integrated replacement seats need the existing seat removed first, since the new one attaches through the same hinge bolt holes. Many riser-frame products, by contrast, are designed to install directly over the existing seat and skip this step entirely.
- If removal is required, locate the hinge bolts underneath the bowl. These are typically at the back of the bowl, beneath the hinges that currently hold your seat in place.
- Unscrew or unclip the hinge bolts. Some are secured with a simple screw accessible from underneath, while others use a quick-release clip designed to pop open without tools.
- Lift the old seat away once both hinges are free. Set it aside, and wipe down the now-exposed bolt holes and bowl surface before installing the new product, since a clean surface makes the next steps easier.
Step 2: Position and Align the New Seat or Frame
This step is where the two product types diverge most, so follow the version that matches what you’re actually installing.
- For integrated seats: align the new hinge posts with the existing bolt holes on the bowl. Set the seat down gently and check that both hinge posts drop cleanly into their corresponding holes before moving on.
- For riser frames: center the frame over the bowl and existing seat. Lower it into place so it sits evenly across both sides rather than favoring one edge, using the bowl’s rim as your reference point for centering.
- Check that the product sits level before tightening anything. Look at it from the front and from the side — a product that’s visibly tilted at this stage will only get harder to correct once hardware is tightened.
- Confirm the front-to-back positioning looks correct. The product should sit centered over the bowl opening with even clearance on both sides, not shifted noticeably toward the front or back.
- Make small adjustments now, before securing anything. It’s much easier to shift the seat or frame slightly at this stage than after the mounting hardware is tightened, so take the extra moment here rather than rushing to the next step.
Step 3: Secure the Clamps or Mounting Hardware
With everything positioned and level, it’s time to actually secure the product in place. The specific hardware differs between the two product types, but the underlying principle — tightening evenly rather than favoring one side — applies to both.
- For integrated seats: thread the mounting bolts or hinge hardware into place by hand first. Get both sides started before fully tightening either one, so the seat doesn’t get pulled off-center partway through.
- Tighten the integrated seat’s hardware evenly on both sides. Alternate a few turns on one side, then the other, rather than fully tightening one hinge before starting the second.
- For riser frames: locate the side clamps and begin tightening them by hand. Most riser frames use adjustable clamps on each side that grip the bowl or existing seat to hold the frame in place.
- Tighten the riser frame’s clamps evenly, alternating sides rather than fully securing one before the other. This keeps the frame centered as it tightens instead of gradually pulling it toward whichever side you secured first.
- Recheck level and centering once everything is snug. A quick visual check now catches any drift that happened during tightening, before you move on to handles or your final stability check.
⚠️ Warning: Tighten mounting hardware evenly on both sides rather than fully securing one side before the other — this keeps the seat or frame centered and prevents it from sitting crooked or putting uneven pressure on the bowl.
Step 4: Attach Handles or Arms (If Included)
Not every product includes handles or arms, so this step only applies if yours does. If your model doesn’t include this hardware, skip ahead to the stability check in Step 5.
- Locate the handle or arm attachment points on the main frame. These are typically slots or brackets built into the sides of the frame, designed to accept the handles at a fixed angle.
- Attach the handles or arms according to the included hardware. Some slide and lock into place, while others require a small bolt or pin to secure them — check your specific instructions for the exact mechanism.
- Confirm the handles are seated firmly and don’t wobble independently of the main frame. Grip each handle and apply gentle pressure in different directions; it should move only as part of the whole unit, not shift on its own at the attachment point.
Step 5: Check Stability Before Use
This last step takes less than a minute, but it’s the one that actually confirms your installation is genuinely secure rather than just visually complete. Don’t skip it, even if everything looks fine.
- Apply firm downward pressure with both hands on the seat or frame. Press as though you were sitting down, and watch and feel for any shifting, sinking, or flexing that shouldn’t be there.
- Apply side-to-side pressure to check for lateral wobble. A properly secured installation should resist this movement almost entirely, not rock noticeably from side to side.
- Re-tighten any hardware that shows play during either check. If you find movement, go back to Step 3 and tighten the specific clamp or bolt that’s loose, then repeat the pressure check.
- Only consider the installation finished once both checks come back solid. A stable result here means you’re genuinely done, not just that the product looks correctly positioned.
Troubleshooting Common Fit Issues
If the product doesn’t sit flush or level even after careful positioning, the first thing to double-check is the bowl shape measurement from the Before You Start section. This is by far the most common cause of a poor fit — a round-bowl product simply won’t seat correctly on an elongated bowl, and vice versa, no matter how carefully you install it. Remeasure from the bolt holes to the front edge of the bowl and compare that number against your product’s specified fit before assuming anything else is wrong.
If a riser frame feels loose even after following the tightening steps in Step 3, confirm the clamps are actually gripping the bowl or the existing seat itself, not slipping onto the tank, a decorative trim piece, or another nearby fixture by mistake. It’s an easy thing to overlook, especially on toilets with an unusual bowl profile, and re-seating the clamps onto the correct surface often resolves looseness that tightening alone couldn’t fix. It’s also worth checking that the clamps are tightened against a rigid part of the bowl or seat rather than a rounded edge that lets them slip gradually under weight, since that’s a subtler version of the same underlying problem.
If an integrated seat’s bolt holes don’t align with your bowl’s existing holes, resist the temptation to force a fit by over-tightening or improvising with different hardware. Instead, confirm the product is actually rated for your specific bowl shape and hinge spacing — some bowls, particularly older or non-standard models, use a slightly different hole spacing than what a given seat expects, and forcing the connection risks cracking the bowl or permanently warping the seat’s mounting hardware.
US Regional Context: US toilet bowl dimensions are fairly standardized between round and elongated styles, but a small number of older or imported fixtures may have nonstandard measurements. If a product marketed as a standard fit genuinely won’t seat correctly after double-checking alignment, it’s worth confirming your toilet’s measurements against the manufacturer’s specific fit chart rather than assuming user error.
Need a Professional Plumber?
This is generally a tool-free or basic-hardware project, but if you run into an unexpected plumbing issue while working around your toilet, it’s worth having a licensed plumber take a look. Search PlumberArchive.com — the US plumber directory with 12,000+ verified local plumbers across all 50 states.
Find a trusted plumber near you → PlumberArchive.com
Frequently Asked Questions
Q: Do I need any tools to install a riser-frame elevated toilet seat?
Most riser-frame products are designed to be entirely tool-free, using hand-tightened clamps that grip the bowl or existing seat without a screwdriver or wrench. Some models do include optional hardware for extra security, but the core installation for the majority of riser frames on the market can be done with your hands alone. Integrated replacement seats are the exception — those typically require the same basic hardware as a standard toilet seat swap, usually just a screwdriver. If your specific product’s instructions call for a tool that isn’t included in the box, that’s usually listed clearly on the packaging before you buy, so it’s worth a quick check if you want to confirm you won’t need anything extra.
Q: How do I know if my toilet is round or elongated?
Measure from the center of the two bolt holes at the back of the seat to the front edge of the bowl. A round bowl typically measures around 16.5 inches over that distance, with a more circular front edge. An elongated bowl typically measures closer to 18 to 19 inches, with a more oval, egg-like shape at the front. If you’re not confident measuring it yourself, many toilet manufacturers list the bowl shape directly on a label inside the tank or in the product documentation from when the toilet was installed.
Q: Is it normal for a riser frame to feel slightly different from a fixed seat?
Yes, to a degree. A riser frame is a separate structure clamped over your existing seat rather than a single integrated piece, so it’s normal for it to feel a bit different underneath you than a standard seat does — slightly more height, and occasionally a subtly different feel where the frame meets the bowl. What shouldn’t happen is any noticeable wobble, shifting, or flexing during use. If you’re feeling actual movement rather than just a different sensation, that’s a sign to revisit Step 3 and re-tighten the clamps, not something to get used to.
Q: Can I install an elevated toilet seat on any toilet?
Not universally — bowl shape compatibility is the main limiting factor, and a product built for elongated bowls simply won’t seat correctly on a round one, or vice versa. Beyond bowl shape, most standard residential toilets are compatible with either an integrated seat or a riser frame designed for their bowl type. If you have an unusually shaped or non-standard bowl, or you’re not confident about the fit after measuring, checking the manufacturer’s specific fit chart before buying is the safer move rather than assuming compatibility and finding out otherwise mid-installation. Wall-mounted and some compact or corner-style toilets are the cases most likely to need extra attention, since their bowl and seat dimensions can differ from a standard floor-mounted toilet even when the bowl shape itself is correctly identified.
Conclusion
Installing an elevated or raised toilet seat is a genuinely approachable project once you’ve confirmed the two things that matter most: your toilet’s bowl shape, and whether you’re working with an integrated replacement seat or a riser frame. Get those two details right before you start, and the rest of the process — positioning, securing the hardware evenly, and checking for stability before use — takes well under half an hour for most installations. If something doesn’t sit right, the bowl shape measurement is almost always the place to look first before assuming anything else is wrong. And whichever product type you’re working with, that final stability check in Step 5 is worth the extra thirty seconds every time — it’s the difference between an installation that looks finished and one that’s actually ready to use with confidence.
Prices and ratings may change. Always check Amazon for current prices.
✍️ About This Guide
PTR Editorial Team — Plumbing Guides. We compare manufacturer specifications, installation requirements, compatibility and available product documentation to help homeowners choose suitable tools and parts. How we review →