Please note: Information in this guide is based on our research at time of writing and is subject to change. Always consult a licensed plumber for diagnosis of serious plumbing issues before attempting repairs.
Introduction
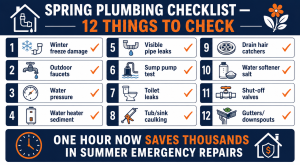
Spring is the single best time of year to give your plumbing system a thorough look over — and most of the checks on this list take no tools at all. Winter freeze-thaw cycles put stress on pipes, fittings, outdoor faucets and seals that often don’t show symptoms until months later, usually during a summer heatwave when your plumber’s next available appointment is two weeks out. Running through this checklist once every spring takes about an hour and consistently catches problems while they’re still small.
This guide covers 12 essential spring plumbing checks any homeowner can do — from inspecting exposed pipes for hairline cracks to testing your sump pump before the first heavy rain of the season. If you find an active leak during your inspection, our guide to fixing a leaking pipe covers the repair options step by step. This quick seasonal walkthrough pairs well with a deeper once-a-year review — see our annual home plumbing inspection guide for the full room-by-room version. For homes in cold-climate states, the section on pipe insulation for winter is worth reviewing alongside this checklist to prepare for next season at the same time.
At a Glance
| Difficulty |
Easy — most checks need no tools |
| Time |
1–2 Hours for the full checklist |
| Cost |
Free to inspect — repairs vary |
| Tools Needed |
Flashlight, water pressure gauge, basic hand tools for minor fixes |
| Skill Level |
Beginner |
✏️ Our Take
Spring is the single best time of year to catch small plumbing problems before they become expensive summer emergencies. Winter freeze-thaw cycles stress pipes, fittings and seals in ways that often don’t show symptoms until months later — usually during a heatwave when your plumber is booked solid. Walking through this checklist once a year, every spring, takes about an hour and consistently catches issues while they’re still a $20 fix instead of a $2,000 emergency.
Why Spring Plumbing Checks Matter
Freeze-thaw cycles are the hidden enemy of residential plumbing. A pipe that survives winter without an obvious leak can still have a hairline crack that only opens up once water pressure increases with warmer temperatures. By the time you notice the drip, the water has often already done damage behind a wall or under a floor.
Sediment builds up in water heaters throughout the winter months when usage is at its highest. Outdoor faucets take more stress than any other fixture — the freeze-thaw cycle is most concentrated at the point where the pipe transitions from inside to outside. And slow-draining fixtures, stiff shut-off valves, and cracked caulk all get worse over winter without being noticed. Catching these issues in spring means addressing them while they’re still inexpensive.
💡 Tip: Plumbers are busiest in summer — finding and fixing small issues in spring means faster appointments and lower emergency call-out fees if you do need a pro.
1. Check for Winter Freeze Damage
Start your inspection where pipes are most exposed to cold: basements, crawl spaces, attached garages, and any uninsulated areas along exterior walls. Bring a flashlight and work methodically along every visible run of pipe.
Look closely at joints and fittings — these are where hairline cracks concentrate after a freeze. Check that pipe insulation is intact and hasn’t been damaged by rodents or compressed against a sharp edge over winter. If you find damaged insulation, our guide to insulating pipes for winter covers the replacement options and installation process.
⚠️ Warning: A pipe that survived winter without an obvious leak can still have a hairline crack that only shows symptoms once water pressure rises in warmer weather. Don’t skip this check just because you didn’t notice anything during winter.
2. Inspect Outdoor Faucets and Hose Bibs
Turn on each outdoor faucet fully and let it run for 30 seconds. You’re looking for steady, consistent flow — not a weak trickle. Then examine the faucet body itself while it’s running and again after you shut it off. Any dripping or weeping from the faucet body (rather than the spout) points to an internal crack caused by freezing.
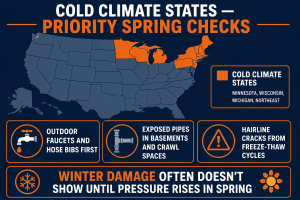
In cold-climate states like Minnesota, Wisconsin, Michigan and the Northeast, spring outdoor faucet inspection is especially critical. Pipes that survived winter freezing often develop hairline cracks that only leak once water pressure increases with warmer weather. Homeowners in these states should treat this check as the first item on the list every year, without exception.
💡 Tip: If your outdoor faucet drips internally even when fully closed, it likely froze and cracked over winter — replacement is a straightforward DIY job that most homeowners can complete in under an hour.
3. Test Your Water Pressure
Attach a water pressure gauge to an outdoor spigot or hose bib and turn the water on fully. Normal residential water pressure runs between 40 and 80 psi. Pressure consistently above 80 psi stresses every fitting, valve and appliance in the system — including your water heater and washing machine hoses — and is one of the leading causes of premature plumbing failure in US homes.
If your reading comes in above 80 psi, a pressure reducing valve (PRV) is the correct fix. If you don’t already have a gauge, our roundup of the best water pressure gauges covers the options at every price point — this is one of the most useful tools to keep on hand for annual maintenance.
💡 Tip: Testing water pressure takes under 5 minutes with a gauge and can reveal issues that would otherwise go unnoticed for years — until a supply hose bursts or a fitting blows.
4. Check Water Heater for Sediment
Winter is peak usage season for water heaters, which means sediment accumulates more rapidly over those months than at any other time of year. Stand near your water heater during a heating cycle and listen. A quiet, steady hum is normal. Popping, rumbling or crackling sounds indicate sediment is present at the base of the tank and is interfering with the heating element.
If your water heater hasn’t been flushed in more than a year, spring is the right time to schedule it. Annual sediment flushing extends the life of the unit, maintains heating efficiency and prevents the premature failure that comes from neglected buildup.
💡 Tip: Popping or rumbling sounds from your water heater tank are sediment hitting the heating element — a sign a flush is overdue. Don’t ignore it; the longer sediment sits, the harder it becomes to remove.
5. Inspect Visible Pipes for Leaks or Corrosion
Open the cabinet under every sink in the house and look at the supply and drain lines with a flashlight. Check around the water heater and along any exposed pipe runs in the basement. You’re looking for three things: active drips, water stains on the cabinet floor or walls (indicating a past or intermittent leak), and discoloration on the pipes themselves.
Green or white powdery corrosion on copper or galvanized pipe joints indicates a slow leak has been present for some time, even if you can’t see active dripping. Address these before they worsen. Our guide to fixing a leaking pipe covers the repair approaches from pipe tape through to full joint replacement depending on severity. If you suspect a leak but can’t find where it’s coming from, our guide to how to detect a water leak covers the meter test and other diagnostic methods.
💡 Tip: Green corrosion on copper pipe joints indicates a slow leak has been present for some time — even if you can’t see active dripping. It won’t resolve on its own.
6. Test Sump Pump Function
Pour a full bucket of water slowly into the sump pit. The pump should activate automatically once the water level reaches the float trigger, drain the pit completely, and shut off cleanly. If there’s any hesitation, grinding, or if the pump doesn’t activate at all, it needs attention before spring rains and snowmelt season.
Also check the discharge pipe that carries water away from the house. After winter it can be blocked by debris, ice, or shifted by ground movement — a blocked discharge means the pump runs but accomplishes nothing. Confirm water is exiting freely at the outdoor end of the discharge line.
⚠️ Warning: A sump pump that fails during spring snowmelt or heavy rain can mean thousands in basement flood damage — test it now, not after the first storm of the season.
7. Check Toilet Tanks for Running or Leaks
Flush each toilet and then stand quietly and listen after the tank refills. Any sound of running water after the tank is full indicates water is escaping into the bowl through a faulty flapper — a running toilet that goes unaddressed wastes a significant amount of water and adds noticeably to your water bill.
For silent leaks that you can’t hear, add a few drops of food coloring to the tank (not the bowl) and wait 15 minutes without flushing. If color appears in the bowl, the flapper is leaking. Check also around the base of the toilet and the supply line connection point for any moisture or staining.
💡 Tip: A toilet that runs continuously can waste hundreds of gallons per day — the fix is usually an inexpensive flapper replacement that takes about 10 minutes with no tools beyond a sponge to dry the tank.
8. Inspect Caulking Around Tubs and Sinks
Run your finger along the caulk line where the tub or shower meets the wall and where the sink basin meets the countertop. Fresh caulk is smooth, flexible and completely sealed. Old or failing caulk cracks, peels at the edges, or develops gaps that allow water to penetrate behind the surface.
Any gap in bathroom caulking allows water behind the wall, where it causes hidden mold growth and structural rot that you won’t discover until the damage is already extensive. Recaulking a tub surround is a simple task that takes an afternoon and a tube of caulk — far cheaper than the mold remediation that follows from ignoring it.
💡 Tip: Cracked caulk around a tub looks cosmetic but allows water behind the wall where it causes mold and structural damage you won’t see until it’s extensive — and expensive to remediate.
9. Clean Drain Hair Catchers and Stoppers
Remove the hair catcher or drain cover from every shower and bathroom sink drain. Clean accumulated hair and debris from the catcher itself and from the drain opening below it. Run water and observe — water should drain immediately and completely with no pooling or slow drainage. Any hesitation suggests a partial clog forming further down the pipe.
If you don’t currently have hair catchers installed in your shower drains, spring is the best time to add them — before the buildup from winter and spring sheds further. Our review of the best drain hair catchers covers the options for different drain types across every price range.
💡 Tip: If you don’t already have hair catchers installed, spring is a good time to add them before the problem builds up further — prevention is significantly easier than clearing a full clog.
10. Check Water Softener Salt Levels
If your home has a water softener, lift the brine tank lid and check the salt level. The tank should be at least half full at all times. Over winter, with higher hot water usage, salt depletes faster than during warmer months — many homeowners come to spring with a brine tank that’s been running low for weeks without noticing.
While the lid is open, check for salt bridges — a hardened crust that forms across the top of the tank and creates a false impression of adequate salt levels while the water flows through without softening. Break up any visible bridging with a long-handled tool and clean the brine tank if buildup is visible at the base.
💡 Tip: Most water softeners need a salt refill every 6–8 weeks depending on household size and water hardness. If you’re not sure when you last refilled, check now — running without salt means hard water passing untreated through your pipes.
11. Test Shut-Off Valves
Locate your main water shut-off valve — typically near the water meter, in the basement, or in a utility room — and turn it through its full range of motion: fully closed, then fully open again. It should move smoothly and stop the water flow completely when closed. Do the same for the individual fixture shut-off valves under each sink and behind each toilet.
Valves that haven’t been operated in years often seize partially or fail to close completely. Discovering this now — when there’s no emergency — gives you time to address it properly. A stuck main shut-off valve that you discover while a pipe is actively leaking is a much more serious problem than one you find during a routine spring check.
⚠️ Warning: Don’t wait for an emergency to discover your main shut-off valve is stuck or broken — test it now while there’s no pressure to fix it quickly. A valve that fails during an active leak means water running unchecked until a plumber arrives.
12. Inspect Gutters and Downspouts for Drainage Away From Foundation
Clear any debris that has accumulated in gutters over winter — leaves, twigs, and compacted organic matter from autumn that wasn’t fully cleared before the first freeze. Blocked gutters cause water to overflow at the eaves rather than route through the downspouts, sending it directly against the foundation.
After clearing, run a hose into each gutter and watch where the water exits the downspout. It should exit at ground level and flow away from the house — ideally directing water at least six feet from the foundation. Downspouts that empty directly against the foundation or into a poorly draining area are a leading cause of basement and crawl space moisture problems that often get blamed on the plumbing system when the root cause is actually drainage.
💡 Tip: Downspouts that empty within a few feet of your foundation are a leading cause of basement moisture problems that get blamed on plumbing when they’re actually a drainage issue — a downspout extender is one of the cheapest fixes in home maintenance.
Need a Professional Plumber?
Found a problem during your inspection that’s beyond a DIY fix? A stuck shut-off valve, an active pipe leak, or a sump pump that won’t start all warrant a call to a licensed plumber — before the issue becomes an emergency. The earlier you book in spring, the better the appointment availability and the less you’ll pay compared to a summer emergency callout.
Find a licensed plumber in your area at PlumberArchive.com — the US plumber directory with 12,000+ verified local plumbers across all 50 states.
Find a trusted plumber near you → PlumberArchive.com
Follow Us on Facebook
Get weekly plumbing tips, honest tool reviews and DIY maintenance guides delivered straight to your Facebook feed. We cover seasonal maintenance, pipe repairs, drain cleaning and everything in between — written for US homeowners who want to handle more themselves.
Follow PlumbingToolsReview on Facebook →
Frequently Asked Questions
Q: When should I do a spring plumbing check?
The best time is as soon as temperatures are consistently above freezing and before the first heavy rainfall of the season — typically March through April depending on your region. In cold-climate states like Minnesota, Wisconsin and Michigan, wait until overnight lows are reliably above freezing before turning on outdoor faucets. In warmer states, early March is fine. The goal is to catch any freeze damage while there’s still time to address it before summer plumber demand peaks.
Q: How long does a full spring plumbing checklist take?
For most homes, a thorough walkthrough of all 12 items takes between one and two hours. A smaller home or apartment with fewer fixtures will be closer to an hour. A larger home with a crawl space, basement, sump pump, water softener, and multiple bathrooms will take closer to two hours. The time is well spent — most homeowners who skip the inspection discover problems later in the year when plumber availability is low and rates are higher.
Q: Do I need to hire a plumber for a spring inspection?
No — the checks on this list are designed for homeowners with no specialist knowledge. All you need for most items is a flashlight and basic observation skills. A water pressure gauge is the only tool you’ll need to buy if you don’t already have one, and that’s a simple attachment to any outdoor spigot. However, if your inspection uncovers an active leak, a seized shut-off valve that won’t budge, or a sump pump that fails to activate, those are situations where calling a licensed plumber is the right call.
Q: What is the most common plumbing issue found in spring?
Damaged outdoor faucets and hose bibs are the single most common finding — they take more freeze-thaw stress than any other fixture and are often the first point of failure. Running toilets are a close second, since the flapper and fill valve components that wear over time are rarely inspected unless there’s an obvious symptom. In cold-climate states, hairline cracks in exposed pipe runs are a significant finding that homeowners often don’t discover until they see water staining weeks later.
Conclusion
An hour of checking in spring prevents expensive emergencies in summer. Most of the 12 items on this checklist cost nothing to inspect and take only minutes to complete — the value is entirely in catching problems while they’re still small. A hairline crack found in March is a straightforward fix; the same crack found in July, after it’s been dripping behind a wall for three months, is a much more expensive conversation.
For homeowners in cold-climate states, prioritize outdoor faucets and exposed pipe checks first — these are where freeze-thaw damage concentrates. Address any issues found before peak summer plumber demand makes appointments harder to get and more expensive. And if your inspection uncovers an active leak, our guide to fixing a leaking pipe covers the repair options by severity.
For ongoing prevention, picking up a water pressure gauge to keep on hand and reviewing your pipe insulation situation before next winter — our guide to insulating pipes for winter covers what to use and where — will help you stay ahead of issues year-round rather than reacting to them.
✍️ About This Guide
PTR Editorial Team — Plumbing Guides. We compare manufacturer specifications, installation requirements, compatibility and available product documentation to help homeowners choose suitable tools and parts. How we review →