Please note: Product availability and information are based on our research at time of writing and are subject to change. Always check Amazon for the latest details before purchasing.
Introduction
🔧 DIY OR HIRE A PLUMBER?
Not sure if this is a job you can do yourself?
Use our free Plumbing Cost Estimator to compare DIY costs vs hiring a licensed plumber — takes just 30 seconds.
Try the Free Estimator →
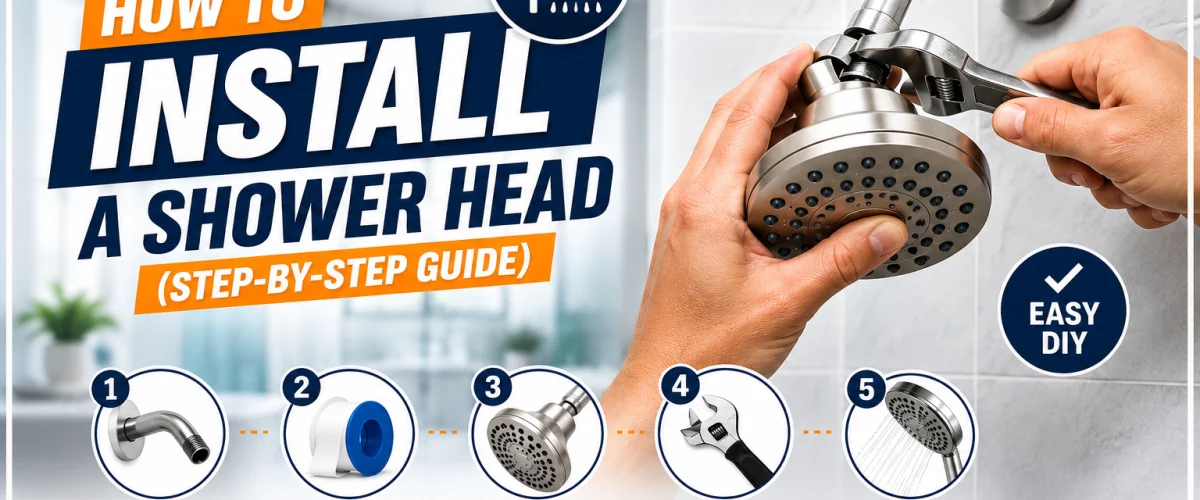
Installing a new shower head is one of the easiest DIY plumbing upgrades you can make — and it takes under 15 minutes, even if you’ve never touched a pipe in your life. There’s no need to call a plumber, drain your pipes, or shut off your main water supply. All you need is a pair of hands, some plumber’s tape, and the right shower head.
Knowing how to install a shower head properly can make a real difference to your daily routine. A quality replacement can dramatically improve water pressure, give you multiple spray settings, and even cut your water consumption — some modern shower heads use up to 40% less water than older models while maintaining strong flow. Whether you’re upgrading a tired old fixture, switching to a handheld model, or fixing a persistent drip, this step-by-step guide walks you through the entire shower head installation process from start to finish.
Looking for the best model before you start? Browse our best shower heads guide for a full breakdown of the options at every budget.
What You’ll Need
Shower head installation requires minimal tools. Here’s everything to have ready before you start:
Tools
- Adjustable wrench or pliers — for removing the old head and tightening the new one. Wrap the jaws in cloth or use a strap wrench to protect the finish.
- Plumber’s tape (PTFE / Teflon tape) — essential for a leak-free seal at the threads. See our best plumbing tapes guide for the top options.
- Dry cloth or rag — for cleaning the shower arm threads and protecting the fitting during wrench work.
- Old towel — place it in the tub or shower base to catch drips and protect the surface from dropped tools.
Recommended Shower Heads
These two MOST POPULAR models are ideal for a beginner-friendly shower head installation — both fit the standard US 1/2 inch NPT shower arm thread and include all the hardware you need:
AquaCare High Pressure 8-Mode Handheld Shower Head — A EDITOR’S CHOICE handheld shower head with 8 spray settings, a self-cleaning nozzle, and an extra-long hose. Popular choice for homeowners upgrading from a fixed mount. Rated ★★★★★ and straightforward to install, with all hardware included.
🛒 Check Price on Amazon — $$ →
HOPOPRO 5-Mode High Pressure Shower Head — A bestselling fixed shower head with 5 spray modes engineered to boost water pressure. A MOST POPULAR, budget-friendly choice for a no-fuss change shower head project. Hand-tighten installation — no tools required for most fittings.
🛒 Check Price on Amazon — $ →
How to Install a Shower Head: Step-by-Step
Step 1: Turn Off the Water Supply (Optional but Recommended)
For a straightforward shower head swap, you don’t technically need to shut off the main supply — turning your shower valve fully to the off position stops the flow. However, locating your bathroom shut-off valve (usually in an access panel or near the shower valve) and closing it takes five seconds and gives you a completely dry, drip-free working environment.
We recommend closing the supply valve whenever you can. It keeps the threads dry for a cleaner plumber’s tape application and removes any risk of an accidental drip mid-install. If you’re also replacing the shower arm at the same time, closing the supply is essential.
💡 Tip: Lay a towel in the base of your shower or bathtub before you start. It catches any residual water that drips from the shower arm when you remove the old head, and protects the tub surface from dropped tools.
Step 2: Remove the Old Shower Head
Grip the old shower head at the connector — the threaded collar where it meets the shower arm — and turn it counterclockwise to unscrew it. Many shower heads, especially on newer installations, will unscrew by hand.
If it resists, wrap a cloth around the connector and apply an adjustable wrench. Always brace the shower arm with your other hand as you turn — if the arm rotates with the shower head, it can crack the pipe connection inside the wall. If the head is genuinely stuck, skip ahead to the How to Remove a Stuck Shower Head section below before forcing it.
Once removed, inspect the shower arm threads for damage before moving on.
Step 3: Clean the Shower Arm Threads
Use a dry cloth or an old toothbrush to remove all traces of old plumber’s tape, thread sealant, and mineral deposits from the shower arm threads. The threads need to be as clean as possible for the new tape to bond properly and create a reliable seal.
Run a finger around the threads. They should feel smooth and even. If you notice cracked or damaged threads, the shower arm itself may need replacing before you proceed — a damaged thread is one of the most common causes of a leaking shower head installation.
⚠️ Warning: Never skip the thread cleaning step. Old sealant residue prevents fresh plumber’s tape from seating cleanly in the thread grooves. Even a correctly torqued shower head will drip if the tape can’t bond to a clean surface.
Step 4: Wrap the Threads with Plumber’s Tape
Take your PTFE plumber’s tape and wrap it clockwise around the shower arm threads — in the same direction you’ll be tightening the new shower head. This ensures the tape seats deeper into the grooves as you screw the head on, rather than unrolling and bunching up.
Apply 2–3 firm wraps, pulling the tape slightly taut so it presses into the thread grooves. Cover all exposed threads from the tip back toward the wall. Tear or cut the tape and press the end flat. For the best results, use a quality PTFE tape — standard white thread seal tape works perfectly for shower head replacement. Check our best plumbing tapes guide for the top choices.
💡 Tip: Wrap clockwise when you’re facing the open end of the shower arm. A simple way to remember: look at the end of the arm and wrap in the same direction as the hands of a clock. Wrap the wrong way and the tape peels back during installation, destroying the seal before you even test it.
Step 5: Hand-Tighten the New Shower Head
Before using any tools, thread the new shower head onto the shower arm by hand. Turn it clockwise and continue until you feel genuine resistance — don’t stop at the first hint of drag. Hand-tighten as firmly as you comfortably can.
If your new shower head includes a rubber washer inside the connector (most do), confirm it’s seated squarely before threading the head on. The washer creates a secondary seal alongside the plumber’s tape and is a key part of the shower head replacement leak prevention system. A wonky washer is a common cause of first-install drips.
Step 6: Finish Tightening with a Wrench
Once hand-tight, give the shower head an additional quarter to half turn with an adjustable wrench. Wrap a cloth around the connector first to protect the chrome or brushed finish from jaw marks. Use your free hand to brace the shower arm against the wall — use steady body-weight pressure, not sharp force.
Don’t over-tighten. A quarter turn past hand-tight is sufficient for a leak-free install. Cranking harder risks cracking the fitting, stripping the threads, or snapping the shower arm — repairs that turn a 15-minute job into a major plumbing task. For help choosing the right wrench for bathroom plumbing work, see our best pipe wrenches guide.
Step 7: Turn the Water Back On
If you closed the supply valve, turn it counterclockwise to restore flow. If you only used the shower handle to stop the water, leave it as-is — you’ll open it in the next step.
For handheld shower head installations: before turning the water on, double-check that the hose is securely connected at both ends — at the hand shower unit and at the wall bracket fitting. It’s easy to forget to tighten the wall-end connection, which results in a surprise spray when the water comes on. A hand-tight connection is enough for the hose fittings on most handheld models.
Step 8: Check for Leaks and Test
Turn the water on fully and watch the connection at the shower arm for drips. Observe for 30–60 seconds with the water running. A brief drip that stops as pressure builds is usually residual air — if it continues, you have a minor leak to address.
To fix a drip at the connection:
- Turn off the water.
- Unscrew the shower head.
- Rewrap the threads with one or two additional layers of fresh plumber’s tape.
- Reinstall hand-tight, add a quarter turn with the wrench, and retest.
A correctly completed shower head installation should be completely leak-free. Once you’re satisfied, test all spray modes if your new head has them — and enjoy the upgrade. That’s how to install a shower head from start to finish.
Types of Shower Heads — Which Is Easiest to Install for Beginners?
Not all shower head replacements are equally involved. Here’s how the main types compare for ease of installation:
Fixed Shower Heads
The simplest possible shower head installation. Fixed heads screw directly onto the shower arm and sit at a fixed angle — thread it on, tighten it, and you’re done. No hose, no bracket, no extra hardware. If you’ve never done a shower head replacement before, a fixed model is the ideal starting point. Most can be installed in under 10 minutes.
Handheld Shower Heads
A popular choice for upgrading older bathrooms, and still very approachable for a first-timer. A handheld unit includes a flexible hose, a wall bracket or slide bar, and the handheld shower itself. You attach the hose fitting to the shower arm in place of your old fixed head, mount the bracket, and connect the hand shower to the other end of the hose. The AquaCare model above is a great example of an easy-fit install handheld shower with all hardware included. Allow 15–20 minutes.
Rain Shower Heads
Larger fixed heads designed to simulate a rainfall-style shower experience. Most mount directly to the standard shower arm thread using the same process as a fixed head. Some models require an extension arm to position the head overhead — that’s one additional threaded connection but remains a straightforward DIY task. Allow 15–25 minutes depending on whether an extension arm is needed.
Dual Shower Heads
Dual systems combine a fixed overhead head with a handheld unit connected through a single diverter fitting. The diverter replaces the standard connector at the shower arm and splits the water flow between both heads. These take a little more time — typically 20–30 minutes for a first install — but are still firmly within DIY territory with no specialist plumbing knowledge required.
For complete beginners, a fixed shower head or a basic handheld with a simple wall bracket is the easiest place to start. Both are straightforward thread-on installations with no special tools needed.
How to Remove a Stuck Shower Head
If the old shower head won’t move by hand — or even with a standard wrench — years of mineral deposits and corrosion may have effectively fused it to the shower arm. Here are three proven methods to break it free before you change shower head fittings:
Method 1: Using a Strap Wrench
A strap wrench grips the shower head connector firmly without marring the finish — making it the safest first tool to try. Loop the strap around the connector, thread it through the handle, and apply firm counterclockwise pressure. Strap wrenches can generate substantial torque without slipping and are far kinder to chrome and brushed finishes than adjustable pliers. Always brace the shower arm with your free hand as you turn. For most stuck shower heads, this method alone is enough.
Method 2: Using Penetrating Oil
If the shower head is corroded solid, apply a penetrating oil — WD-40 or a dedicated thread penetrant — to the joint between the shower head connector and the shower arm. Let it soak for at least 20–30 minutes, or leave it overnight for a heavily corroded fitting. The oil works its way into the threads and dissolves mineral buildup. After soaking, try turning counterclockwise again — in most cases the resistance will have reduced significantly. Wipe off any excess oil before wrapping the threads with plumber’s tape.
Method 3: Using Heat
Gentle heat causes metal to expand slightly, which can break the grip of mineral deposits on the threads. Direct a hair dryer on medium-to-high heat at the connection point for 2–3 minutes before attempting to unscrew. The expansion is enough to free most seized fittings without damaging the shower arm, tile, or any plastic components. Never use an open flame or heat gun on shower fittings — the heat is excessive and risks warping plastic components, melting seals, and damaging wall tile.
In the vast majority of cases, penetrating oil combined with a strap wrench will free any stuck shower head. If none of these three methods work, the fitting may need to be cut and the shower arm replaced — at which point a licensed plumber is the sensible call.
When to Call a Plumber
Shower head installation is one of the most beginner-friendly plumbing tasks there is — but there are three situations where professional help is the right decision:
1. The Shower Arm Is Cracked or Severely Corroded
If removing the old shower head reveals split, cracked, or heavily corroded threads on the shower arm, the arm needs replacing before you can fit a new head. Replacing a shower arm involves accessing the pipe connection inside the wall — a job best left to a licensed plumber unless you have hands-on experience with pipe work. Trying to force a new shower head onto a damaged arm is a short-term fix that will leak.
2. A New Shower Head Doesn’t Solve Low Water Pressure
If you’ve installed a EDITOR’S CHOICE high-pressure shower head and the flow is still disappointing, the problem lies elsewhere in your plumbing system — a partially closed valve, a failing pressure regulator, or scale buildup inside the pipes. A plumber can diagnose and fix the root cause rather than just treating the symptom at the shower head end.
3. Water Is Leaking from the Wall — Not Just the Fitting
If water appears from behind the wall plate or around the base of the shower arm — rather than just at the thread connection — there’s a leak inside the wall. This is a pipe joint failure that requires access to the plumbing behind the tiles. Never ignore it: undetected leaks cause serious structural damage, mold growth, and costly repairs over time.
Frequently Asked Questions
Q: Do I need to turn off the water to change a shower head?
For a basic shower head swap, you don’t need to shut off the main supply — closing your shower handle valve fully stops the flow just as effectively for this job. That said, closing the dedicated shut-off valve behind the shower is always the safer approach. It keeps the threads completely dry (which helps plumber’s tape bond better) and removes any chance of an unexpected drip while you’re working. If the valve is easily accessible, it takes five seconds and is worth doing every time.
Q: How do I stop my new shower head from leaking?
A drip at the thread connection is almost always caused by one of three things: insufficient plumber’s tape, tape wrapped in the wrong direction, or insufficient tightening. Start by removing the shower head, cleaning the threads completely, and rewrapping with fresh PTFE tape — two to three firm clockwise wraps covering all exposed threads. Reinstall hand-tight first, then add a quarter turn with a wrench. If the drip continues, check that the rubber washer inside the connector is present and seated flat. A missing or misaligned washer is the other common culprit in a leaking shower head installation.
Q: Can I install a shower head without a plumber?
Absolutely — shower head installation is one of the most beginner-friendly DIY plumbing jobs you can do. You need no specialist knowledge, no pipe cutting, and no soldering. As long as the shower arm threads are in good condition and your new head fits the standard US 1/2 inch NPT fitting (which covers virtually every shower head sold in America), you can complete the job in under 15 minutes with just an adjustable wrench and a roll of plumber’s tape.
Q: What type of shower head gives the best water pressure?
For maximum pressure, look for a shower head specifically marketed as high-pressure. These models use a pressure-compensating flow optimizer that concentrates the spray into a stronger, more forceful stream — the HOPOPRO and AquaCare models above are both engineered for high pressure and perform well even in homes with lower mains pressure. Multi-mode handheld heads also typically include a “jet” or “massage” setting that concentrates the flow for maximum intensity. For a full comparison of the best options across all types and budgets, see our best shower heads guide.
Conclusion — Ready to Install Your New Shower Head?
Shower head replacement is one of the most satisfying DIY plumbing upgrades you can make — quick, low-cost, and immediately noticeable every morning. With the right preparation, a roll of plumber’s tape, and 15 minutes of your time, you can transform your shower without ever calling a plumber.
To recap how to install a shower head: turn off the water, remove the old head, clean the threads, wrap with plumber’s tape, hand-tighten the new head, finish with a quarter-turn wrench, restore the water supply, and check for leaks. Eight steps, under 15 minutes, no specialist skills required.
Before you buy, browse our best shower heads guide for a full comparison of the most popular models across every style and budget. Deciding between a fixed and a handheld head? Our fixed vs handheld comparison covers it, and if the valve behind the wall is the real problem, see the best shower valves guide. And once your new shower head is in place, make sure you’ve got a good stock of plumber’s tape for future maintenance jobs — it’s one of the most useful things to keep in any home toolkit.
Happy installing.
✍️ About This Review
PTR Editorial Team — Plumbing Guides. We compare manufacturer specifications, installation requirements, compatibility and available product documentation to help homeowners choose suitable tools and parts. How we review →