
Guides
19 Oct 2026

Can’t Reach the Faucet Nut? Choose the Right Tool Before You Buy
Not sure which tool fits your faucet nut? Identify the fixing, see how it lets go and check your clearance first. Then choose a tool, or use one you own.
Check mount, sink thickness, clearances, drain, dishwasher and power before buying a replacement garbage disposal, using the makers' own documents.
Please note: Information in this guide is based on manufacturer documents and product pages we read on 2 November 2026 and is subject to change. Always check the maker’s current documents for your exact model, and consult a qualified electrician or plumber before changing wiring or drain connections.
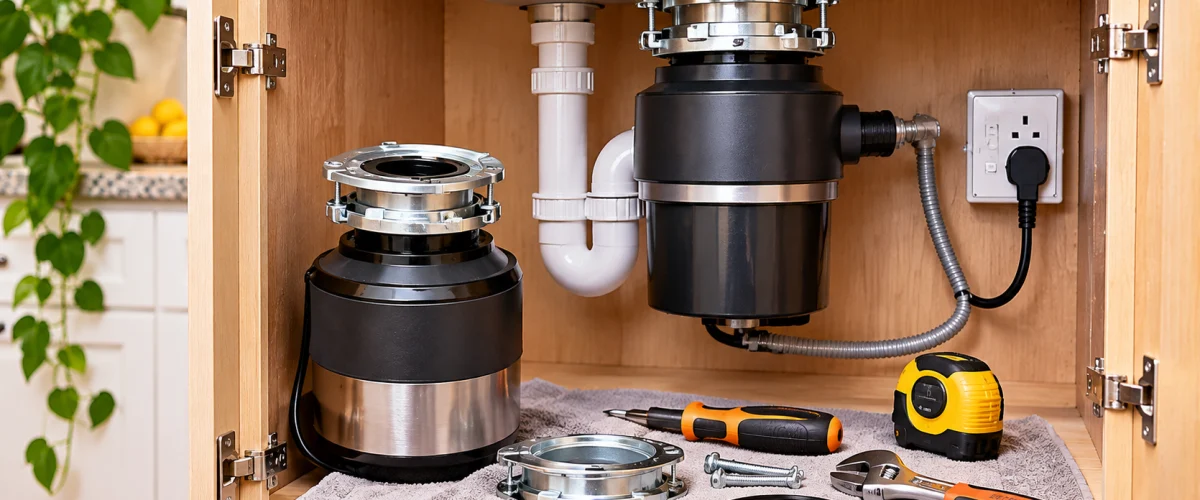
A replacement garbage disposal has to fit what is already under your sink: the mounting hardware that holds it to the sink, the space in the cabinet, the drain it empties into, the dishwasher hose (if there is one) and the way it gets power. A unit can be a good disposal and still be wrong for your sink if any one of those does not line up.
This guide is a checklist for what you can see and look up before you choose or order a unit. It does not cover installation, and it does not compare motor sizes or product picks. For the installation itself, see our guide to installing a garbage disposal. To compare specific models, see our review of five garbage disposals. What follows about specific units is what the manufacturers say in their own documents, linked at the end; we have not installed or tested these units.
At a Glance
| Difficulty | Easy — for this guide’s checks only, which are external observation (no disassembly, no electrical work) |
| Time | 20–40 minutes (editorial estimate) |
| Cost | No purchase normally needed if you already have the measuring tools |
| Tools Needed | Tape measure, flashlight, phone or notepad |
| Skill Level | Beginner — for external observation only; installing a disposal is a separate job |
✏️ Our Take
Five details decide whether a replacement fits: the mount, the sink thickness, the space under the sink, the drain and dishwasher connections, and the power arrangement. The manufacturers’ documents describe each one for their own models, and none of them gives a rule that holds across brands. So the useful habit is to write down what you can see and look up first, mark anything you cannot see as unknown, then compare that list with the new unit’s own documents instead of assuming a unit will fit because it looks similar.
IN THIS GUIDE
These checks are about looking, measuring what is visible and looking things up. You need:
Write down or photograph the following. They are the facts you compare against in the next four checks.
The mount is the hardware that attaches the disposal to the sink flange. Whether a new unit can use the mount you already have is a claim each maker makes for its own models. Here is what the makers say, each tied to the units they name.
| Maker and model | What the maker says |
|---|---|
| InSinkErator Badger 5XP (product page) | Describes a “Twist-On/Off Quick Lock Mount for fast replacement of existing InSinkErator food waste disposer.” |
| InSinkErator installation manuals (Badger and Contractor series; EZ Connect Power, Contractor and Evolution series) | Ask whether the new disposer’s mounting is the same as the old one and say that if it is, the existing mounting assembly may be kept. If it is not the same, they describe replacing the mounting assembly. |
| Moen Prep Series GT50C (spec sheet) | Says it “fits most existing assemblies, including the InSinkErator brand” and installs on “most existing 3-bolt assemblies.” |
| Waste King EZ Mount (installation manual; L-111 spec sheet; FAQ) | The manual says to inspect the current mounting ring and that a new disposal “may be compatible with the existing mounting ring and could be reused.” The L-111 sheet lists an EZ Mount twist-and-lock sink flange. Asked whether a Waste King 3-Bolt Mount works with a Moen disposal, the FAQ says “while the mounting systems look similar they are different.” |
What this tells you. These are statements by the makers about particular models, not a rule that any brand fits any mount, and look-alike mounts can differ. The documents we read do not say which generations of older InSinkErator units share a mount, so we cannot give you a chart; write down what you have and check it against the new unit’s own compatibility notes. The InSinkErator manuals treat “same mounting” as a shortcut and describe a path for when it is not the same, so a mismatch changes the job rather than ruling a unit out.
Sink thickness. Mounting hardware is designed for a range of sink thicknesses, and the ranges differ. Moen lists a maximum sink thickness of 1/2 in for the GT50C, and Waste King lists 1/2 in for the L-111. InSinkErator says its disposers can be installed on thicker sinks using extended mounting flange screws, and that an extended sink flange accessory is available for extra-thick sinks. To compare, use the thickness in your sink’s own specification. If you cannot find it, record it as unknown: a unit with a stated maximum cannot be confirmed for your sink until you know the figure, so ask the sink’s maker or a plumber before you buy.
If you have a basket strainer rather than a disposal flange, that is a different starting point; see our comparison of the kitchen sink strainer and the garbage disposal flange.
A disposal has to fit the cabinet in three ways: how tall it is, how wide it is, and where its discharge outlet sits. The makers publish these figures in different places, so find each one in the document for the unit you are considering.
What to measure in your cabinet (nothing here requires taking anything apart):
The drain connection. The Moen GT50C and Waste King L-111 sheets both list a 1-1/2 in drain connection. Compare the size and position of the discharge outlet on the new unit with the drain fitting your current disposal empties into. If the sizes or positions differ, that is a change to the drain plumbing, not just a swap of the unit, and a plumber can tell you what it involves.
The dishwasher connection. Disposals have a dishwasher inlet, and the makers’ documents are specific about it:
Because a knocked-out plug cannot be put back (per InSinkErator), decide whether a dishwasher will be connected before the new unit is opened up. How the dishwasher’s own drain hose is routed, with an air gap or a high loop, is a separate question; see our comparison of the dishwasher air gap and high loop.
Disposals differ in whether they arrive with a cord, and the makers’ documents handle each case differently. For this check, look only at what is visible: the unit’s cord or cable, any outlet and any switch. Do not open or remove any cover. The question to answer is how your current unit appears to be powered and whether the new one can be powered the same way.
| Maker and model | What the maker says about power |
|---|---|
| InSinkErator Badger 5XP (product page) | Lists the power cord as available with or without, so check which version a listing is. |
| InSinkErator Badger and Contractor series (manual) | If a disposer did not include a factory-installed cord, use a cord with an equipment-grounding conductor and grounding plug; the accessory CRD-00 is recommended. |
| InSinkErator EZ Connect series (manual and site) | Says not to re-use a pre-existing power cord, and that the EZ Connect cord must be bought separately if it is not provided with the unit. A separate EZ Connect hardwire adapter is “designed to work with Romex or BX cable” and should not be used with a standard three-prong cord. |
| Moen Prep Series GT50C (spec sheet) | Comes with a pre-installed, removable power cord that can be removed for optional hardwiring. |
| Waste King L-111 (spec sheet and manual) | Pre-installed power cord. The manual lists hardwiring as optional and says that if a grounding outlet is not available, a qualified electrician should install one. |
| GE (owner’s manual) | For models not equipped with a cord, describes two routes: attach a power cord, or wire the disposer directly into the house current. |
The outlet and the switch. The InSinkErator and Waste King manuals both say a corded unit must plug into a properly grounded outlet, and Waste King says to have a qualified electrician install one if you do not have it. From the cabinet you can see whether a receptacle is there and what it looks like, but a receptacle that looks grounded (for example, one with three slots) does not show that it is correctly grounded. Appearance alone cannot confirm grounding; have a qualified electrician check it if uncertain. InSinkErator’s Badger-series manual says the disposer requires a switch with a marked “Off” position within sight of the sink opening, and Waste King says a dedicated switch with a marked “Off” position must be within sight of the sink opening, the disposal or the air switch control unit. Waste King’s L-111 sheet says it can be activated by a wall switch or a sink-mounted air switch; the Moen sheet lists wall switch control. If you are considering an air switch, see our garbage disposal air switch review.
In practice the power check is four questions: does your current unit appear to use a cord or a cable, is there a receptacle where a cord would plug in, where is the switch, and does the new unit’s document describe the arrangement you have. GE and Waste King both tell readers who are not familiar with electrical work to call a qualified electrician.
Use this table to record what you have, with “unknown” wherever you could not see or look something up, and compare it with the unit you are considering.
| Check | Record from your sink | Compare on the new unit’s documents | If they differ or are unknown |
|---|---|---|---|
| Mount | Photos of the mounting ring and flange; brand and model if visible | The maker’s statement about fitting existing mounts, and whether a mounting assembly is included | Treat it as needing the new unit’s own mount; read how the maker describes that path |
| Sink thickness | The figure from the sink’s own specification, or “unknown” | Maximum sink thickness; accessories for thick sinks | Ask the sink’s maker or a plumber; do not dismantle the flange to measure |
| Space | Sink underside to cabinet floor; cabinet width and the narrowest opening; height of drain pipe; other items in the cabinet | Overall height; width or diameter; distance from sink bottom to discharge centre line (add 1/2 in for stainless where the maker says so); any clearance the maker names | A smaller unit or a different discharge position; ask a plumber if the pipe would have to move |
| Drain | Size and position of the fitting the current outlet empties into | Drain connection size and outlet position | A plumbing change; ask a plumber |
| Dishwasher | Whether a hose is attached; hose size at the disposal | Dishwasher inlet size; what the maker says about the inlet plug and adapters | A hose adapter or connector kit if the maker lists one |
| Power | Visible cord or cable; whether a receptacle is visible; where the switch is. Grounding: appearance alone cannot confirm it | Whether a cord is included; the maker’s hardwiring and switch requirements | Call a qualified electrician before buying a unit that needs a different arrangement |
If the checks show that the drain pipe sits in a different place from the new unit’s discharge, or that you cannot tell how the current unit is connected, a plumber or electrician can settle it before you buy.
To look for local plumbers, you can search PlumberArchive.com, a plumber directory.
Follow PlumbingToolsReview on Facebook for plumbing tips, tool reviews and DIY maintenance guides. We cover toilet repairs, bathroom fixtures and pipe maintenance, written for US homeowners who want to handle more themselves.
Only where the maker says so for that model. Moen says its GT50C fits most existing assemblies including InSinkErator’s, and Waste King says a new disposal may be compatible with the existing mounting ring, but its FAQ also says that its 3-Bolt Mount and a Moen disposal look similar and are different. Compare your photographs with the new unit’s own documents. If they do not match, the makers’ manuals describe replacing the mount as part of the job.
It changes what you check. If a dishwasher is connected now, look at the new unit’s dishwasher inlet size and read what the maker says about the inlet plug and any adapter. InSinkErator says the plug must be removed to connect a dishwasher and cannot be replaced afterward, so decide before the unit is opened.
Not necessarily. Several units come with a cord (the Moen GT50C and Waste King L-111 are listed with pre-installed cords), some are sold with or without one, and the makers list hardwiring as an option. Which arrangement you can use depends on what is in your cabinet: a receptacle where the cord would plug in, or an existing cable. If you are unsure which you have or whether it is grounded correctly, a qualified electrician is the right person to ask.
Look up your sink’s own specification: its brand and model number, spec sheet or original paperwork. You cannot see the thickness at the drain opening while the flange is installed, so do not take the flange apart to measure it. Compare the figure with the new unit’s maximum sink thickness (Moen and Waste King list 1/2 in for the units named above). If you cannot find the figure, record it as unknown and ask the sink’s maker or a plumber; InSinkErator offers extended mounting screws and an extended sink flange accessory for thicker sinks.
A replacement disposal fits when five things line up: the mount, the sink thickness, the space and discharge position, the drain and dishwasher connections, and the power arrangement. The makers’ documents publish what each of their units needs, and the reliable approach is to write down what you can see and look up, mark the rest unknown, and check each item against the document for the specific unit.
Once the checks line up, our review of five garbage disposals compares specific models, and our guide to installing a garbage disposal walks through the installation itself.
These are the manufacturer documents and pages this guide draws on, read on 2 November 2026. Each covers only the models it names, so use the document for your own unit.
✍️ About This Guide
PTR Editorial Team — Plumbing Guides. We compare manufacturer specifications, installation requirements, compatibility and available product documentation to help homeowners choose suitable tools and parts. How we review →
Not sure which tool fits your faucet nut? Identify the fixing, see how it lets go and check your clearance first. Then choose a tool, or use one you own.
Check your manual and the drain route first: gravity hose, built-in pump or external pump. Then see whether you need a dehumidifier hose at all.
Explore portable bidets that need no water-line connection, from bottle caps and squeeze bottles to battery-powered handhelds.

