Guides
4 Oct 2026

How to Make a PEX Crimp or Clamp Connection (2026) — Step-by-Step Guide
Make a PEX crimp or clamp connection step by step: ring and clamp placement, gauge checks, failed joints and code notes from maker sheets.
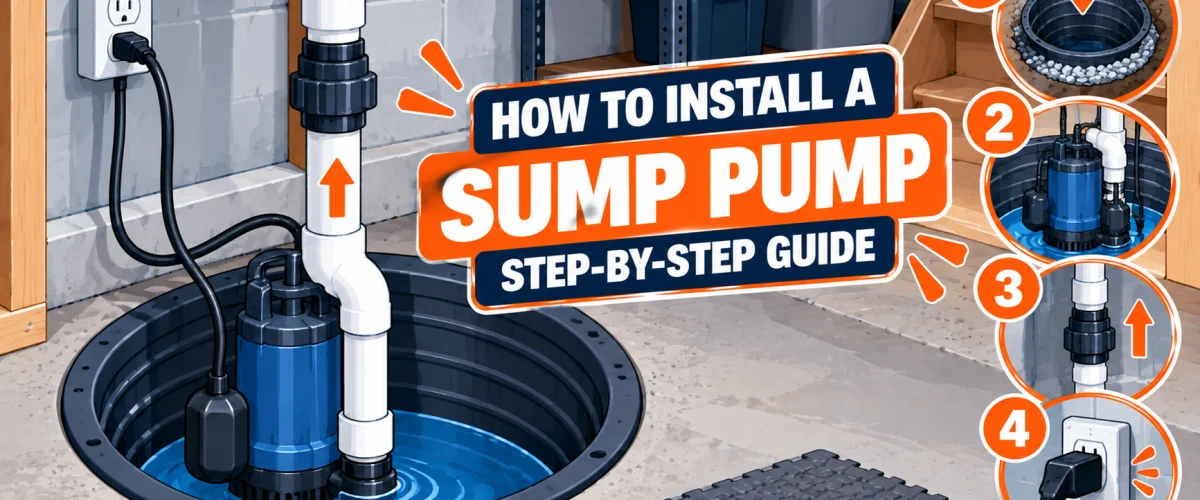
Replace or install a submersible sump pump in an existing pit: disconnect power, set the pump, connect the discharge pipe and check valve, then test.
Please note: Product information is based on our research at time of writing and may change. This guide is general. Always follow the instructions that come with your pump, and check local plumbing and electrical code if you’re unsure.
This guide covers replacing or installing a submersible sump pump in a pit, liner and discharge line that are already in place, the most common sump pump job for a homeowner. It doesn’t cover digging a new pit or pedestal pumps, which work differently. If your pit doesn’t exist yet, our sump pump review explains why that’s a licensed contractor’s job, cutting into a concrete floor and setting a liner.
This guide also doesn’t walk through the check valve’s own cut-and-clamp installation in full detail. Our check valve guide covers that on its own. If you’re deciding between a submersible and a pedestal pump, or a sump pump and a utility pump, see our utility vs. sump pump comparison.
At a Glance
| Difficulty | Moderate |
| Time | 30–60 Minutes |
| Cost | $ for install materials (check valve, PVC fittings/cement or slip couplings, Teflon tape); pump not included, see our sump pump reviews |
| Tools Needed | Hacksaw or pipe cutter, PVC primer and cement (or slip couplings with hose clamps and a screwdriver), adjustable wrench, Teflon tape, a bucket for the test fill, and a drill only if your pump’s manufacturer calls for a drilled vent hole |
| Skill Level | Beginner-to-Intermediate |
✏️ Our Take
Replacing a pump in a pit that’s already set up is a real weekend job, not a specialty one. What decides how it goes is the check valve orientation, the float switch’s clearance from the pit wall, and following your own pump’s instructions on the vent hole, since manufacturers genuinely disagree on that detail.
IN THIS GUIDE
1. Your outlet. Sump pumps plug in, and the manuals we read are firm that this must be a GFCI-protected outlet, with the cord reaching it directly. The National Electrical Code requires GFCI protection for basement receptacles in most jurisdictions. None of the manuals allow an extension cord. If you don’t have a suitable outlet nearby, that’s an electrician’s job.
2. Your pit and pump size. Manufacturers set different minimum pit diameters, from about 10 to 18 inches depending on the brand and model, so check your pump’s own manual against your pit. The pit should be clear of debris, with a hard, level surface for the pump to sit on, not sand, gravel or dirt.
3. Your vent hole. Some pumps need a small hole drilled in the discharge pipe to prevent air lock, and manufacturers genuinely disagree on this: one requires a 3/16 inch hole below the check valve, another recommends an optional 1/8 inch hole, and a third builds an anti-airlock passage into the pump housing and says no hole is needed. There’s no universal answer here, so follow your own pump’s manual.
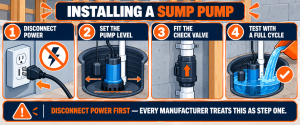
Every manual we read treats this as the mandatory first step, not an afterthought. Zoeller’s manual (model FM0447) states it plainly: “FOR YOUR PROTECTION, ALWAYS DISCONNECT PUMP FROM ITS POWER SOURCE BEFORE HANDLING.” Wayne’s instructions (model 600002W-001) use nearly identical wording: “ALWAYS DISCONNECT THE PUMP from power supply before installing, servicing or making any adjustments.” Unplug the old pump, or shut off power at the breaker if it’s hardwired, before you touch anything in the pit.
Lift the old pump out by its handle, never by the power cord. Zoeller’s manual is explicit on this: “DO NOT carry or lift pump by its power cord.” Wayne’s instructions give the same warning: “DO NOT LIFT OR CARRY THE PUMP BY THE POWER CORD.” Disconnect it from the discharge pipe and check valve.
Place the pump on the pit floor so it sits level and stable. Position it so the float switch has clearance on all sides. The manuals we read call for at least an inch of clearance from the pit wall, with the float free to move through its full range without touching the pump, the pit wall or the discharge pipe.
Use a discharge pipe the same diameter as the pump’s outlet, never smaller. Zoeller’s manual states: “DO NOT use a discharge pipe smaller than the pump discharge.” Connect it according to your pump’s fitting, whether that’s threaded or a slip fitting. For a permanent installation, Wayne’s instructions require rigid PVC pipe rather than flexible hosing.
The check valve goes on the discharge pipe close to the pump, oriented to let water flow up and out while blocking it from flowing back down when the pump cycles off. Check valves are typically marked with a flow-direction arrow on the body; install the valve so that arrow points away from the pump, in the direction water flows when the pump is running. None of the three manuals we read for this guide gives that specific arrow-orientation detail — this is general plumbing knowledge, not something we’re attributing to a manufacturer. For the cut-and-clamp mechanics of fitting the valve itself, our check valve guide covers that step in detail.
If your manual calls for one, drill it in the discharge pipe below the check valve, at the size your manual specifies. If your pump has a built-in anti-airlock feature, skip this step.
Connect the rest of the discharge pipe or hose to carry water away from the house. One manufacturer we read specifies at least 3 feet from the foundation; the actual distance for your home depends on your yard’s slope and local drainage, so check what’s already routed if you’re just replacing a pump. Our winterizing guide covers routing and freeze protection for the discharge line in more depth. Never connect the discharge to a sanitary sewer line; plumbing code prohibits mixing storm water into sewage-only drains.
Plug the pump into the GFCI outlet. Fill the pit with water using your bucket and watch the pump cycle on, empty the pit and shut off. Wayne’s instructions describe this same fill-and-watch test and call for checking, during the test, that the discharge point is routed at least 3 ft. away from the foundation. Run a second fill-and-drain cycle and check that the float moves freely and the discharge line is actually carrying water away.
The pump won’t turn on. Check the GFCI outlet hasn’t tripped, and that the float switch isn’t jammed against the pit wall or pump.
Water backs up into the pit after the pump stops. The check valve may be installed backward, or it may be stuck open. Recheck the orientation.
The pump runs but struggles or trips repeatedly. This can be air lock. If your pump calls for a vent hole and doesn’t have one, that’s the likely cause.
Water pools around the discharge outlet outside. The line may not be routed far enough from the foundation for your yard’s slope. See our winterizing guide for routing guidance.
Not usually, if the pit, liner and discharge line are already in place. Many homeowners do this themselves in under an hour. Call a professional for anything involving hardwiring, a new pit, or standing water near live electrical.
It depends on the model. Some manufacturers require one, some make it optional, and some build anti-airlock protection into the pump so none is needed. Check your pump’s own manual.
No. Every manual we read prohibits it. The pump needs a GFCI outlet within direct reach of its cord.
It varies by yard and local guidance. One manufacturer we read specifies at least 3 feet as a minimum. Our winterizing guide covers this in more detail.
They’re built for different jobs. See our comparison.
Replacing a sump pump in an existing pit is a real DIY job: disconnect power first, set the pump level with clearance for the float, connect the discharge pipe and check valve, follow your pump’s own guidance on the vent hole, and test with a full fill-and-drain cycle before you call it done. If any part of the job touches wiring, a new pit, or standing water, that’s the point to call a professional. To choose a pump, see our sump pump review.
✍️ About This Guide
Written by Mike Reynolds, DIY Home Improvement Writer at PlumbingToolsReview — former residential contractor helping US homeowners tackle plumbing repairs with confidence. Learn how we test →
Make a PEX crimp or clamp connection step by step: ring and clamp placement, gauge checks, failed joints and code notes from maker sheets.
Install a bathroom sink pop-up drain assembly step by step: remove the old stopper, seat the flange, connect the pivot rod, and adjust the lift rod strap.
Install a handheld bidet sprayer in 30-45 minutes: fit the T-valve, connect the hose, mount the holster, and build the after-use shutoff habit.

