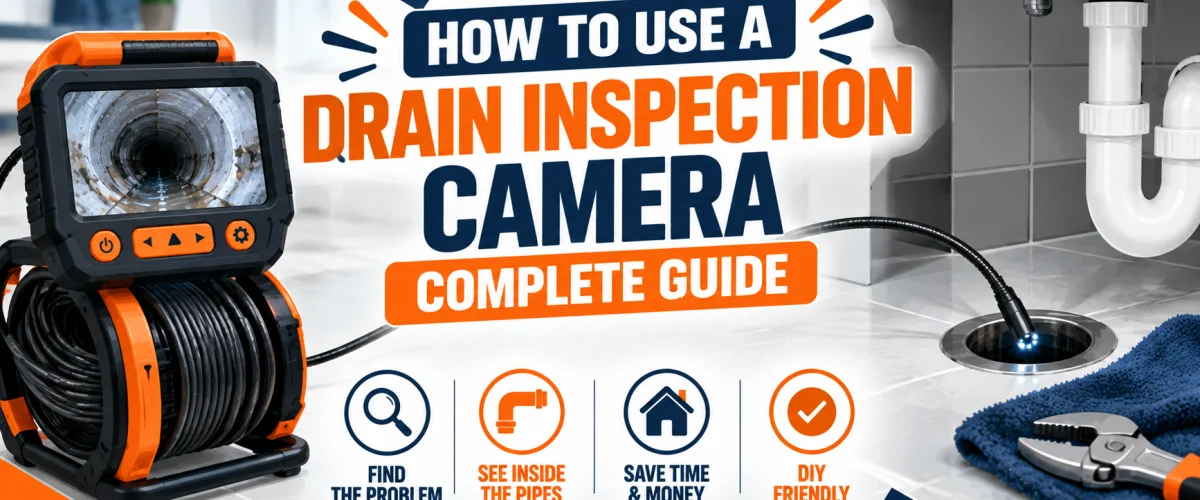
Please note: This guide covers operating a consumer-grade drain inspection camera safely and effectively. Controls, cable lengths, and monitor displays vary by manufacturer — if anything about your specific unit doesn’t match what’s described here, check your camera’s manual before use.
Introduction
A drain inspection camera lets you see exactly what’s happening inside a pipe before you decide how to fix it — instead of guessing at the cause of a slow or recurring clog, you can look directly at it. That matters because “the drain is slow” can mean a dozen different things underneath the surface: a soft grease buildup that a snake will clear in seconds, a partial clog further down than a hand auger can reach, root intrusion working its way into a joint, or a genuinely damaged pipe that no amount of snaking will fix. A camera tells you which one you’re dealing with before you commit to a repair.
It’s most useful in a few specific situations: a clog that keeps coming back even after you’ve cleared it, confirming a line is actually clear before or after running a drain snake — see our guide to unclogging a basement floor drain for a snaking procedure this pairs naturally with — or simple curiosity about why a drain is running slow when nothing you’ve tried has fixed it. This guide covers operating the camera itself once you own one — access points, insertion technique, and reading what’s on the monitor. If you’re still shopping for a camera, our 5 Best Drain Cameras roundup covers picks across screen size, cable length, and waterproof rating.
At a Glance
| Skill Level |
Beginner — no plumbing experience required, just a steady hand and patience with the feeding technique below. |
| Tools Needed |
A drain inspection camera, a soft cloth or lens wipe to keep the lens clean, and access to a cleanout or drain opening. |
| Time Needed |
10 to 20 minutes for a straightforward inspection, longer if you’re navigating multiple bends or a longer run. |
| Critical First Step |
Clear any standing water and loose debris from the drain opening before inserting the camera, so the lens isn’t immediately obscured. |
Choosing the Right Access Point
Where you insert the camera depends on what access your home actually has. A dedicated cleanout — a capped fitting, often a few inches across, usually found in a basement, crawl space, or just outside the foundation — is the best option when one exists. It’s built specifically for this kind of access, gives the cable a straight run into the main line, and doesn’t require disassembling anything else first.
If there’s no cleanout near the drain you’re inspecting, the next option is removing the P-trap under a sink — the curved section of pipe just below the drain. Unscrewing the two slip nuts that hold it in place (have a bucket underneath for the water that’s held in it) gives you a direct path into the branch line. For floor drains and some tub or shower drains, you can often insert the camera directly into the drain opening itself, sometimes after removing a strainer or cover plate first. Whichever access point you use, the goal is the same: get the cable into the line with as few obstructions as possible before you start feeding it.
Preparing the Camera and Drain
Before you insert anything, check the cable itself for kinks, cracks in the outer sheathing, or a loose connection at the camera head — feeding a damaged cable into a pipe is how small problems become bigger, harder-to-retrieve ones. Wipe the lens clean with a soft cloth; even a light film from storage or the last use will show up as a blur on the monitor the moment you’re underground and can’t easily fix it.
Then prepare the drain itself. Clear any standing water you can — a wet vac works well for this — and remove loose debris (hair, soap scum, visible buildup) from right around the opening. This is the At a Glance table’s “critical first step” for a reason: a camera lens that goes straight into murky standing water is effectively blind for the first several feet, and you’ll be feeding cable without any real picture of what it’s passing.
💡 Tip: Turn the monitor’s brightness up before you start rather than adjusting it mid-inspection. It’s a small thing, but fumbling with settings one-handed while feeding cable with the other is how camera heads get pushed further than intended.
Inserting and Feeding the Cable
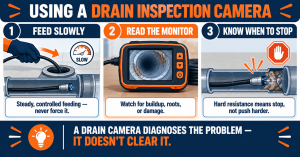
Feed the cable in slowly and steadily, watching the monitor the entire time rather than the cable itself. Rushing the feed is the single most common way beginners lose track of what they’re looking at — the camera passes something worth noting and you don’t catch it because the cable was already three feet further in by the time you looked back at the screen.
You’ll feel resistance at every bend — that’s normal, and a gentle, patient push (sometimes combined with a slight rotation of the cable) is usually enough to work the head around it. A genuine blockage feels different: the cable stops advancing no matter how you angle or rotate it, and pushing harder doesn’t gain you any distance, it just puts more bend into the cable behind the stuck point. That distinction — a bend you can work through versus a hard stop that doesn’t give — is the main skill this job comes down to.
⚠️ Warning: Never force the cable past a hard stop. Consumer camera cables and heads aren’t built to be pushed through an actual obstruction, and forcing it risks damaging the camera head, kinking the cable, or — if the stop is a cracked or offset pipe joint — making an existing pipe problem worse. If it won’t advance after a few gentle attempts, that’s your answer: back the cable out and treat it as a diagnostic finding, not an obstacle to push through.
Reading the Monitor and Identifying Common Line Conditions
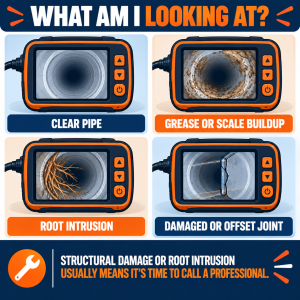
A clean, healthy pipe interior looks smooth and uniform — consistent color, a rounded cross-section filling the frame evenly, and nothing breaking up the walls as the camera moves past. Once you know what that baseline looks like, the common problems are fairly easy to recognize by comparison:
- Grease buildup shows up as a yellowish or tan coating narrowing the pipe from the walls inward, often thickest at the bottom of horizontal runs. The pipe’s round shape is still visible, just smaller than it should be.
- Root intrusion looks like thin, dark, hair-like or rope-like strands entering through a joint or crack, sometimes just a few strands and sometimes a dense mat nearly filling the pipe. It almost always enters at a joint rather than through solid pipe wall.
- A partial clog appears as a distinct, more solid mass — paper, wipes, food debris, or a mix — that visibly narrows or interrupts the pipe’s interior rather than coating it evenly the way grease does.
- A cracked or offset pipe joint shows up as a visible gap, a step or misalignment where two pipe sections don’t line up flush, or a crack line running along the pipe wall. This is a structural issue rather than a clog, and it’s the finding most likely to mean a repair rather than a cleaning.
If what you’re seeing doesn’t clearly match any of these, that’s fine — the point of the camera isn’t to self-diagnose every possible pipe condition, it’s to have a clear picture (and ideally a recording, if your camera has DVR capability) to describe or show a plumber if the issue turns out to be beyond what you can address yourself.
Navigating Bends and Fittings
A standard 90-degree bend is the most common point where beginners get the camera head stuck. Slow down as you approach one, and use a light rotating motion on the cable as you push — this helps the semi-rigid head find the turn rather than jamming straight into the corner. Backing off slightly and re-approaching at a different rotation often works better than pushing harder from the same angle.
A Y-fitting, where two lines join, is trickier because the camera can head into either branch depending on the angle it enters at. If you know which branch you’re trying to inspect, a gentle push-and-rotate combination while watching the monitor closely as you approach the junction gives you the best chance of steering into the right one. If the head goes down the wrong branch, back it out fully and try again rather than continuing to feed cable down a line you didn’t mean to inspect.
Locating the Camera Head
Some consumer camera models include a built-in transmitter, often called a sonde or locator, inside or near the camera head. If yours has one, a separate handheld locator device — sold with the camera or as an accessory — can be swept over the ground or floor above the cable’s approximate path to pinpoint the head’s location and depth. This is genuinely useful once you’ve found something worth marking, since it tells you exactly where above ground the issue sits, without needing to guess based on how much cable you’ve fed in. Not every consumer model includes this feature, so check your specific camera’s documentation if you’re not sure whether yours does.
When to Call a Professional
A consumer drain camera is a diagnostic tool with real limits, and knowing where those limits sit is as important as the technique itself. Cable length on consumer models typically tops out well short of what a full main sewer line run requires, and the resolution — while good enough to identify the line conditions covered above — isn’t a substitute for professional-grade equipment when a repair decision is on the line. Most importantly, the camera can only show you a problem; it can’t clear or fix anything it finds.
Call a licensed plumber if the camera reaches the end of its cable before you’ve found the cause, if the issue appears to be deep in a main line beyond what a consumer camera can reach, or if what you’re seeing is a confirmed structural problem — a cracked or offset joint, or root intrusion significant enough that it looks like more than a routine cleaning will fix. This is the same category of finding our toilet auger vs drain snake comparison points to when it notes that a licensed plumber has access to equipment neither hand tool can match — a consumer camera confirms exactly when you’ve reached that point, rather than leaving you guessing. Professional-grade cameras paired with a locator can pinpoint the exact spot to excavate if a repair turns out to be necessary, which is often the next step once a structural issue is confirmed.
US Regional Context: Most US homes built from the 1980s onward have a dedicated exterior or basement cleanout as a matter of plumbing code, making that the standard access point described above. Older homes — particularly pre-1960s construction common across the Northeast and parts of the Midwest — often lack one, which is why removing a P-trap or using a drain opening directly is still a routine, expected part of this job rather than a workaround. If you’re not sure whether your home has a cleanout, a walk around the exterior foundation and a check of the basement or crawl space is worth doing before assuming you’ll need to remove a trap.
✏️ Our Take
Keep the camera’s job in perspective: it’s a diagnostic tool, not a clearing tool. It tells you what’s actually wrong so you can pick the right fix — snake it yourself, try a different clog remedy, or call a plumber — instead of guessing and possibly making a structural issue worse by treating it like a routine clog. The technique itself is straightforward once you’ve done it once or twice; the real value is in what you learn from the monitor, not the mechanics of feeding a cable.
Prices and ratings may change. Always check Amazon for current prices.
Frequently Asked Questions
Q: Can a drain inspection camera clear a clog by itself?
No. A drain camera is a diagnostic tool only — it shows you what’s causing the problem so you can choose the right fix, but it doesn’t remove anything from the pipe. Clearing the line still requires a snake, hydro-jetting, or another appropriate method once you know what you’re dealing with.
Q: How far can a consumer drain camera actually reach?
It depends entirely on the model’s cable length, which varies quite a bit across consumer cameras. Our 5 Best Drain Cameras roundup breaks down cable length options if you’re choosing a camera and want to match it to how far into your line you’re likely to need to inspect.
Q: Do I need to remove the P-trap to use a drain camera?
Only if your home doesn’t have a dedicated cleanout near the drain you’re inspecting. Where a cleanout exists, that’s the more direct access point and there’s no need to disassemble the trap. Where one doesn’t, removing the P-trap is a normal and expected part of getting access.
Q: What if the camera shows root intrusion or a cracked pipe?
That’s a structural finding, not a routine clog, and it’s a sign to stop and call a licensed plumber rather than continue trying to clear it yourself. See the When to Call a Professional section above for what that finding typically means and what comes next.
Conclusion
Using a drain inspection camera comes down to patience more than skill: choose the right access point, feed the cable slowly while actually watching the monitor, and learn to tell a normal bend from a genuine blockage. Once you can read what’s on screen — a clean pipe versus grease, roots, a partial clog, or a structural problem — you’ll know whether you’re looking at something you can clear yourself, or a finding that’s worth taking straight to a licensed plumber. Pair it with our basement floor drain guide to confirm a line is genuinely clear after snaking, not just clear enough that the water happens to be draining again.
✍️ About This Guide
Written by Mike Reynolds, DIY Home Improvement Writer at PlumbingToolsReview — former residential contractor helping US homeowners tackle plumbing repairs with confidence. Learn how we test →