
Guides
19 Oct 2026

Can’t Reach the Faucet Nut? Choose the Right Tool Before You Buy
Not sure which tool fits your faucet nut? Identify the fixing, see how it lets go and check your clearance first. Then choose a tool, or use one you own.
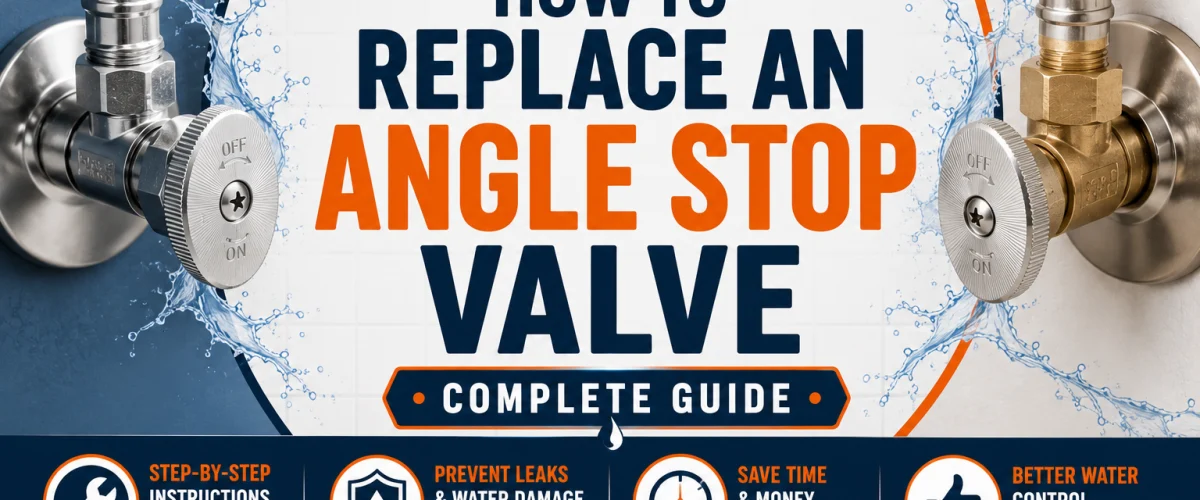
Step-by-step instructions for replacing a leaking, seized, or corroded angle stop valve — no soldering required with modern compression and push-to-connect valves.
Please note: Information in this guide is subject to change. If a valve is severely corroded, seized, or you’re uncomfortable working near your home’s main water supply, consult a licensed plumber before proceeding with any repair.
A leaking or seized angle stop valve is one of the more common under-sink repairs in an older home, and it tends to show up in one of two ways. Either you notice a small but steady drip or corrosion building up at the valve body itself — a sign the internal seals are wearing out — or you go to shut off water for an unrelated repair, like a faucet swap or a supply line replacement, and discover the valve won’t turn or won’t fully stop the flow. Both situations point to the same fix: the valve needs to come out and be replaced, not just tightened or cleaned.
The good news is that replacing an angle stop valve is a genuinely approachable DIY repair. Decades ago, this job often meant sweating a new valve onto copper pipe with a torch, a skill most homeowners don’t have. Modern compression and push-to-connect valves have changed that entirely — both mount onto the pipe without any soldering, and both are within reach of a first-time DIYer working carefully with basic hand tools.
At a Glance
| Process | Shut off main water supply → Drain the line → Remove old valve → Prep the pipe → Install new valve → Test for leaks |
| Estimated Time | 30–60 Minutes |
| Cost | $ – $$ (cost of the replacement valve itself) |
| Tools Needed | Adjustable wrench or basin wrench, new angle stop valve, bucket or towels, Teflon tape |
| Skill Level | Beginner to Intermediate |
✏️ Our Take
Replacing an angle stop valve is one of the more approachable repairs in home plumbing — there’s no soldering involved if you choose a compression or push-to-connect replacement, and the whole job typically takes under an hour once the water is off. The part that trips people up isn’t the installation itself, it’s dealing with an old valve that’s corroded onto the pipe. Go in expecting to work slowly and patiently at that step, and the rest of the job is genuinely straightforward.
IN THIS GUIDE
Not every issue at an angle stop valve calls for a full replacement, but a few specific signs mean the valve has reached the end of its useful life. The most obvious is visible leaking or corrosion at the valve body — a damp ring under the cabinet, mineral crust around the packing nut, or greenish staining on copper are all signs the internal seals are breaking down, and tightening the packing nut is at best a short-term patch.
A second sign is a valve that turns but won’t fully shut off water flow, usually because the internal washer or seat has worn out. This is a more urgent case, since the valve can no longer do its actual job of isolating the fixture. Our guide on how to shut off water to a single fixture covers how to properly test whether a local shutoff is actually working, worth doing before you conclude a valve needs replacing rather than just exercising.
The third and most common trigger is a valve that’s seized and won’t turn at all — usually discovered mid-repair, when you go to isolate water for another job and the handle simply won’t budge. A seized valve is not safe to leave in place, since it means you have no way to isolate that fixture in a future emergency, even if it isn’t actively leaking today.
This is a short parts list, and most of it is either already in a basic homeowner toolbox or available at any hardware store for a modest cost. Gather everything before you shut off the water so the job isn’t interrupted partway through.
If you haven’t already picked out a replacement valve, our angle stop valve reviews cover current compression and push-to-connect options side by side, which is worth a look before you’re standing under the sink mid-repair.
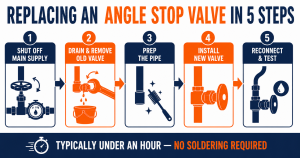
Because the local angle stop valve itself is the thing being replaced, you can’t rely on it to isolate water the way you normally would for a smaller repair. Instead, this job starts at the main house shutoff.
With the main supply off, the next step is clearing the line of pressure and residual water before you start disconnecting anything, then working the old valve free of the pipe.
A stubborn nut is the single most common holdup in this repair. Give penetrating oil real time to work — often 10 to 15 minutes on a badly corroded fitting — rather than reapplying force every few minutes. Patience here saves you from a bigger repair if a nut snaps or a pipe twists loose behind the wall.
With the old valve off, take a moment to prepare the bare pipe end before installing the new valve. Skipping this step is one of the most common reasons a new valve ends up leaking almost immediately after installation.
Take an extra minute here even if the pipe looks fine at a glance — a smooth, round, clean pipe end is the single biggest factor in whether the new valve seals correctly on the first try.
How you install the new valve depends on which type you chose. Both methods are straightforward, but the steps differ enough that it’s worth knowing which one you’re working with before you start.
For a compression valve:
For a push-to-connect valve:
Whichever type you install, keep the valve’s handle in the closed position at this stage — there’s no reason to have it open until the supply line is reconnected in the next step.
With the new valve installed on the pipe, the last steps are reconnecting the fixture’s supply line and confirming everything holds under full water pressure.
A slow drip at either connection after testing is almost always a slightly undertightened nut or a valve that wasn’t fully seated — recheck both before assuming there’s a defect in the new valve itself.
If you haven’t already settled on a valve type, this specific repair scenario tends to make the choice fairly easy. Compression valves cost less and are fully reusable if you ever need to disconnect and reconnect the joint again later, but they do require a wrench and a bit more care getting the tightening torque right. Push-to-connect valves cost a little more but require no tools at all to seat — you simply push the valve onto a properly prepped pipe — which makes them a good fit if you’re working in a cramped space or want the fastest possible installation.
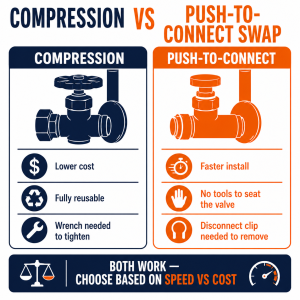
Either type is a fully appropriate choice for a straightforward angle stop replacement. If you want a closer look at build quality, materials, and specific models before deciding, our angle stop valve reviews break down current compression and push-to-connect picks in more detail than fits in this guide.
Angle stop valve replacement is one of the most common minor plumbing repairs in US homes, particularly in housing stock where the original valves have never been touched since construction. Many hardware stores nationwide carry both compression and push-to-connect replacement valves in-stock specifically because this repair is so frequent — it’s rarely a special-order part.
If the old valve is badly corroded, the pipe itself looks damaged, or you’re not comfortable working near your home’s main shutoff, search PlumberArchive.com — the US plumber directory with 12,000+ verified local plumbers across all 50 states.
Get weekly plumbing tips and DIY guides delivered straight to your Facebook feed.
No, not with modern replacement valves. Both compression and push-to-connect angle stop valves are designed to mount onto copper, PEX, or CPVC pipe without any soldering — a compression valve seals with a nut and ferrule tightened with a wrench, and a push-to-connect valve seals internally the moment it’s pushed onto a properly prepped pipe. Soldering is only relevant if you’re specifically installing an older-style sweat valve, which most homeowners have no reason to choose today.
Apply a penetrating oil to the nut and let it sit for at least 10 to 15 minutes before trying again, reapplying and waiting longer if needed on a badly corroded fitting. Avoid jumping straight to heavy force — a stuck compression nut can shear off or twist the pipe inside the wall if you push past its actual resistance. If it still won’t budge after a couple of rounds of penetrating oil and patient effort, that’s a reasonable point to call a plumber rather than risk damaging the pipe behind the wall.
Yes. Push-to-connect valves work on the same standard copper, PEX, and CPVC pipe sizes as compression valves, so switching from one type to the other during a replacement is completely normal and doesn’t require any special adapter. The only requirement is that the pipe end is clean, round, and properly deburred, since push-to-connect fittings rely entirely on the pipe surface itself to form a seal.
Most angle stop valve replacements take 30 to 60 minutes from shutting off the main water supply to testing the finished connection. The installation itself is usually the fastest part — 10 minutes or less for either valve type. The variable that adds time is dealing with a seized or corroded old valve, which can add anywhere from a few extra minutes to significantly longer if it needs repeated applications of penetrating oil.
Replacing an angle stop valve is a manageable weekend repair once you understand the sequence: shut off the main supply, drain and remove the old valve, prep the pipe properly, install the new valve, and test the connections before calling it done. The installation steps themselves rarely give homeowners trouble — it’s almost always the old, corroded valve that slows the job down, so budget extra patience there rather than reaching for excessive force.
Whether you choose a compression or push-to-connect replacement comes down to personal preference more than performance, and either is a solid, DIY-friendly choice for this repair. For help picking a specific valve, see our angle stop valve reviews, and if you’re not yet sure whether your valve needs replacing at all, our guide on how to shut off water to a single fixture walks through how to properly test an existing valve first.
Prices and ratings may change. Always check Amazon for current prices.
✍️ About This Guide
PTR Editorial Team — Plumbing Guides. We compare manufacturer specifications, installation requirements, compatibility and available product documentation to help homeowners choose suitable tools and parts. How we review →
Not sure which tool fits your faucet nut? Identify the fixing, see how it lets go and check your clearance first. Then choose a tool, or use one you own.
Check your manual and the drain route first: gravity hose, built-in pump or external pump. Then see whether you need a dehumidifier hose at all.
Explore portable bidets that need no water-line connection, from bottle caps and squeeze bottles to battery-powered handhelds.

