Please note: Information in this comparison is based on our research at time of writing and is subject to change. If you’re planning a large-scale or behind-the-wall installation, check your local plumbing code or consult a licensed plumber before choosing a connection method.
Introduction
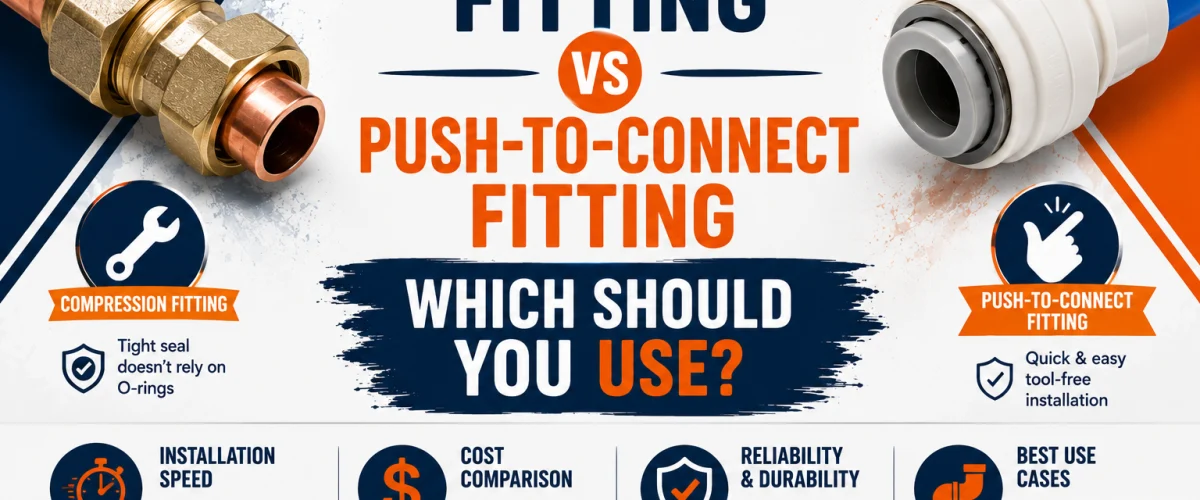
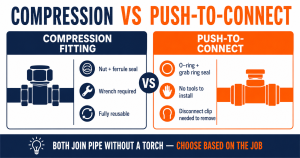
Compression fittings and push-to-connect fittings solve the same basic problem — joining pipe without a torch or solvent cement — but they get there in genuinely different ways. Compression fittings rely on a mechanical nut-and-ferrule seal that’s been the standard for finished connections like supply lines and angle stops for decades. Push-to-connect fittings skip the wrench entirely, using an internal grab ring and O-ring that seal the moment the pipe is pushed in.
Neither is a universal upgrade over the other — each is genuinely better suited to different jobs, and most well-stocked toolboxes end up with both. This comparison covers how each works, what they cost, how easy they are to remove or reuse, and which situations favor one over the other. If you’ve already decided on push-to-connect specifically, our Best Push-to-Connect Fittings review covers current options, and our Push-to-Connect vs Crimp Fittings comparison covers the third common joining method if PEX pipe is involved.
At a Glance
Compression Fitting
- Nut + ferrule mechanical seal
- Tool required to tighten (wrench)
- Fully reusable if the ferrule is undamaged
- Works on rigid pipe ends
Push-to-Connect Fitting
- No tools needed to install
- Removable with a disconnect clip
- Works across PEX, copper, CPVC, PE-RT, and HDPE
✏️ Our Take
Compression fittings and push-to-connect fittings both let you join pipe without a torch, but they reward different situations. Compression fittings are the more established, lower-cost option and remain the standard for finished connections like supply line hookups — they need a wrench to tighten but create a dependable, inspectable seal. Push-to-connect fittings trade a small cost premium for speed and flexibility, particularly useful mid-repair when you need to join dissimilar pipe materials or work in a tight space with no room to swing a wrench. Neither replaces the other entirely — most well-stocked toolboxes have both.
Quick Comparison Table
The table below maps the most common decision factors to whichever method actually wins on that point, based on everything covered in this comparison.
| Factor |
Winner |
| No tool required to install |
PUSH-TO-CONNECT |
| Lower cost per fitting |
COMPRESSION |
| Standard for finished supply line hookups |
COMPRESSION |
| Joins dissimilar pipe materials without adapters |
PUSH-TO-CONNECT |
| Best in a tight space with no room to swing a wrench |
PUSH-TO-CONNECT |
| Removable and reusable with the right tool |
COMPRESSION |
| Fastest for a mid-repair fix |
PUSH-TO-CONNECT |
How Compression Fittings Work
A compression fitting has three parts: the fitting body, a nut, and a small brass or copper ring called a ferrule (also known as a compression ring). The pipe end slides into the fitting body, the ferrule sits over the pipe just behind the joint, and the nut threads over the top and draws everything together. As the nut is tightened, it forces the ferrule to compress and bite slightly into the outer surface of the pipe, creating a mechanical seal between the ferrule, the pipe, and the fitting body.
Tightening correctly usually takes two wrenches — one to hold the fitting body steady so it doesn’t twist, and a second to turn the nut. Hand-tightening first, then adding roughly a quarter to half turn with the wrench, is the standard technique. The exact amount varies slightly by fitting size and material, but the general rule is snug and secure without excessive force, since overtightening is a common cause of a cracked ferrule.
Compression fittings show up constantly on the visible, accessible side of residential plumbing — supply lines running from a shutoff valve to a toilet or faucet, and angle stop valves themselves, are almost always compression connections. That visibility is part of the appeal: a compression joint can be inspected, retightened, or disassembled at any point without special tools beyond the two wrenches used to install it.
💡 Tip: Hand-tighten a compression nut first, then add only a quarter to half turn with a wrench — going much further than that is the most common way to crack a ferrule and cause a leak that wasn’t there before you started.
How Push-to-Connect Fittings Work
Push-to-connect fittings work exactly the way the name suggests: the pipe end is pushed directly into the fitting body until it seats, and an internal O-ring and stainless steel grab ring do the rest. The O-ring compresses against the pipe’s outer surface to form a watertight seal, while the grab ring’s small teeth bite into the pipe to hold it firmly in place under water pressure. No tightening, crimping, or gluing is involved at any point.
That simplicity is the entire appeal. Installation requires no tool beyond your hands, no technique to practice, and no verification step beyond a visual and tactile check that the pipe has been pushed in fully to the internal stop. It’s genuinely as fast as it sounds, which is exactly why push-to-connect fittings have become popular for quick repairs and situations where pulling out a wrench isn’t practical.
A major advantage over a compression fitting is material flexibility. The same push-to-connect fitting typically works across PEX, copper, CPVC, PE-RT, and HDPE pipe without needing to match fitting type to pipe material, since the seal works on outer diameter rather than a material-specific technique. That’s genuinely useful in a home with a mix of pipe materials from different renovation eras, where a compression fitting sized for one material might not seal correctly against another.
💡 Tip: Always push the pipe in fully until it bottoms out against the internal stop — an incompletely seated push-to-connect fitting is the most common cause of a slow leak with this connection method.
Cost Comparison
Compression fittings are generally the lower-cost option per piece. The parts themselves — a simple nut, ferrule, and machined body — are inexpensive to manufacture, and no specialized internal components add to the price. For a project with many connections, that lower per-piece cost adds up to a meaningful difference over push-to-connect.
Push-to-connect fittings carry a moderate price premium over compression, reflecting the internal O-ring, grab ring, and precision-molded housing that make tool-free installation possible. That premium is still modest in absolute terms — even at the higher end, a push-to-connect fitting costs a small fraction of what a full re-plumb or a service call for a soldering job would run, so the convenience is rarely a hard sell for a single repair.
Neither fitting type requires an expensive tool investment the way a crimping setup does. A wrench for compression fittings is something most homeowners already own, and push-to-connect needs no tool at all beyond an optional disconnect clip. The real cost difference between the two methods shows up in per-piece pricing on larger jobs, not in any upfront tooling gap — a project with two or three connections won’t feel the difference either way, but a project with a dozen or more will make the lower per-piece cost of compression noticeably harder to ignore.
Reusability and Removal
Compression fittings can typically be loosened and retightened multiple times without losing their seal, as long as the ferrule itself hasn’t been damaged or overtightened to the point of cracking. This makes them genuinely convenient for a connection you expect to revisit occasionally, like a shutoff valve you might need to service again down the road. If the ferrule does crack or deform, it needs to be replaced — a cheap, quick fix, but one worth knowing about before you assume any compression joint can be reopened indefinitely.
Push-to-connect fittings are also designed to be removable, but the process is different. Pulling on the pipe by hand won’t release it — the grab ring is specifically designed to resist that. A dedicated disconnect clip, sold inexpensively on its own, depresses the internal grab ring so the pipe can be pulled free cleanly. Without the clip, forcing a push-to-connect fitting off risks damaging both the pipe end and the fitting’s internal mechanism, potentially making the fitting unusable even if you intended to reuse it elsewhere.
💡 Tip: Keep a disconnect clip in your toolbox if you’re using push-to-connect fittings anywhere you might need to service later — without it, removing the fitting risks damaging the pipe end.
Reliability and Leak Risk
Both fitting types are genuinely reliable when installed correctly, and neither is a compromise choice on paper for standard residential water pressure. Both are widely used in code-compliant residential installations across the country, and failure rates for either method trace back almost entirely to installation mistakes rather than any inherent weakness in the design.
Compression fittings mostly leak from overtightening, which cracks the ferrule and creates a gap the seal can’t close, or from under-tightening, which leaves the ferrule not fully compressed against the pipe. Both are avoidable with the hand-tight-plus-partial-turn technique and a check for drips after the water’s back on, rather than assuming tighter is always better.
Push-to-connect fittings mostly leak from a pipe end that isn’t cut square, isn’t fully deburred, or isn’t pushed in far enough to seat against the internal stop. An angled or rough-cut pipe end can prevent the O-ring from forming a complete seal around the full circumference, even if the fitting looks properly installed from the outside.
⚠️ Warning: Whichever type you use, always cut the pipe end square and deburr it before inserting — an angled or burred cut is the most common cause of a slow leak with either connection method.
Which Should You Choose?
Choose compression for a finished, permanent connection you won’t need to access often and want at the lowest reasonable cost — supply lines, angle stop valves, and any connection where a clean, inspectable seal matters more than installation speed. It’s the established standard for exactly this kind of accessible, semi-permanent joint, and the wrench-based technique is quick to learn even for a first-timer.
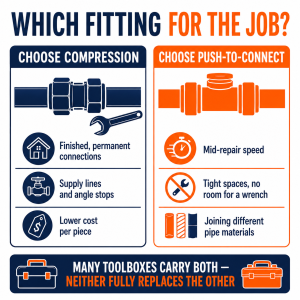
Choose push-to-connect when speed matters mid-repair, when you’re working in a cramped space with no room to swing a wrench, or when you need to join two different pipe materials without hunting down a specific adapter. It’s also the more forgiving choice if you’re not confident about your wrench technique, since there’s no tightening step to get wrong.
Both fitting types are widely available at hardware stores across the US, but push-to-connect fittings have become especially popular for repair work in older homes with a mix of copper, PEX, and CPVC from different renovation eras — a common situation nationwide where matching fitting to pipe material would otherwise require extra adapters on hand. If most of your supply lines are still original to the house, our braided supply lines review is worth a look too, since compression is the connector type on most of them.
Frequently Asked Questions
Q: Can I mix compression and push-to-connect fittings on the same pipe run?
Yes. There’s no compatibility issue at the pipe level — a single run of pipe can have a compression fitting at one end and a push-to-connect fitting at the other, and it’s genuinely common to see both used within the same home. A supply line might use a compression fitting at the shutoff valve and a push-to-connect fitting for a mid-run repair added later. Each fitting simply needs to be installed correctly for its own method.
Q: Which is more likely to leak over time?
Neither is inherently more leak-prone when installed correctly. Compression fittings can loosen slightly over years of thermal expansion and contraction, which is why an occasional check for drips at the nut is worthwhile even on a connection that’s never given you trouble. Push-to-connect fittings hold their seal reliably once properly seated, though the internal O-ring is a wear component that, like any rubber seal, has a finite service life measured in years rather than being permanent in the way a compression joint’s metal-on-metal bite is.
Q: Do I need any special tools for either type?
Compression fittings need two wrenches — one to hold the fitting body, one to turn the nut — which most homeowners already have on hand. Push-to-connect needs no tool at all for installation, and only an inexpensive disconnect clip if you plan to remove a fitting later. Neither method requires a significant tool investment the way crimping PEX does.
Q: Are push-to-connect fittings approved for permanent, concealed installations?
Many modern push-to-connect fittings are rated for permanent use and have matured considerably since they were first introduced, but code approval for concealed or behind-the-wall installations varies by local jurisdiction. Compression fittings are typically expected to remain accessible for inspection rather than sealed permanently behind a wall or under a slab, and the same caution is worth applying to push-to-connect for anything you won’t be able to easily reach again. Check your local plumbing code or consult a licensed plumber before finalizing a concealed installation with either method.
Conclusion
Compression and push-to-connect fittings solve the same problem from two different directions, and neither one makes the other obsolete. Compression remains the lower-cost, established standard for finished, accessible connections like supply lines and angle stops. Push-to-connect trades a modest price premium for speed, no-tool installation, and the flexibility to join different pipe materials without extra adapters.
For most homes, having both on hand covers the full range of situations you’re likely to run into. If you’ve settled on push-to-connect for an upcoming repair, our Best Push-to-Connect Fittings review covers current options, and our Push-to-Connect vs Crimp Fittings comparison covers the third joining method if PEX is involved.
Prices and ratings may change. Always check Amazon for current prices.
✍️ About This Comparison
PTR Editorial Team — Product Comparisons. We compare manufacturer specifications, installation requirements, compatibility and available product documentation to help homeowners choose suitable tools and parts. How we review →