Please note: Information in this guide is based on our research at time of writing and is subject to change. Always check Amazon for the latest product details before purchasing.
Introduction
A stuck shutoff valve is a genuinely common discovery, and it almost never happens at a convenient time. Usually it’s mid-repair — a faucet is already disassembled, or water is actively running — and the valve you’re counting on to isolate that fixture simply won’t turn. The handle feels frozen solid, and the instinct to grab a bigger wrench and force it kicks in fast, especially with water on the floor.
That instinct is exactly what causes the real damage. Before concluding a stuck valve needs full replacement, there’s a sequence of safe techniques worth trying first — penetrating oil, correct leverage, gentle heat, and patient testing in small increments. This guide walks through that sequence in order, plus how to tell when replacement really is the right call.
At a Glance
| Common Cause |
Mineral buildup, corrosion, or simply years of never being turned |
| First Rule |
Never force it — risk of snapping the valve or cracking the pipe |
| Tools Needed |
Penetrating oil, adjustable wrench, sometimes a valve wrench for leverage |
| Time Needed |
Varies — can take multiple attempts over 15–30 minutes with soak time |
✏️ Our Take
A shutoff valve that won’t turn is one of the more stressful plumbing discoveries, mostly because it’s usually found in the middle of another repair when you actually need the water off. The instinct is to apply more force, but that’s exactly the wrong move — old brass and cast valve bodies can crack under enough torque, and a broken valve mid-repair turns a simple job into an emergency. The right approach is patient and sequential: penetrating oil, proper leverage, gentle heat if needed, and testing in small increments rather than one big forceful turn. Most stuck valves free up with this approach without ever needing replacement.
Why Shutoff Valves Seize Up
A shutoff valve doesn’t seize overnight — it’s almost always the slow result of years of exposure combined with neglect. The most common cause is mineral deposits and scale buildup accumulating around the valve stem, the part that rotates when you turn the handle. Every time water sits in or moves through the valve, it leaves behind trace minerals, and over years those deposits harden into a crust that locks the stem in place against the body.
Corrosion is the second major factor, especially on older brass or steel valve bodies. Brass corrodes more slowly than steel, but neither is immune, and once corrosion sets into the threads or stem packing, it adds resistance on top of any mineral buildup already present. Galvanized steel valves are particularly prone to this, since rust can form directly on load-bearing surfaces inside the valve rather than just cosmetically.
The third factor is simply neglect. Many shutoff valves are installed once and never touched again for years or decades. A valve that’s exercised — closed and reopened occasionally — keeps its internal surfaces from settling into one fixed position long enough for deposits to harden undisturbed. A valve left untouched for a decade gives corrosion all the time it needs to fuse the stem solidly in place, which is why so many stuck valves are discovered only in an emergency.
Safety First — What NOT to Do
This is the single most important section in this guide, because the biggest risk with a stuck valve isn’t failing to free it — it’s damaging something worse while trying. Never apply excessive force with a wrench. It’s tempting to lean into the handle with everything you’ve got, but old brass and cast valve bodies aren’t designed to absorb that torque indefinitely, and a valve that suddenly gives way under heavy force can snap rather than simply turn.
Never use a pipe extension, sometimes called a cheater bar, slid over a wrench handle for extra leverage without understanding the risk. A cheater bar multiplies the torque you apply, which also multiplies the force transferred to a valve body or pipe connection already weakened by corrosion. What feels manageable at the handle can translate into a cracking force at the valve itself.
Never strike the valve with a hammer to try to jar it loose. Impact force doesn’t discriminate between breaking corrosion’s grip and cracking the metal underneath, and cast valve bodies are prone to fracturing under a sharp impact rather than the gradual pressure a proper technique applies.
⚠️ Warning: Excessive force on a stuck valve doesn’t just risk stripping the handle — it can crack the valve body or twist the connected pipe, turning an annoyance into an active leak. If a valve won’t budge after trying the techniques in this guide, that’s the signal to call a plumber, not to apply more force.
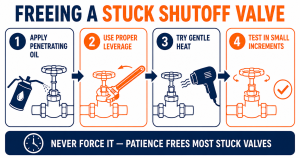
Step 1: Shut Off Water at the Main Supply
Before working on a stuck valve, you need the water off somewhere — and the valve you’re trying to free may be exactly the one you’d normally use to isolate that fixture. If it won’t turn, you can’t rely on it to protect you while you work, so the main house shutoff becomes your safety net instead.
- Locate the main shutoff valve. It’s typically near the water meter, in a basement, crawlspace, or utility area. Our how to shut off water to a single fixture guide covers locating both fixture-level and whole-house shutoffs if you’re unsure where yours is.
- Turn the main valve fully closed. This cuts water to the entire house, not just the fixture connected to the stuck valve, so plan around a brief full-house interruption.
- Open a low fixture to relieve pressure. A faucet or hose bib at a lower point lets residual pressure and standing water drain out, making the stuck valve easier and safer to work on.
- Confirm the stuck valve is now depressurized. With the main off and pressure relieved, it should no longer have live water pressure behind it, reducing the consequences of an unexpected leak while you work.
- Keep the main valve’s location in mind for the rest of the job. If anything goes wrong, you’ll want a fast, already-confirmed way to cut water again.
With the main supply off and pressure relieved, you can work on the stuck valve without the added stress of live pressure behind it. From here, the actual freeing process begins.
Step 2: Apply Penetrating Oil
Penetrating oil is the first real tool in the process, and it does the bulk of the work in most successful attempts. Reach for an actual penetrating oil, not a household lubricant — the two are formulated differently, and a household lubricant isn’t designed to break down the mineral and rust deposits actually holding the valve stem in place.
- Identify exactly where the stem meets the body. This seam, usually visible as a slight gap just below the handle, is where the oil needs to reach to do any good.
- Apply penetrating oil directly to that seam. Saturate the visible gap all the way around the stem, rather than spraying broadly across the whole valve.
- Let it sit and soak. Give it at least 15 minutes for mild cases — don’t rush this step, it’s the single easiest way to fail at freeing a valve.
- Reapply for more severe buildup. If the valve looks heavily corroded or hasn’t been touched in years, apply a second and third coat over the course of an hour.
- Consider an overnight soak for badly seized valves. Applying oil and leaving it untouched overnight gives it far more time to penetrate than reapplication in a single sitting.
💡 Tip: Penetrating oil works by capillary action, seeping into the microscopic gap between stem and body — it needs time to work. Don’t rush straight to force after a five-minute soak; longer dwell time, sometimes reapplied over several hours, makes a real difference.
Once the oil has had adequate time to work, you’re ready to attempt turning the valve — but the way you apply force at this stage matters just as much as the oil itself.
Step 3: Use Proper Leverage, Not Force
With the oil soaked in, the next step is moving the valve — but technique matters as much as the tool. Use a properly fitted wrench, not pliers, which grip at only a few contact points and tend to round off the valve’s edges rather than turning it, leaving a damaged fitting that’s even harder to grip.
- Choose a wrench sized correctly for the valve. An adjustable wrench set snugly against the flats, or a proper valve wrench for round bodies, distributes force evenly rather than concentrating it on a few points.
- Position the wrench for a full, controlled grip. Make sure the jaws are fully seated against the flats before applying pressure, since a partial grip is more likely to slip and round the edges.
- Apply steady, even pressure. Push or pull with consistent, gradually increasing force rather than a sudden jerk, giving the loosened corrosion a chance to give way gently instead of snapping.
- Work the valve back and forth in small increments. Rather than forcing a full turn, rock it slightly closed, then slightly open, then closed again — this works the oil deeper into the seized area than a single-direction push.
- Stop immediately if you feel unusual resistance or hear a creak. That’s the valve telling you it’s close to its limit — step back and revisit the earlier steps rather than pushing through.
If the valve still won’t budge after a properly leveraged, patient attempt, don’t escalate to more force. The next step introduces heat, which often succeeds where oil and leverage alone come up short.
Step 4: Try Gentle Heat (If Penetrating Oil Alone Doesn’t Work)
Heat is a legitimate next step when oil and correct leverage haven’t been enough. A hair dryer or heat gun on a low setting applied to the valve body can help expand the metal slightly, and that expansion is often just enough to break the physical grip corrosion has established between stem and body.
- Use a hair dryer or heat gun on its lowest setting. The goal is gentle, gradual warming, not rapid or intense heat, which can damage surrounding materials or the valve’s internal seals.
- Apply heat evenly around the valve body, not just one spot. Move the heat source in a slow circular pattern around the stem-to-body seam, allowing the metal to warm gradually and evenly.
- Never use an open flame near plumbing. A propane torch or similar open flame risks damaging nearby materials, melting plastic components, and near gas lines represents a genuine safety danger a hair dryer doesn’t carry.
- Reapply penetrating oil immediately after heating. With the metal slightly expanded, the gap between stem and body is marginally wider, giving fresh oil a better chance to seep in than it could pre-heat.
- Let the reapplied oil work into the now-expanded gap. Give it several minutes before attempting to turn the valve again, so heat and fresh oil have time to actually do their job.
After heat and a fresh application of oil, you’re ready to test the valve again — and this next step, testing in small increments, applies throughout the whole process rather than just at the end.
Step 5: Test in Small Increments
After each attempt — whether it’s a fresh oil application, a leverage attempt, or a round of heat — test the valve with light pressure rather than immediately going for a full turn. A cautious test tells you whether you’re making progress without risking damage from a full-force attempt on a valve that isn’t ready to move yet.
- Apply light, exploratory pressure first. Use the properly fitted wrench from Step 3, but apply only enough force to feel for resistance, not enough to strain against it.
- Look for any give or movement at all. Even a fraction of a degree confirms the current approach is working, even if the valve hasn’t fully freed yet.
- Treat any movement as a cue to keep going, not to force through. If you feel the slightest give, work it gently back and forth rather than cranking toward a full turn.
- Repeat the oil-and-wait cycle if the valve remains completely frozen. Zero movement after a round of oil, leverage, and heat isn’t necessarily a dead end — it often just means the deposits need another soak cycle.
- Track how many rounds you’ve attempted. A rough count helps you recognize a reasonable, thorough effort versus when it’s time to call a professional instead.
When to Stop and Call a Professional
There’s a clear point where continued attempts stop being productive. If the valve shows zero movement after multiple rounds of oil, leverage, and heat, that’s a strong signal the corrosion has gone deeper than these techniques can reach, and further attempts mostly just raise the risk of damage.
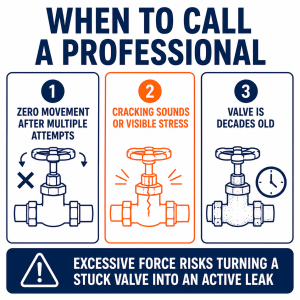
If you notice any cracking sounds or visible stress on the valve body or pipe, stop immediately. Even a hairline crack means the valve has already been compromised, and further force risks turning it into an active leak or full failure.
Age is also worth weighing honestly. If the valve is decades old and at the end of its useful life — heavily corroded, made of an older material like galvanized steel, or original to a house built decades ago — the safest path is professional replacement rather than continued attempts to save it. A valve that finally turns after this much resistance has been through significant stress, and its long-term reliability is genuinely questionable. Once a stuck valve is freed or confirmed to need replacing, our how to replace an angle stop valve guide walks through the swap itself, and our angle stop valve reviews cover current options if you’re shopping for a new one.
US Regional Context: Valve seizing from mineral buildup is especially common across the US in hard water regions, where scale deposits accumulate faster around valve stems than in soft water areas. Homeowners in these regions may find shutoff valves worth exercising every six months to a year specifically to prevent seizing before it becomes a real problem.
Frequently Asked Questions
Q: What’s the difference between penetrating oil and regular household lubricant?
Penetrating oil is formulated with a low viscosity that lets it seep into microscopic gaps between corroded or mineral-crusted surfaces, breaking down the bond holding them together. A general household lubricant is designed to reduce friction between already-moving parts, not to dissolve existing corrosion and scale. Using one on a stuck valve often just leaves a slick surface coating without ever reaching the actual buildup holding the stem in place.
Q: Is it safe to use heat on a plumbing valve?
Gentle heat from a hair dryer or heat gun on a low setting is generally safe and can help expand the metal enough to break corrosion’s grip. What’s not safe is an open flame, such as a propane torch, which can damage nearby materials, melt plastic components, and near gas lines poses a genuine safety risk. Stick to low, indirect heat, and never leave a heat source unattended near plumbing.
Q: How long should I let penetrating oil soak before trying again?
At minimum, give it 15 minutes for mild cases, but for a valve with visible heavy corrosion or one untouched in years, plan on multiple applications spaced over an hour, or even an overnight soak for the most severely seized valves. Penetrating oil works through slow capillary action, so a longer soak consistently outperforms a quick five-minute wait followed by a forceful attempt.
Q: Should I replace a valve once it’s finally freed, even if it works again?
It depends on how much resistance the valve went through and its overall age and condition. A valve that freed up fairly easily with oil and gentle leverage is usually fine to keep using, especially if you exercise it periodically going forward. A valve that needed heavy leverage, multiple heat applications, or shows visible external corrosion is a reasonable candidate for planned replacement, since it’s already demonstrated it’s near the end of its reliable service life even though it’s working again for now.
Conclusion
A stuck shutoff valve is almost always fixable without force or full replacement, provided you work through the sequence patiently: isolate water at the main supply, apply penetrating oil and give it real time to work, use properly fitted leverage rather than brute strength, add gentle heat if needed, and test in small increments along the way. The one hard rule throughout is to never force it — a cracked valve body or a twisted pipe turns a simple annoyance into an active leak. If a valve still won’t budge after honestly working through these steps, that’s your answer: it’s time to call a professional rather than push harder.
Prices and ratings may change. Always check Amazon for current prices.
✍️ About This Guide
Written by Mike Reynolds, DIY Home Improvement Writer at PlumbingToolsReview — former residential contractor helping US homeowners tackle plumbing repairs with confidence. Learn how we test →