
Guides
19 Nov 2026

Why Are My Baseboard Heaters Cold When the Boiler Is Running?
Boiler running but baseboards still cold? Check thermostat settings, affected zones and common circulation problems—and know when to call a professional.
Radiant floor loop not heating? Learn what purging air involves, how to tell whether air is the cause, and when to call a heating professional.
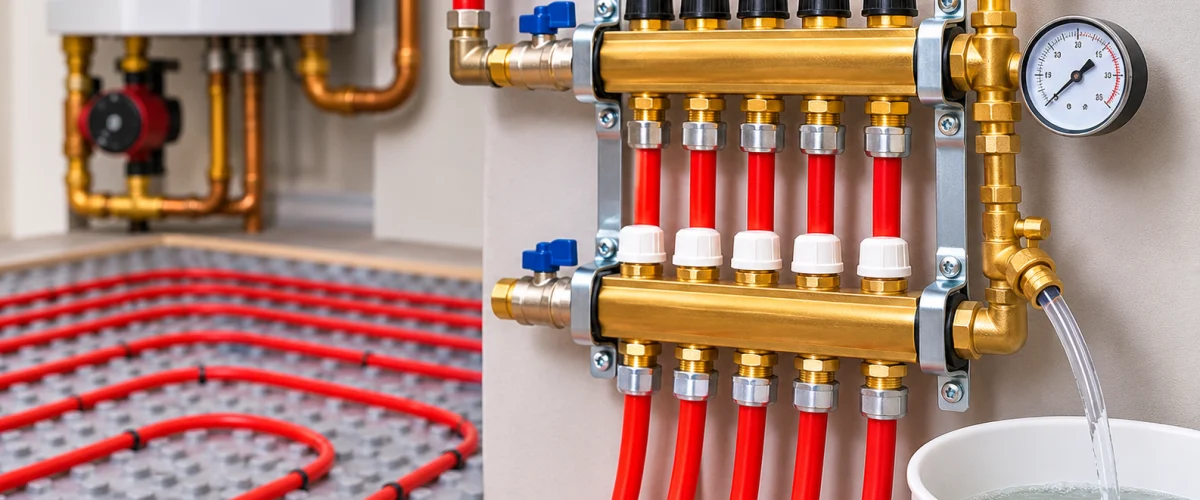
Please note: This is general information about hot-water radiant floor heating, not instructions for your particular manifold or system. Your manufacturer’s instructions come first, and a heating professional should handle anything involving pressurised, hot or glycol-filled equipment.
If one part of your radiant floor stays cool while the rest heats, trapped air is a reasonable suspect. This guide is about hot-water radiant floor systems, where a boiler sends warm water through tubing in the floor. It doesn’t cover electric floor heating.
The short answer: purging means pushing water through one isolated circuit, from an approved connection to an approved discharge, so the flowing water carries trapped air out with it. That’s a different job from opening an automatic air vent, which only releases air that has already gathered at the vent. The valves and connections involved depend on your actual manifold and system, so treat this guide as a map of the process, not a set of steps to copy.
It’s also unlike bleeding a baseboard. Some hot-water baseboards have a manual bleeder that releases trapped air locally. Radiant floor tubing generally has no accessible vent along the buried loop, so the air has to be carried out by moving water.
✏️ Our Take
Air is one possibility, not the only one. Signs that fit include gurgling or swishing in the piping, trouble that began after filling, draining or repairs, and a loop that doesn’t heat as expected. Caleffi’s troubleshooting guidance says that when excessive air is present the circulators won’t provide proper flow, and in the extreme a large pocket can block flow completely.
Several other problems can look similar: an actuator that hasn’t opened (some take up to three minutes), an incorrect control setting, restricted flow or a balancing problem. A flow meter helps, but a reading on its own doesn’t establish the cause. Low flow in a loop can come from air, a closed or slow actuator, a restriction or an unbalanced circuit. Note the reading and which loop it belongs to, and don’t adjust anything because of one number.
| What you notice | What it could suggest | Safe next check |
|---|---|---|
| Gurgling or swishing in the piping or at the manifold | Air may be in the circuit, though other causes are possible | Note where and when you hear it, and whether any filling or repair came first. |
| A loop doesn’t heat after filling, draining or repairs | Air is a candidate; so are a closed actuator or a control setting | Check the thermostat settings for that zone and note anything unusual on the manifold. |
| One loop shows lower flow than the others | Air, a closed or slow actuator, a restriction or balancing | Write down the reading and which loop it is. Don’t adjust valves because of it. |
| A loop heats unevenly, or only part of the floor warms | Trapped air, restricted flow or balancing could all be involved | Note which area stays cool and for how long, and photograph the manifold labels. |
Before you start
Fluid handling and disposal must follow your supplier’s documentation and your local requirements. Those rules vary, so ask rather than assume.
A manifold is where the floor loops meet the rest of the system. Warm water arrives at the supply header, runs out through each loop and comes back through the return header. Depending on the model you may find loop valves, flow meters, actuators (the small motorised heads that open and close a loop when a thermostat calls) and purge or fill and drain ports.
Layouts differ, and not every manifold has the same controls. Caleffi’s manifold-distribution journal notes that stations with individual circuit valves are the easiest to purge, while large valveless stations are more challenging. If you’re comparing manifolds, our guide to the best radiant floor heating manifolds covers the features to look at.
Here is the process in six stages, with the purpose of each. It isn’t a valve sequence for your system.
Water from a purging source enters the supply header through an open inlet purge valve. Only loop 1 is open; loops 2 and 3 are closed. Water and air leave through the return header and an open outlet purge valve into a bucket or approved discharge.
Purging source
pump or approved supply
Inlet purge valve: open
SUPPLY HEADER
Loop 1open
Loop 2closed
Loop 3closed
Water andair flow
Other loopsclosed off
RETURN HEADER
Outlet purge valve: open
Hose to bucket orapproved discharge
Simplified example, not an installation diagram. It shows only the idea of one open loop with a flow path from a source to a discharge. Valves that isolate the manifold from the rest of the system are also closed. Your manifold’s valves, ports and sequence will differ; follow its own instructions.
Two manufacturers show how much the details can differ. Caleffi’s manifold-distribution journal describes one arrangement for a manifold with purge valves: close all but one circuit valve and the valves that isolate the manifold station, connect hoses to the inlet and outlet purge valves, force water through the open circuit until the discharge is free of visible air, then work across the circuits one at a time. It also gives a closing order for the purge valves, and warns that when the water comes straight from building plumbing, closing them wrongly could quickly over-pressurise the system and open the relief valve. It calls for a backflow preventer in that case.
Uponor’s EP Heating Manifold guide gives a different fill-and-purge routine for its own manifold, using the fill valve on the supply cap and a separate drain hose on the return cap, one loop at a time. Neither is a recipe for yours. Some procedures also call for a feed valve’s fast-fill mode, which is not a shortcut to use on an unknown system.
Purging doesn’t always help, because air may not have been the cause. A professional will also look at whether the actuator and control are opening the loop, whether something restricts flow, whether the circuits are balanced and whether circulation is reaching the manifold at all. If the circulator itself is suspected, our hydronic circulator guide is further reading after diagnosis.
Bulk purging removes trapped air. Dissolved gases can later come out of solution as conditions change, and a suitable air separator helps remove the resulting bubbles (Caleffi’s troubleshooting guidance describes this). If air keeps returning, something may be letting it in or failing to remove it, and that needs diagnosis before parts are added. Our comparison of an air separator and an air scoop is for after that.
No. An automatic vent only releases air that has risen to it. Purging moves water through an isolated circuit to carry air out, and it uses approved purge connections, not the vent.
There’s no honest universal figure, because it depends on the manifold, the loop length and the flow. The manufacturer guides we’ve cited describe continuing until the discharge runs free of visible air or bubbles, not for a set time.
Fresh water carries dissolved air, so some can reappear after any fill. If air returns repeatedly, something may be letting it in or failing to remove it. That’s a question for a heating professional, not a reason to purge again and again.
Confirm the signs point to air, identify your manifold and the fluid in the system, and find the manufacturer’s instructions. If any of that is unclear, ask a heating professional to purge the loop, and take the notes above with you.
✍️ About This Guide
PTR Editorial Team — Plumbing Guides. We compare manufacturer specifications, installation requirements, compatibility and available product documentation to help homeowners choose suitable tools and parts. How we review →
Boiler running but baseboards still cold? Check thermostat settings, affected zones and common circulation problems—and know when to call a professional.
Learn how to find and use a manual bleeder on a hot-water baseboard heater, and what to do if the heater has no bleeder or stays cold.
What a compression sleeve puller is for, what its maker documents about 1/2 in (5/8 in OD) fit, and what to check before you choose one.

