Guides
4 Oct 2026

How to Make a PEX Crimp or Clamp Connection (2026) — Step-by-Step Guide
Make a PEX crimp or clamp connection step by step: ring and clamp placement, gauge checks, failed joints and code notes from maker sheets.
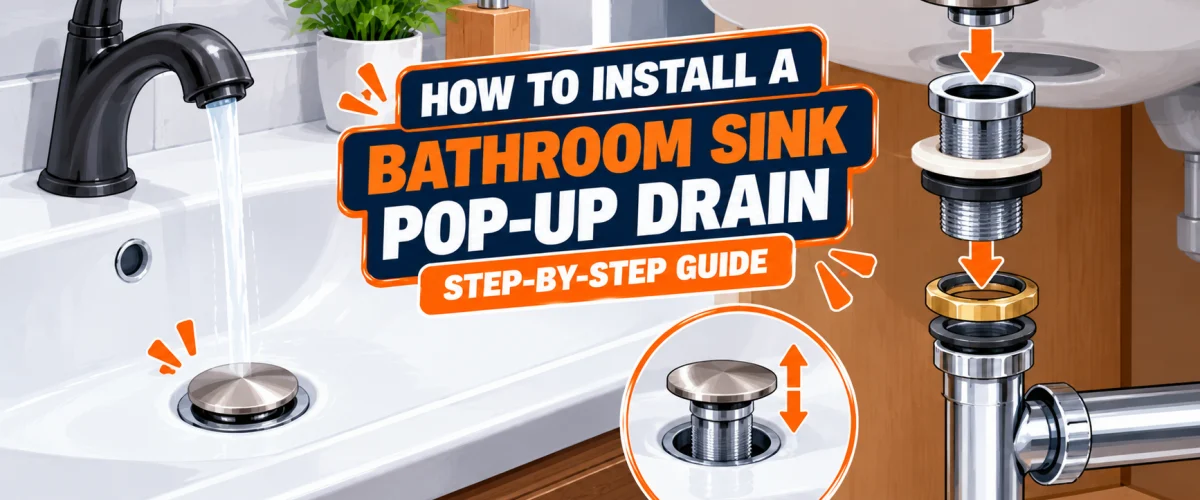
Install a bathroom sink pop-up drain assembly step by step: remove the old stopper, seat the flange, connect the pivot rod, and adjust the lift rod strap.
Please note: Product information is based on our research at time of writing and may change. This guide is general. Always follow the instructions that come with your specific drain assembly.
A pop-up drain assembly is the stopper mechanism in most bathroom sinks, raised and lowered by a knob behind the faucet or a lever on the drain itself. Swapping one, whether it’s worn out or you’re upgrading the style, is a basic hand-tool job for most sinks.
This guide covers the common lift-rod, pivot-rod type, the mechanism used by most pop-up assemblies and the one our sources describe in full. Push-type pop-ups, which seal with a press instead of a rod, are a separate, simpler mechanism covered briefly below. If you’re choosing an assembly first, see our best bathroom sink pop-up drain assemblies review.
If your stopper won’t lift out and you’re trying to clear a clog rather than replace the assembly, our how to unclog a bathroom sink guide covers the same pivot-rod disconnection in that context. And for seating the flange with plumber’s putty, our how to use plumber’s putty guide covers that technique in full.
At a Glance
| Difficulty | Easy |
| Time | 15–30 Minutes |
| Cost | $ for the pop-up assembly and sealant |
| Tools Needed | Adjustable pliers, screwdriver, and plumber’s putty or silicone sealant, depending on your drain’s instructions |
| Skill Level | Beginner |
✏️ Our Take
This is one of the easier bathroom swaps, and the only real skill is patience with the pivot rod: get the stopper to the right open height before you lock the strap down, and check whether your drain actually allows putty before you reach for it.
IN THIS GUIDE
Check your new assembly’s own instructions before you seal the flange. Most pop-up drains work fine with plumber’s putty, but at least one manufacturer, Newport Brass, states plainly that petroleum-based plumber’s putty will void the warranty on their products and recommends clear silicone sealant instead. This varies by brand, so don’t assume putty is always the safe default. Our plumber’s putty guide also notes that some modern plastic or “designer” pop-ups seal with an O-ring at the flange and need no sealant at all.
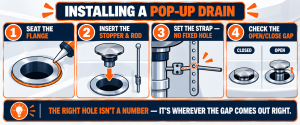
If you’re replacing an existing pop-up, disconnect the pivot rod first. Our unclogging guide walks through this: find the retaining nut under the sink where the pivot rod meets the drain pipe, unscrew it, and slide the rod out. The stopper should then lift free. Remove the old drain flange from the sink.
Apply plumber’s putty or silicone sealant to the new flange, following whichever your assembly’s instructions call for. Our plumber’s putty guide covers the technique for seating the flange and trimming the bead.
Place the pop-up plug into the flange from above. One Moen installation sheet notes a choice worth knowing about: the pivot rod can go through the hole in the stopper itself, which stops it from being lifted out easily, or beside it, which lets you lift the stopper out for cleaning without disconnecting the rod. Check which your assembly uses or allows.
Insert the pivot rod through the drain body’s rod opening and into the stopper or the clevis strap, depending on your assembly. Secure it with the clip or screw included with your kit. Don’t overtighten the pivot nut or the flange locknut; both only need to be snug.
Slide the lift rod down through the faucet body, then connect it to the pivot rod with the clevis strap. The strap has several holes. Which one you use isn’t a fixed number; it’s chosen by testing. With the stopper in its full-open position, pick the hole that leaves the lift rod knob sitting where you want it above the faucet, then tighten the strap screw.
With the stopper closed, there should be a small gap, roughly 1/8 inch, between the pivot rod and the strap, and about a 1/2 inch gap for the stopper to pop up when open. If the gap is off, loosen the strap screw, reposition, and retighten.
Fill the basin partway and check that it holds water with the stopper closed, then open the stopper and confirm it drains freely. Check under the sink for any drips at the flange or pivot rod connection.
The sink won’t hold water. The stopper may not be seating fully closed. Recheck the gap adjustment in Step 6, and confirm the flange seal is tight.
The stopper won’t open or close with the knob. The pivot rod may not be properly connected to the lift rod strap, or the clip has come loose. Recheck Step 4 and Step 5.
Water drips under the sink at the flange. The sealant may not have seated fully, or the locknut needs a little more tightening. Don’t overtighten, especially on a porcelain or ceramic sink, since that risk applies to any basin regardless of brand.
Some pop-up drains use a simple press-to-seal mechanism instead of a lift rod, with no pivot rod or strap to connect. These install the same way through Steps 1 through 3, but skip the pivot rod and lift rod steps entirely; you press the stopper to open and close it. Check your specific assembly’s instructions, since push-type units vary more by manufacturer than the lift-rod type.
Installing a pop-up drain assembly is a genuine DIY job for almost everyone. But if your inspection reveals a cracked drain body, a damaged flange opening, or a P-trap leak unrelated to the stopper itself — those are issues worth a plumber’s assessment before you invest in new hardware on top of a bigger underlying problem.
Find a licensed plumber in your area at PlumberArchive.com — the US plumber directory with 12,000+ verified local plumbers across all 50 states.
Get weekly plumbing tips, honest tool reviews and DIY maintenance guides delivered straight to your Facebook feed. We cover toilet repairs, bathroom fixtures, pipe maintenance and everything in between — written for US homeowners who want to handle more themselves.
Check your assembly’s own instructions first. Most work with either, but some manufacturers, including Newport Brass, specifically require silicone and state that putty will void the warranty. Some modern pop-ups use an O-ring and need neither.
There’s no fixed hole number. Position the stopper fully open, then pick the hole that lets the lift rod knob sit where you want above the faucet, and adjust from there using the open and close gap in Step 6.
Yes. Shutting off the water supply before you start keeps things simple, even though most of the work happens below the stopper itself.
No. Kitchen sink stoppers are a different product with a different mechanism, often combined with a strainer basket. See our kitchen sink strainers and baskets review for that.
Installing a bathroom sink pop-up drain is a straightforward swap: remove the old assembly, seat the new flange with the right sealant for your brand, connect the pivot rod and lift rod strap, and adjust until the open and close gap feels right. If the drain body itself is damaged or there’s a leak elsewhere in the line, that’s a job for a licensed plumber. To choose an assembly, see our pop-up drain assemblies review.
✍️ About This Guide
Written by Mike Reynolds, DIY Home Improvement Writer at PlumbingToolsReview — former residential contractor helping US homeowners tackle plumbing repairs with confidence. Learn how we test →
Make a PEX crimp or clamp connection step by step: ring and clamp placement, gauge checks, failed joints and code notes from maker sheets.
Replace or install a submersible sump pump in an existing pit: disconnect power, set the pump, connect the discharge pipe and check valve, then test.
Install a handheld bidet sprayer in 30-45 minutes: fit the T-valve, connect the hose, mount the holster, and build the after-use shutoff habit.

